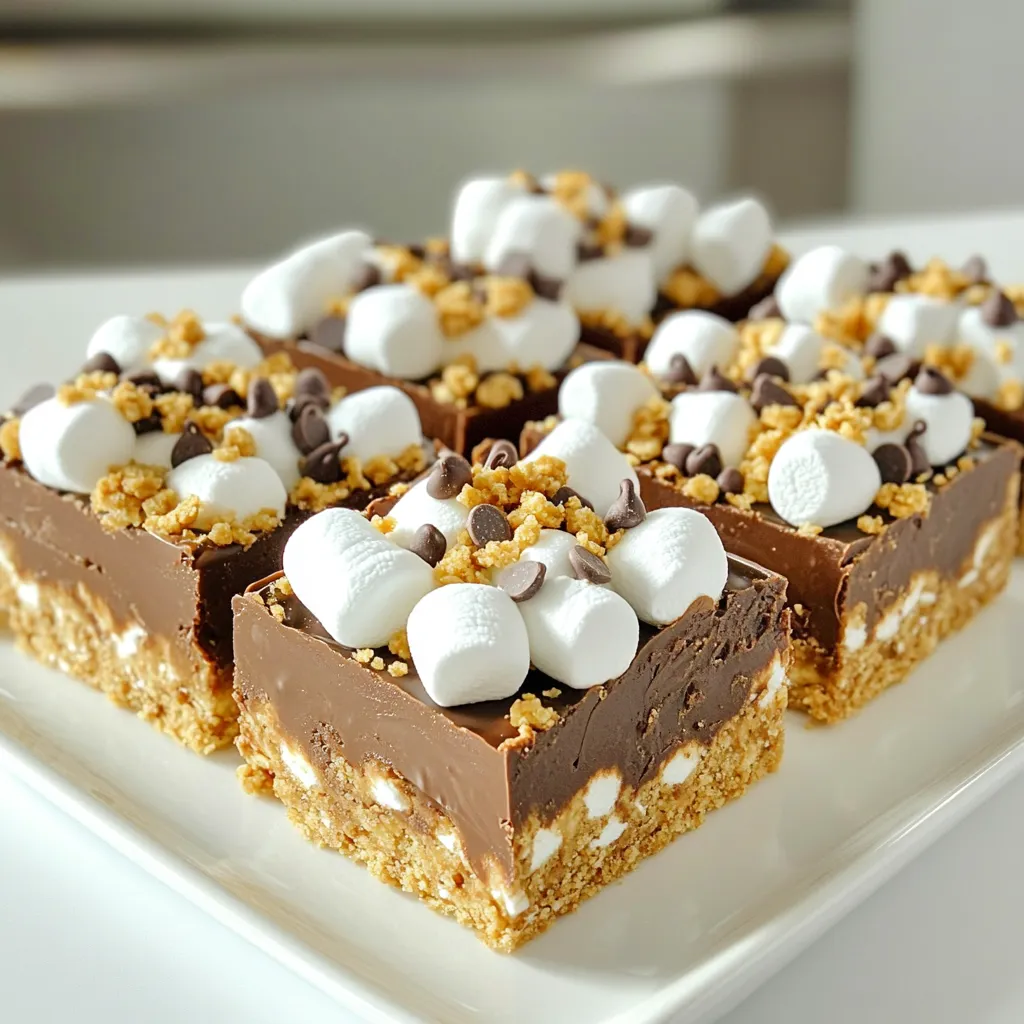
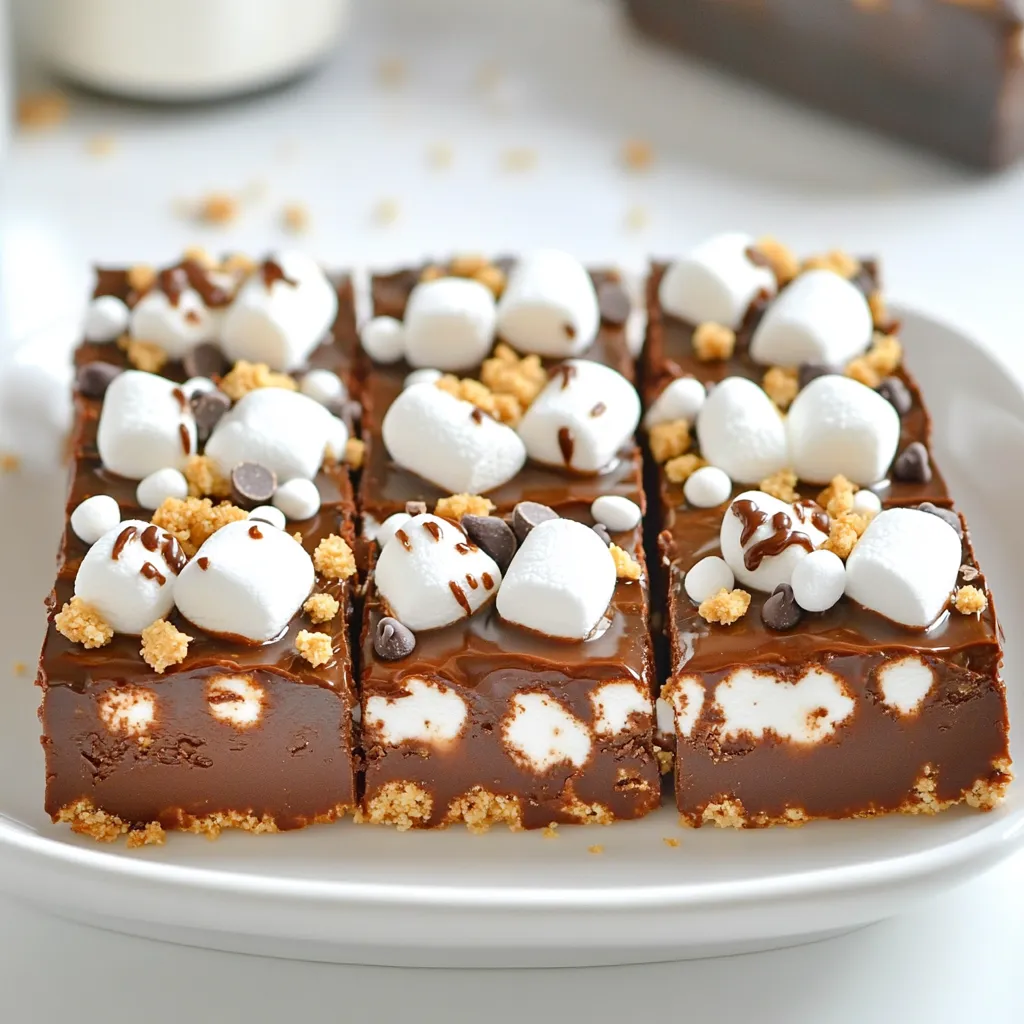
Craving a sweet treat that’s quick and easy? Look no further! My No Bake S’mores Fudge Bars are the perfect solution. With layers of gooey chocolate, mini marshmallows, and graham crackers, these bars pack all the classic s’mores flavors without the campfire hassle. Whether you’re baking with kids or whipping up a sweet surprise for friends, this simple recipe is sure to impress. Let’s dive into this delicious journey!
Ingredients
Main Ingredients List
– 1 cup graham cracker crumbs
– ½ cup unsweetened cocoa powder
– ½ cup granulated sugar
– ½ cup unsalted butter, melted
– 1 cup mini marshmallows
– 1 cup milk chocolate chips
– ½ cup crushed graham crackers (for topping)
– ¼ cup mini chocolate chips (for garnish)
To create these no bake s’mores fudge bars, you need simple and tasty ingredients. Each one plays a key role in making your bars delicious.
First, the graham cracker crumbs give the base a nice crunch. They add a sweet and buttery taste. Next, the unsweetened cocoa powder brings rich chocolate flavor. The granulated sugar sweetens the mix just right.
Melted unsalted butter helps bind everything together. It makes the crust smooth and moist. The mini marshmallows are a must. They add that classic s’mores taste and a fun chewy texture.
Milk chocolate chips melt to create a creamy layer. Their sweetness balances the cocoa. For the topping, crushed graham crackers add extra crunch and flavor. The mini chocolate chips on top give a nice finish and extra sweetness.
With these ingredients, you can make a treat that everyone loves. It’s easy, fun, and oh-so-delicious!
Step-by-Step Instructions
Preparation of the Crust
– Combining Dry Ingredients
In a medium bowl, mix the graham cracker crumbs, cocoa powder, and sugar. Whisk them until they look uniform. This step is key for a smooth crust.
– Adding Melted Butter
Now, pour in the melted butter. Stir well until the mixture feels like wet sand. This will help it stick together when pressed.
– Pressing the Mixture into the Baking Dish
Take an 8×8 inch baking dish. Firmly press the mixture into the bottom. Use your fingers or a measuring cup to flatten it down. Make sure it’s even and compact for the best base.
Making the Chocolate Layer
– Melting the Chocolate Chips
Grab a microwave-safe bowl. Add the milk chocolate chips and half of the mini marshmallows. Microwave in 30-second bursts, stirring in between, until smooth and melted.
– Incorporating Mini Marshmallows
Once the chocolate is melted, gently fold in the rest of the mini marshmallows. This adds a fun, chewy texture to the chocolate layer.
Assembling the Fudge Bars
– Spreading the Chocolate Mixture
Pour the chocolate mixture over the crust. Use a spatula to spread it evenly. Make sure to cover all corners for a neat look.
– Adding Toppings and Chilling
Sprinkle the crushed graham crackers on top. Press down lightly to help the toppings stick. Place the dish in the fridge to chill for at least 2 hours. This helps the fudge bars set nicely.
Tips & Tricks
Best Practices for Creating Layers
– Ensuring Even Layer Distribution: To achieve a great texture, spread your crust evenly. Use your hands or a measuring cup to press it down well. This makes each bite full of flavor. Make sure the chocolate layer covers all the crust. This way, every piece has the same taste.
– Pressing Toppings Firmly: After adding marshmallows and crushed graham crackers, press them down lightly. This helps them stick to the chocolate layer. A firm press keeps everything together when you cut the bars. It also makes the bars look nice when served.
Troubleshooting Common Issues
– What to Do if Chocolate Doesn’t Melt Smoothly: If your chocolate is clumpy, try microwaving it in shorter bursts. Stir after each 30 seconds. This helps to evenly melt the chocolate. If it still looks thick, add a tiny bit of oil. This can help make it smooth and shiny.
– Fixing Crust Consistency Problems: If your crust is too crumbly, it may need more butter. Add a little melted butter and mix. If it’s too sticky, add a bit more graham cracker crumbs. Adjusting these will help you get the perfect texture.
Serving Suggestions
– Presentation Tips for Serving: For a great look, serve the bars on a wooden platter. You can also use a fancy dessert stand. To make them even prettier, add a mini marshmallow on top of each bar. A drizzle of melted chocolate adds a nice touch too.
– Pairing Ideas with Other Desserts: These fudge bars pair well with vanilla ice cream. The cold ice cream balances the rich fudge. You can also serve them with fresh fruit like strawberries. The fruit adds a burst of flavor that goes well with the chocolate.
Variations
Adding Flavor Twists
Peanut Butter Integration
You can add peanut butter to the fudge layer. Just mix in ½ cup of smooth peanut butter when you melt the chocolate. This twist adds a nutty flavor that pairs well with the sweetness of the marshmallows.
Using Dark Chocolate Instead
For a richer taste, use dark chocolate chips instead of milk chocolate. The deep flavor of dark chocolate gives a nice balance to the sweetness of the bars. Melt it just like the milk chocolate, and spread it over the crust.
Dietary Modifications
Gluten-Free Options
To make these bars gluten-free, use gluten-free graham crackers. Many brands offer tasty options that work well in this recipe. Just swap them out for regular ones, and you’re good to go!
Dairy-Free Substitutions
You can make these fudge bars dairy-free too. Use coconut oil instead of butter and dairy-free chocolate chips. This way, everyone can enjoy a slice without worry.
Creative Toppings
Introducing Fresh Fruit
Top your fudge bars with fresh fruit for a fun twist. Sliced strawberries or bananas add a burst of flavor and color. Just sprinkle them on top before you chill the bars.
Experimenting with Nuts and Other Candies
Try adding nuts like chopped almonds or walnuts for crunch. You can also sprinkle on mini candy pieces for extra sweetness. Mix and match to find your favorite combo!
Storage Info
Best Ways to Store
– Refrigerating Fudge Bars: Store the fudge bars in an airtight container. They can stay fresh in the fridge for up to one week. Keeping them chilled helps maintain their shape and texture.
– Freezing for Long-Term Storage: For longer storage, wrap the fudge bars tightly in plastic wrap. Place them in a freezer-safe bag or container. They can last up to three months in the freezer. When you’re ready to enjoy them, just take them out and let them thaw in the fridge overnight.
How to Reheat or Serve After Storage
– Recommended Methods for Softening: If the bars feel too hard, you can microwave them for about 10 seconds. Check if they are warm but not melted. This will help soften them without losing the structure.
– Tips for Retaining Texture: To keep the fudge bars nice and firm, avoid leaving them out at room temperature for too long. Serve them chilled for the best taste and texture.
FAQs
What is the best way to cut no-bake fudge bars?
Using a warm knife technique works best. First, heat a sharp knife under hot water. Wipe it dry. Then, slice the bars smoothly. This helps prevent any crumbling. For neat edges, clean the knife between cuts. It makes your fudge bars look nice and tidy.
Can I make these fudge bars ahead of time?
Yes, you can make these fudge bars ahead of time. I recommend preparing them one to two days before you need them. Just keep them in the fridge. This way, they will stay fresh and tasty. Planning ahead saves time on busy days.
How long do the fudge bars last in the refrigerator?
These fudge bars can last about a week in the fridge. Store them in an airtight container. This helps keep them fresh and prevents them from drying out. If you notice any changes in smell or texture, it’s best to toss them.
Can I use other types of chocolate?
Absolutely! You can use dark chocolate or white chocolate for a twist. Each type brings a different flavor to the fudge bars. Dark chocolate has a rich taste, while white chocolate is sweeter. Feel free to mix and match to find your favorite combination.
In this post, I covered how to make delicious no-bake fudge bars. We discussed the key ingredients, from graham cracker crumbs to chocolate chips. I walked you through easy steps for the crust and layers. You learned tips for even layers and how to fix common issues. I also shared ways to add flavor twists, like peanut butter. Remember to store them properly for the best taste. Now, it’s your turn to enjoy these fun treats. Happy baking!