Are you ready to impress your friends and family with a fresh, zesty treat? Our Strawberry Lemonade Layer Cake is the perfect blend of sweet strawberries and bright lemon flavors. It’s a delightful dessert for any occasion, easy to make, and bursting with summer vibes. In this guide, I’ll share secret tips and tricks to create your own stunning cake. Get your apron on, and let’s bake a slice of happiness!
Ingredients
List of Ingredients
– 2 cups all-purpose flour
– 1 ½ cups granulated sugar
– ½ cup unsalted butter (softened)
– 1 cup buttermilk (preferably room temperature)
– 3 large eggs (room temperature)
– 2 tablespoons fresh lemon juice
– Lemon zest from 1 lemon
– 1 teaspoon pure vanilla extract
– 2 teaspoons baking powder
– ½ teaspoon baking soda
– ¼ teaspoon salt
– 1 cup fresh strawberries (pureed)
– 1 cup heavy cream (chilled)
– 2 tablespoons powdered sugar
– Extra strawberries and lemon slices for garnish
To create the perfect Strawberry Lemonade Layer Cake, gather your ingredients first. This helps keep your kitchen organized. Fresh strawberries will give your cake a bright flavor. Use ripe strawberries for the best taste. Make sure your eggs and buttermilk are at room temperature. This helps them mix well with the other ingredients.
Equipment Needed
– Electric mixer
– Mixing bowls
– Measuring cups and spoons
– 3 8-inch round cake pans
– Wire racks
Having the right tools makes baking easier. An electric mixer saves time and effort when creaming butter and sugar. Use mixing bowls for separate tasks. Measuring cups and spoons help you get the ingredient amounts just right. The three 8-inch round pans allow even baking. Lastly, wire racks cool your cakes quickly.
Preparation Tips
– Ensure all ingredients are at room temperature for better mixing.
– Measure the flour correctly for accurate results.
Following these tips will make your cake light and fluffy. Room temperature ingredients blend more smoothly. Accurate measuring, especially for flour, ensures the right texture. Too much flour can make your cake dense. For best results, always follow these simple steps before you start mixing.
Step-by-Step Instructions
Preheat the Oven and Prepare Pans
Preheat your oven to 350°F (175°C). Grease and flour three 8-inch round cake pans. This step is key to help the cakes come out easily after baking.
Creaming Butter and Sugar
In a large bowl, beat the softened butter and granulated sugar. Use an electric mixer at medium speed. Mix for about 3-4 minutes until the mixture looks light and fluffy. This adds air for a soft cake.
Mixing Wet and Dry Ingredients
Add the eggs one by one to the butter-sugar mix. Beat well after each egg. Then add the buttermilk, lemon juice, lemon zest, and vanilla extract. Mix until everything is well combined. In a separate bowl, whisk together the flour, baking powder, baking soda, and salt.
Combining Mixtures
Gradually add the dry ingredients to the wet mix. Use low speed on your mixer or a spatula. Mix just until combined—don’t overmix! This keeps the cake light. Now, carefully fold in the strawberry puree, ensuring it’s evenly mixed without overworking the batter.
Baking and Cooling
Divide the batter evenly among the prepared pans. Smooth the tops with a spatula. Bake for 25-30 minutes. A toothpick inserted in the center should come out clean. Once baked, let the cakes cool in the pans for 10 minutes. Then gently turn them out onto wire racks to cool completely.
Whipping Cream and Assembling
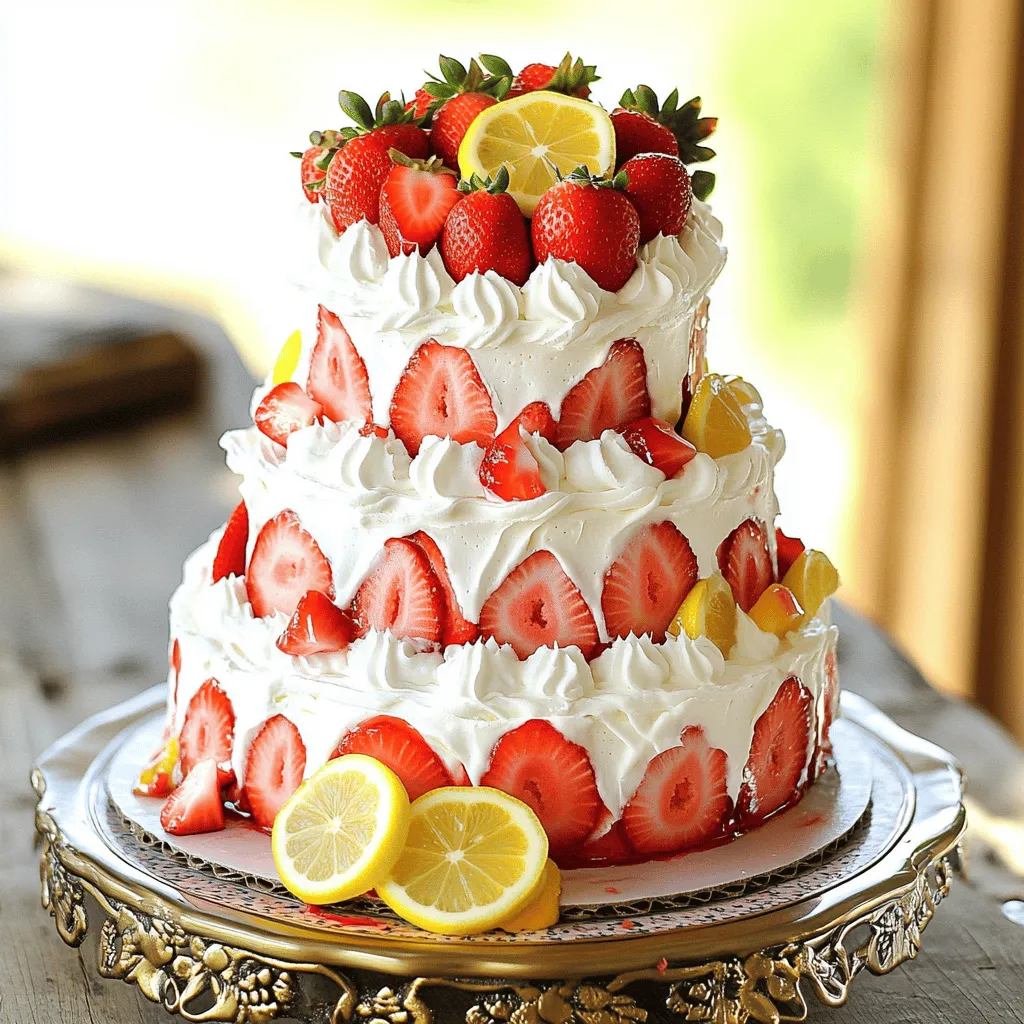
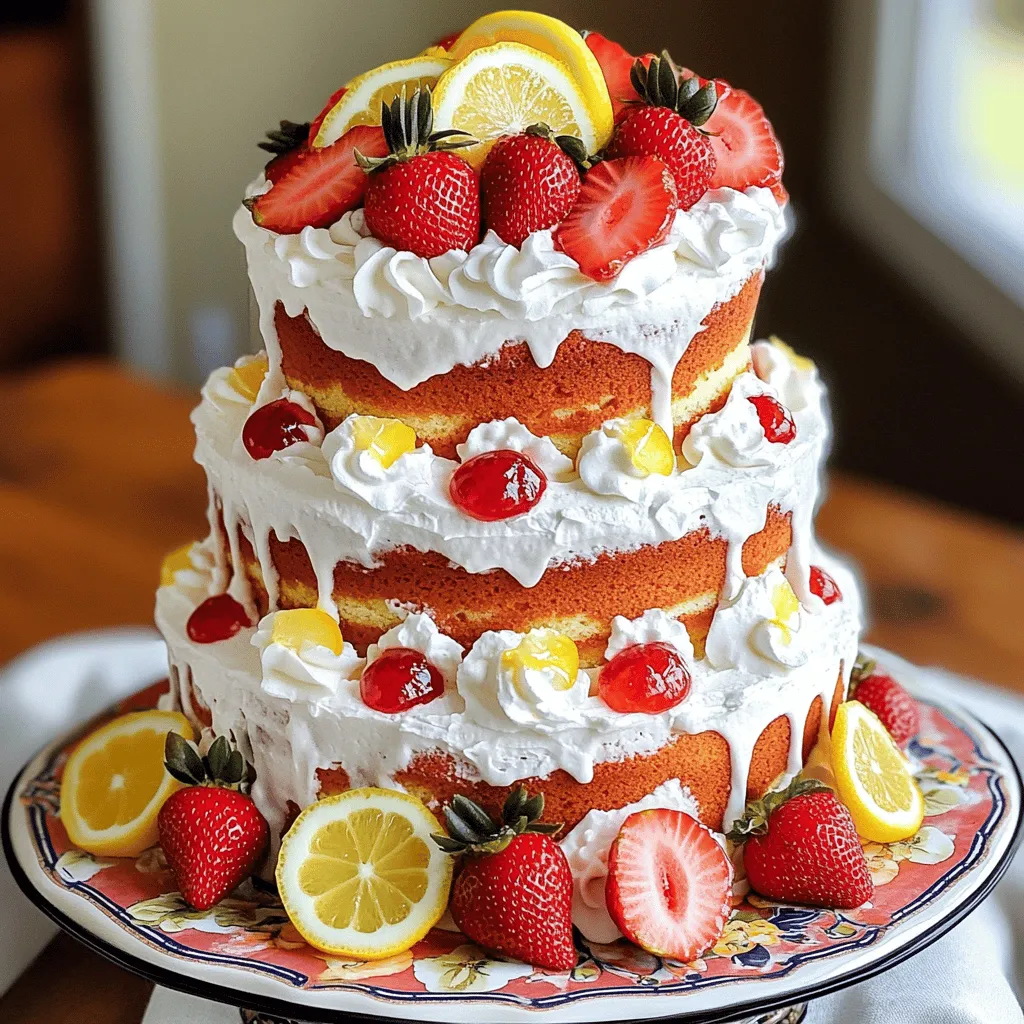
While the cakes cool, whip the chilled heavy cream with powdered sugar until stiff peaks form. This takes about 3-5 minutes with an electric mixer. Once the cake layers are cool, place the first layer on a serving plate. Spread whipped cream on top and add fresh sliced strawberries. Repeat with the second layer. Place the third layer on top and cover the whole cake with the remaining whipped cream.
Garnish
For a lovely finish, decorate the top with extra fresh strawberries and lemon slices. Arrange them nicely to make your cake pop.
Tips & Tricks
Perfecting Cake Texture
To get the best cake texture, avoid overmixing. When you mix the batter, do it just until everything blends. Overmixing can make your cake dense and tough. Keep it light and airy for that perfect bite.
Achieving the Best Flavor
Always use fresh lemons and strawberries. Fresh fruit gives the cake a bright, zesty taste. The flavors pop and make every slice a treat. If you can, pick your strawberries just before using them for the best flavor.
Decorating Ideas
For a stunning look, add extra fruit on top. Place slices of fresh strawberries and lemons for color. You can also use edible flowers for a unique touch. These decorations not only look great; they also boost the flavor. Get creative with your design to make your cake stand out!
Variations
Flavor Swaps
You can change the berries in this cake. Try using raspberries or blueberries. Each berry gives a unique taste and color. Raspberries add a tart flavor, while blueberries give a sweet twist. This allows you to create your own version of the Strawberry Lemonade Layer Cake. You can mix and match berries for fun.
Alternate Frosting Options
If you want a different frosting, look no further than cream cheese frosting. It adds a rich flavor that pairs well with the cake. You could also try a lemon glaze for a light finish. Both options bring their own charm. They can brighten the taste and make the cake even more special.
Gluten-Free Version
Do you need a gluten-free option? Simply swap all-purpose flour for gluten-free flour. This keeps the cake just as tasty. Make sure to choose a good gluten-free mix. This way, everyone can enjoy the Strawberry Lemonade Layer Cake. You won’t miss the gluten at all!
Storage Info
Storing Leftovers
After enjoying your Strawberry Lemonade Layer Cake, store any leftovers in an airtight container. This keeps the cake fresh and moist. You can keep it in the refrigerator for up to 3 days. Just make sure the container is sealed tightly. This way, you can enjoy your cake later without losing any flavor.
Freezing the Cake
If you want to save the cake for a longer time, you can freeze it. First, wrap each cake layer in plastic wrap. This prevents freezer burn and keeps the cake safe. You can freeze the layers for up to 2 months. When you’re ready to enjoy, just take them out of the freezer.
Thawing Methods
Thawing the cake is easy. Simply move the wrapped layers to the fridge the night before you want to serve them. This slow thawing method helps retain moisture. It’s best to let them sit in the fridge overnight. When ready, the cake will be soft, tasty, and ready to impress your guests.
FAQs
Can I make this cake ahead of time?
Yes, prepare and freeze layers ahead of time. This saves you time on the day you plan to serve it. Simply wrap each layer in plastic wrap and store them in the freezer. When you are ready to assemble, let them thaw in the fridge overnight. This keeps the cake fresh and easy to work with.
What type of strawberries should I use?
Use fresh, ripe strawberries for the best flavor and pureeing. Look for berries that are bright red and firm. They should smell sweet and have no soft spots. Fresh strawberries enhance the cake’s taste and create a lovely color.
How can I make the cake less sweet?
Reduce the sugar in the cake and frosting to suit your taste. You can cut back on the granulated sugar by a half cup or so. Taste the frosting as you go to ensure it is still creamy and smooth. This way, you can enjoy the bright flavors without it being too sweet.
Is it necessary to chill the cake before serving?
Chilling allows flavors to meld and improves texture. If you let the cake chill for at least 30 minutes, it becomes easier to slice. Plus, the layers hold together better. You’ll enjoy a more delightful bite when you serve it cold.
This post covered how to make a delicious Strawberry Lemonade Layer Cake. We discussed the key ingredients and equipment needed. I shared step-by-step instructions to guide you through the process. Tips and tricks helped ensure your cake has the best texture and flavor. Finally, we explored variations and storage options.
I hope you feel ready to bake this tasty cake. Enjoy sharing it with friends and family!