Skip to content
DisclaimerTerms Of UseGDPR PolicyCookie Policy

recipesstation

  • Home
  • Drinks
  • Appetizers
  • Dinner
  • Dessert
  • About
  • Contact
  • Privacy Policy
DisclaimerTerms Of UseGDPR PolicyCookie Policy

NO-ING-IMG

- 4 medium apples (Granny Smith or Honeycrisp) - 1 cup packed brown sugar - 1 teaspoon ground cinnamon - 1/4 teaspoon ground nutmeg - 2 tablespoons freshly squeezed lemon juice - 1 tablespoon cornstarch - 1 package of pre-made pie crusts - 1/2 cup caramel sauce - 1 egg, beaten - Whipped cream or vanilla ice cream for serving Gathering the right ingredients is key. I choose Granny Smith or Honeycrisp apples for their tartness. Their firm texture holds up well during baking. The brown sugar adds depth and sweetness. Ground cinnamon and nutmeg bring warmth and spice to the filling. Fresh lemon juice brightens the flavors and prevents browning. Cornstarch thickens the apple filling, making it less runny. Using pre-made pie crusts saves time. If you want to make your own, feel free! The caramel sauce adds a rich, sweet layer. A beaten egg gives the crust a nice golden color. For serving, whipped cream or vanilla ice cream makes the pie even better. You don’t need all the optional toppings, but they sure do enhance the experience. Check out the Full Recipe for a complete guide. - Preheat oven to 425°F (220°C). - In a bowl, mix apples with brown sugar, cinnamon, nutmeg, and lemon juice. Toss until coated. Let it sit for 15 minutes. This helps the flavors blend nicely. - Take one pie crust from the package and roll it out. Line a 9-inch pie dish. - Spoon the apple mixture into the crust. Drizzle half of the caramel sauce over the apples for added sweetness. - Roll out the second crust. You can place it whole over the apples or cut it into strips for a lattice design. - Use a pastry brush to apply the beaten egg wash on top. This gives a nice golden color when baked. - Bake the pie for 25-30 minutes until the crust turns golden brown. The apples should be soft but still hold their shape. - Let the pie cool slightly before serving. Drizzle the remaining caramel sauce on top for a sweet touch. For detailed ingredients and additional tips, check the Full Recipe. For the best caramel apple pies, I love using Granny Smith or Honeycrisp apples. These apples are tart and sweet, giving a great flavor. Their firm texture holds up well during baking. If these apples are not available, you can use Fuji or Braeburn apples. They also taste good and add a nice crunch. A soggy bottom crust can ruin your pie. To avoid this, pre-bake the crust for about 10 minutes before adding the apple filling. Line the crust with parchment paper and fill it with pie weights or dried beans. This helps keep the shape. When working with pie crust dough, keep it cold. If it warms up, it may become sticky and hard to handle. Use a light touch when rolling it out to prevent tearing. Making your own caramel sauce is simple and fun. You need just three ingredients: sugar, butter, and cream. Start by melting one cup of sugar in a pot over medium heat. Stir it until it turns a nice amber color. Then, add 6 tablespoons of butter and mix well. Finally, slowly pour in half a cup of heavy cream while stirring. This gives you a smooth sauce. If it is too thick, add a little more cream. For better flavor, add a pinch of salt to balance the sweetness. {{image_4}} To give your caramel apple pies a twist, try adding spices. Cloves and allspice can bring warmth and depth. Just a pinch of each can elevate the flavor. Start with 1/4 teaspoon of either spice. Mix it into your apple filling for a cozy feel. The blend of spices pairs well with the sweet caramel. Bite-sized treats are fun! To make mini caramel apple pies, use a muffin tin. Cut your pie crusts into smaller circles. Each circle should fit into the muffin holes. Fill them with the apple mixture and caramel sauce. Bake these mini pies for 15-20 minutes. They are done when the crust turns golden. For a gluten-free version, choose a gluten-free pie crust. Many brands offer great options at stores. You can also make your own using almond flour or oat flour. Just follow your favorite gluten-free pie crust recipe. This way, everyone can enjoy this tasty dessert! For the best flavor, stick to the same apple filling recipe. Check out the Full Recipe for all the steps you need to make these variations shine! To keep your caramel apple pies fresh, store them in the fridge. Place the pie in an airtight container or cover it tightly with plastic wrap. This way, you can enjoy the pie for up to four days. If you have slices left, it's best to wrap them individually. For reheating, use the oven. Preheat to 350°F (175°C) and warm the pie for about 10-15 minutes. This method revives the flaky crust and gooey caramel. Yes, you can freeze caramel apple pies! Freezing is a great way to save a pie for later. To freeze, let the pie cool completely. Wrap it tightly in plastic wrap and then cover it with aluminum foil. This double wrap prevents freezer burn. You can freeze the pie for up to three months. When you're ready to eat, defrost it in the fridge overnight. After thawing, reheat it in the oven at 350°F (175°C) for about 20-25 minutes. Enjoy your pie as if it were fresh! Caramel apple pies last about 3 to 4 days in the fridge. To store, cover the pie with plastic wrap or foil. This keeps the pie fresh and tasty. If you want to keep it longer, you can freeze the pie. It will last up to 3 months in the freezer. Just make sure to wrap it well to avoid freezer burn. Yes! You can use other fruits if you like. Pears, peaches, or berries work well. Each fruit brings its own flavor. Just cut the fruit into small pieces like you do with apples. You might need to adjust the sugar, depending on the fruit's sweetness. For example, berries may need less sugar than apples. You can serve caramel apple pies with many toppings. Whipped cream adds lightness. Vanilla ice cream is a big favorite too. For an extra treat, drizzle more caramel sauce on top. Chopped nuts or a sprinkle of cinnamon can also make it special. Feel free to get creative with your toppings! You can tell the pie is done by looking at the crust. It should be golden brown. You can also poke a fork into the apples. If they are soft but not mushy, the pie is ready. Lastly, the house will smell amazing when it’s baking. Trust your nose; it knows when the pie is done! This article walks you through making the perfect caramel apple pie. You learned about the key ingredients and step-by-step instructions. I shared tips for choosing apples and achieving a flaky crust. You explored variations and storage options to keep your pies fresh. In the end, making this pie is fun and rewarding. You can impress family and friends with each slice. Happy baking!

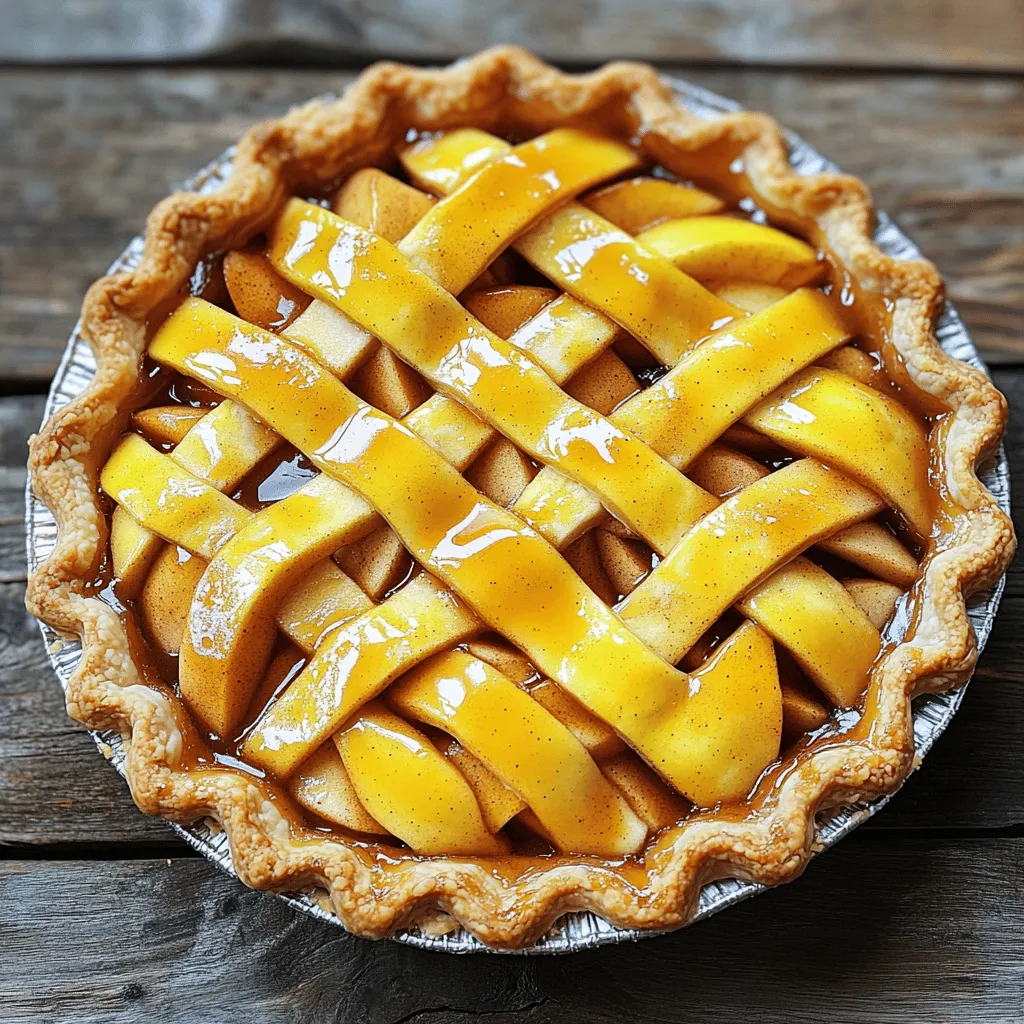
Easy Caramel Apple Pies Deliciously Simple Dessert

If you want a dessert that’s easy and delicious, you’ve hit the jackpot! In this guide to making Easy Caramel

To make this tasty dish, you'll need these main ingredients: - 8 oz fettuccine pasta - 1 lb large shrimp, peeled and deveined - 2 tablespoons extra virgin olive oil - 3 cloves garlic, finely minced - 1 cup heavy cream - 1 cup shredded mozzarella cheese - 1/2 cup fresh basil leaves, chopped - 1/4 teaspoon red pepper flakes (optional for heat) - Salt and freshly ground black pepper to taste - Fresh parsley, chopped, for garnish - Grated Parmesan cheese for serving These ingredients create a creamy and rich base for the dish. The shrimp adds a nice protein boost, while the mozzarella brings a delightful creaminess. You can boost the flavor with these optional ingredients: - Lemon zest for a zesty kick - Sun-dried tomatoes for a touch of sweetness - Spinach for extra nutrients and color - Peas for a pop of sweetness and texture Adding these extras can make your dish even more exciting. Try mixing and matching to find your favorite flavors. To prepare this dish, gather these tools: - Large pot for boiling pasta - Skillet for sautéing shrimp and making the sauce - Measuring cups and spoons for accurate portions - Wooden spoon or spatula for mixing - Colander for draining pasta Having the right tools makes cooking smoother and more enjoyable. This way, you can focus on creating your delicious meal without fuss. For the full recipe, check out the detailed steps. Start by boiling water in a big pot. Make sure to add salt to the water. Once the water is at a rolling boil, add the fettuccine. Cook it according to the package directions, usually about 8-10 minutes. The pasta should be firm but tender, known as al dente. After you cook it, drain the pasta in a colander. Remember to save about half a cup of the pasta water for later. This water helps to make the sauce creamy. In a large skillet, warm two tablespoons of extra virgin olive oil over medium heat. Add three cloves of finely minced garlic. Sauté the garlic for about one minute until it smells great but does not brown. Next, toss in one pound of peeled and deveined shrimp. Cook the shrimp for around 2-3 minutes on each side. They should turn pink and opaque when done. After cooking, take the shrimp out of the skillet and set them aside on a plate. Using the same skillet, pour in one cup of heavy cream. Stir it well to mix with the garlic oil. Bring the mixture to a gentle simmer. This step is key to making the sauce creamy. Lower the heat to keep the sauce warm without boiling. Then, gradually add one cup of shredded mozzarella cheese. Whisk it in until the cheese melts fully. If the sauce gets too thick, add small amounts of reserved pasta water until it reaches the right consistency. Once the sauce is creamy, return the sautéed shrimp to the skillet. Next, add the drained fettuccine. Gently toss everything together, ensuring the pasta and shrimp are well coated in the sauce. Fold in half a cup of chopped fresh basil. Season to taste with salt, freshly ground black pepper, and red pepper flakes if you like a bit of heat. Transfer the creamy shrimp pasta onto serving plates. To make it look nice, sprinkle some chopped parsley on top. Finish with a generous amount of grated Parmesan cheese. Serve this dish right away for the best flavor, and enjoy every bite of this creamy mozzarella shrimp pasta. For the complete recipe, refer to the Full Recipe section. To make a smooth cream sauce, start with low heat. High heat can curdle the cream. After adding the cream, stir gently. This keeps the sauce silky. Add the mozzarella gradually. If the sauce gets too thick, mix in a bit of pasta water. This helps you control the consistency. Season with salt and pepper, but taste as you go. If you have dietary restrictions, don’t worry! You can swap out the heavy cream for a plant-based milk. Almond or coconut milk works well. For a lighter option, use Greek yogurt. You can also change the cheese. Try goat cheese or a dairy-free alternative. If shrimp isn’t your thing, substitute with chicken or tofu for protein. To save time, prep all your ingredients first. Chop the garlic and basil before you cook. Cook the pasta while you sauté the shrimp. This way, everything finishes at the same time. Keep your skillet on low heat while you mix the sauce. This helps you manage the cooking process without rushing. For the full recipe, check out the Creamy Mozzarella Shrimp Pasta. {{image_4}} You can easily boost the nutrition in your creamy mozzarella shrimp pasta. Adding vegetables not only adds color but also flavor. Consider using spinach, cherry tomatoes, or bell peppers. Just sauté them with the garlic before adding the shrimp. For spinach, cook it until wilted. For cherry tomatoes, add them until they burst. Bell peppers should be soft but still crunchy. This will give you a dish full of vitamins and minerals. If you love heat, try making a spicy version. You can add more red pepper flakes to the sauce. Start with one teaspoon instead of just a pinch. For an extra kick, toss in sliced jalapeños or diced serrano peppers when cooking the shrimp. This will give your pasta a fiery twist. Just remember to balance the spice with more cream or cheese. You can make a lighter version of this dish if you want to eat healthier. Swap out the heavy cream for half-and-half or Greek yogurt. You can also use zucchini noodles instead of fettuccine. This keeps the dish low in carbs. Reducing the amount of mozzarella cheese can also help cut calories. These small changes can make a big difference while still keeping the meal tasty. For the complete cooking process, check out the Full Recipe. After enjoying your creamy mozzarella shrimp pasta, store leftovers in an airtight container. Make sure to let the pasta cool down first. This helps keep it fresh. Place it in the fridge if you plan to eat it within three days. For longer storage, consider freezing it. When you reheat creamy pasta, do it gently. Use a skillet over low heat. Add a splash of water or cream to keep it moist. Stir often to prevent sticking. If using a microwave, cover the dish to trap steam. Heat in short bursts, stirring in between. To freeze your creamy shrimp pasta, first let it cool completely. Portion it into smaller containers for easier thawing. Seal tightly to avoid freezer burn. It can last up to three months in the freezer. When ready to eat, thaw in the fridge overnight and reheat as described above. For the full recipe, check out the Creamy Mozzarella Shrimp Pasta details. Yes, you can use other pasta types. I suggest penne or spaghetti. Both work well with the creamy sauce. Just cook them according to the package. Make sure they are al dente for the best texture. If you don’t have mozzarella, try using provolone or fontina cheese. They melt nicely and give a great flavor. You can also use a dairy-free cheese if you want a vegan option. Just ensure it melts well to keep that creamy texture. This dish takes about 25 minutes total. You’ll spend about 10 minutes prepping and 15 minutes cooking. It’s quick and perfect for busy weeknights. Absolutely! You can easily double or triple the recipe. Just make sure you have a big enough pot and skillet. Adjust cooking times slightly for larger amounts, but keep the same flavors. You can make the pasta and sauce ahead of time. Just store them separately in the fridge. When you’re ready to eat, mix and heat them together. The dish tastes best fresh, but it still holds up well. Check the full recipe for tips on storage. In this blog post, we explored the key ingredients and steps for making creamy mozzarella shrimp pasta. You learned how to cook the fettuccine, sauté shrimp, and create a rich sauce. We also discussed helpful tips and variations to suit your taste. Remember, this dish is flexible; feel free to swap ingredients or adjust spice levels. With the right techniques, you can make a delicious meal your friends and family will love. Now, gather your ingredients and start cooking! Enjoy your culinary adventure!

Creamy Mozzarella Shrimp Pasta Flavorful Dinner Recipe

Looking for a tasty weeknight meal? My Creamy Mozzarella Shrimp Pasta is just what you need! This dish combines juicy

Here’s what you need for Tuscan White Bean Soup Delight. This recipe is simple and fun to make. - 2 cans (15 oz each) white beans (cannellini or great northern), drained and rinsed - 4 cups vegetable broth - 1 medium onion, finely diced - 3 garlic cloves, minced - 2 medium carrots, peeled and chopped - 2 celery stalks, chopped - 1 cup diced tomatoes (canned or fresh) - 1 teaspoon dried thyme - 1 teaspoon dried rosemary - 1 teaspoon red pepper flakes (adjust to your preferred spice level) - 2 cups kale, stems removed and chopped - 2 tablespoons extra-virgin olive oil - Salt and pepper to taste - Freshly grated Parmesan cheese (for serving, optional) - Fresh parsley, finely chopped (for garnish) Gather these ingredients to create a warm and hearty soup. Each component adds flavor and nutrition. The white beans provide protein, while the vegetables add color and taste. Fresh herbs bring a lovely aroma. If you want to make it your own, sprinkle some cheese or parsley on top when serving. You can find the Full Recipe for more detailed steps to bring this dish to life! To make Tuscan White Bean Soup Delight, start by gathering your ingredients. You will need two cans of white beans, vegetable broth, and fresh veggies. 1. In a large pot, heat two tablespoons of olive oil over medium heat. 2. Add one diced onion, two chopped carrots, and two chopped celery stalks. 3. Sauté these for about 5-7 minutes. Stir often until the onion turns clear. 4. Next, add three minced garlic cloves. Cook for one more minute, stirring well. 5. Now mix in one cup of diced tomatoes, one teaspoon dried thyme, one teaspoon dried rosemary, and one teaspoon red pepper flakes. Cook for 2-3 minutes. Tip: When checking the doneness of the beans, they should be soft but not mushy. For the kale, it should wilt and stay bright green. 6. Pour in four cups of vegetable broth and bring it to a boil. 7. Reduce the heat to low and let it simmer. 8. Add the rinsed white beans and simmer for 15-20 minutes. This helps the flavors blend nicely. 9. After that, stir in two cups of chopped kale. Cook for another 5 minutes until the kale is tender. 10. Taste your soup and add salt and pepper as needed. For perfect flavor, keep the heat at medium when cooking the veggies. A slow simmer lets the tastes develop well. If you want a creamier soup, use an immersion blender. Blend a part of the soup and stir it back in. This creates a nice texture without losing the hearty feel of the soup. Serve your soup hot. Top it with freshly grated Parmesan cheese and sprinkle some chopped parsley for a lovely finish. You can find the Full Recipe for a detailed guide on making this tasty dish. - Ensuring proper ingredient preparation: Always rinse your canned beans well. This helps remove excess salt and improves the soup’s flavor. Dice your veggies evenly. This ensures they cook at the same rate. - Avoiding overcooking the vegetables: Keep an eye on your veggies while sautéing. You want them tender, not mushy. Overcooked vegetables lose texture and flavor, making your soup less enjoyable. - Suggestions for herbs and spices to elevate the soup: Fresh herbs like basil and thyme can boost flavor. You can also experiment with smoked paprika for a deeper taste. If you like heat, add more red pepper flakes. - Recommendations for high-quality vegetable broth: Use a low-sodium vegetable broth. This gives you better control over the salt level in your soup. A rich, flavorful broth makes all the difference in taste. For a special touch, try homemade broth if you have the time. For the complete experience, check the Full Recipe for Tuscan White Bean Soup Delight. Enjoy your cooking! {{image_4}} You can easily switch out white beans in this recipe. Lentils make a great swap. They cook faster and add a nice texture. You can also try chickpeas for a different flavor. If you want more greens, use spinach or Swiss chard. These greens cook down nicely and add color. For a gluten-free version, check your broth. Make sure it has no gluten. You can also leave out the cheese to make it vegan. Add nuts or seeds for extra protein. To lower the sodium, choose low-sodium broth. Or, you can use fresh herbs instead of salt. Feel free to explore these variations to make Tuscan White Bean Soup Delight your own! For the complete recipe, check the Full Recipe section above. After enjoying your Tuscan White Bean Soup Delight, store leftovers right away. Place the soup in an airtight container. It keeps well in the fridge or freezer. If you put it in the fridge, let it cool first. Make sure to seal it tightly. This helps keep the flavors fresh. For freezing, use freezer-safe containers or bags. Leave some space for the soup to expand. You can also portion it out for easy reheating. When you are ready to eat, thaw overnight in the fridge. For quick defrosting, place the container in warm water. To reheat, use a pot on medium heat. Stir often to avoid sticking. You can also use a microwave. Heat it in short bursts, stirring in between. This keeps the soup warm and tasty. In the fridge, this soup lasts about 3 to 5 days. If you freeze it, it can stay good for 3 months. Always check for signs of spoilage. Look for changes in color or smell. If it smells sour or looks off, throw it away. It's better to be safe than sorry! If you notice any mold, discard the soup immediately. Keeping track of how long it's been stored helps you enjoy your soup at its best. Proper storage ensures that you can savor the flavors of Tuscan White Bean Soup Delight whenever you like! Yes, you can use fresh beans! However, fresh beans take longer to cook. Dried beans need soaking overnight. After soaking, cook them until tender, which can take 1 to 2 hours. Once cooked, you can add them to your soup. This method gives a great taste but takes more time and effort. Pair this soup with simple sides. Here are some tasty ideas: - Crusty bread or baguette for dipping - A fresh green salad with lemon vinaigrette - Roasted vegetables for added flavor - Garlic bread for a classic touch These sides complement the soup and make a full meal. Yes, this soup is very healthy! It is rich in fiber and protein from the beans. Plus, the vegetables add vitamins and minerals. Kale is a great source of nutrients, and the olive oil provides healthy fats. This dish is low in calories and helps keep you full. Enjoying it regularly can support a balanced diet. This blog post shared a recipe for Tuscan White Bean Soup Delight. You learned about the key ingredients, preparation steps, and cooking techniques. I highlighted common mistakes to avoid and tips for enhancing flavor. I also covered ingredient swaps and dietary options to fit your needs. Lastly, I provided storage tips and answered important FAQs. Now, you can create a delicious soup that fits your taste and dietary needs. Enjoy the warmth and health benefits this meal brings!

Tuscan White Bean Soup Delight Simple and Tasty Meal

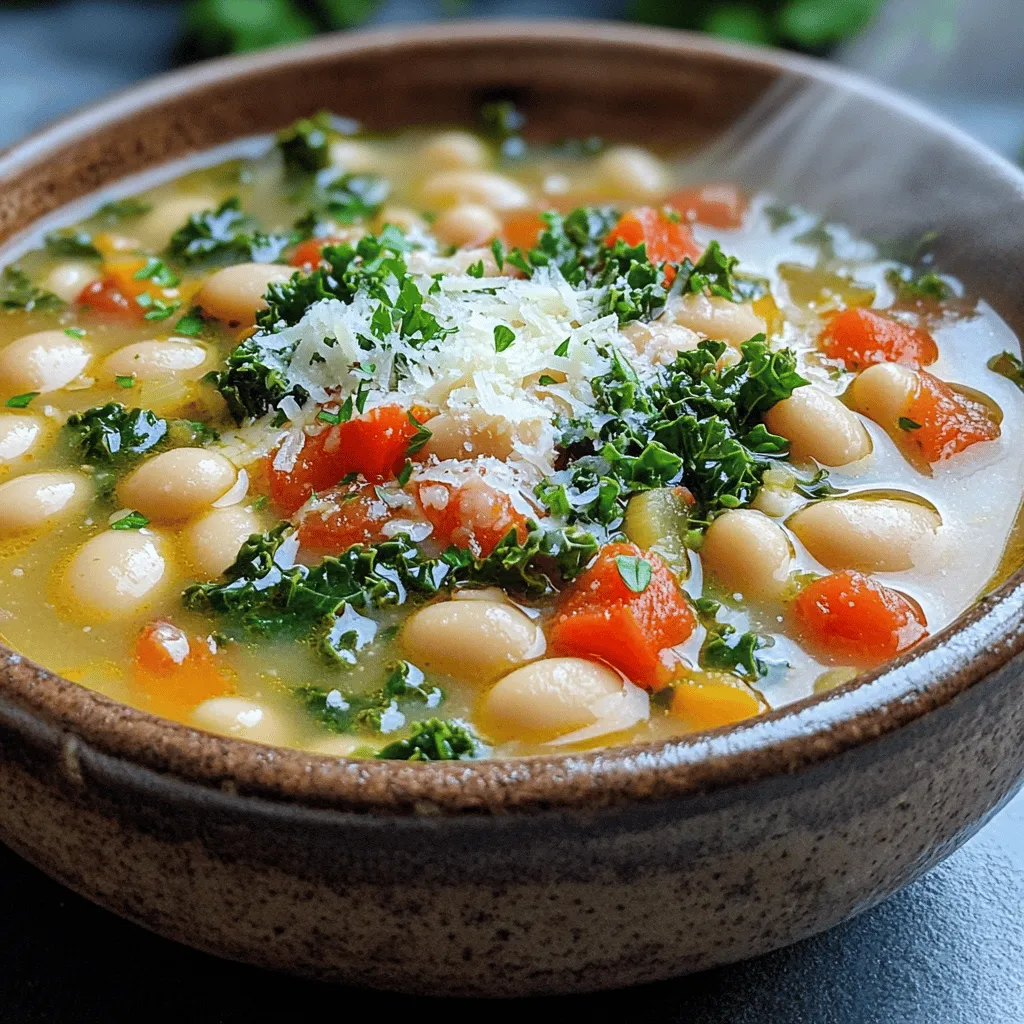
Looking for a warm and comforting meal? Let me introduce you to Tuscan White Bean Soup Delight! This simple and

Newer posts
← Previous Page1 … Page85 Page86

dsad

© 2026 recipesstation • Built with GeneratePress

Our Policies

  • Copyright Policy
  • Cookie Policy
  • GDPR Policy
  • Privacy Policy
  • Disclaimer
  • Terms Of Use

More Information

  • Home
  • About
  • Contact
  • Appetizers
  • Dessert
  • Dinner
  • Drinks
©2026, recipesstation About Back To Top