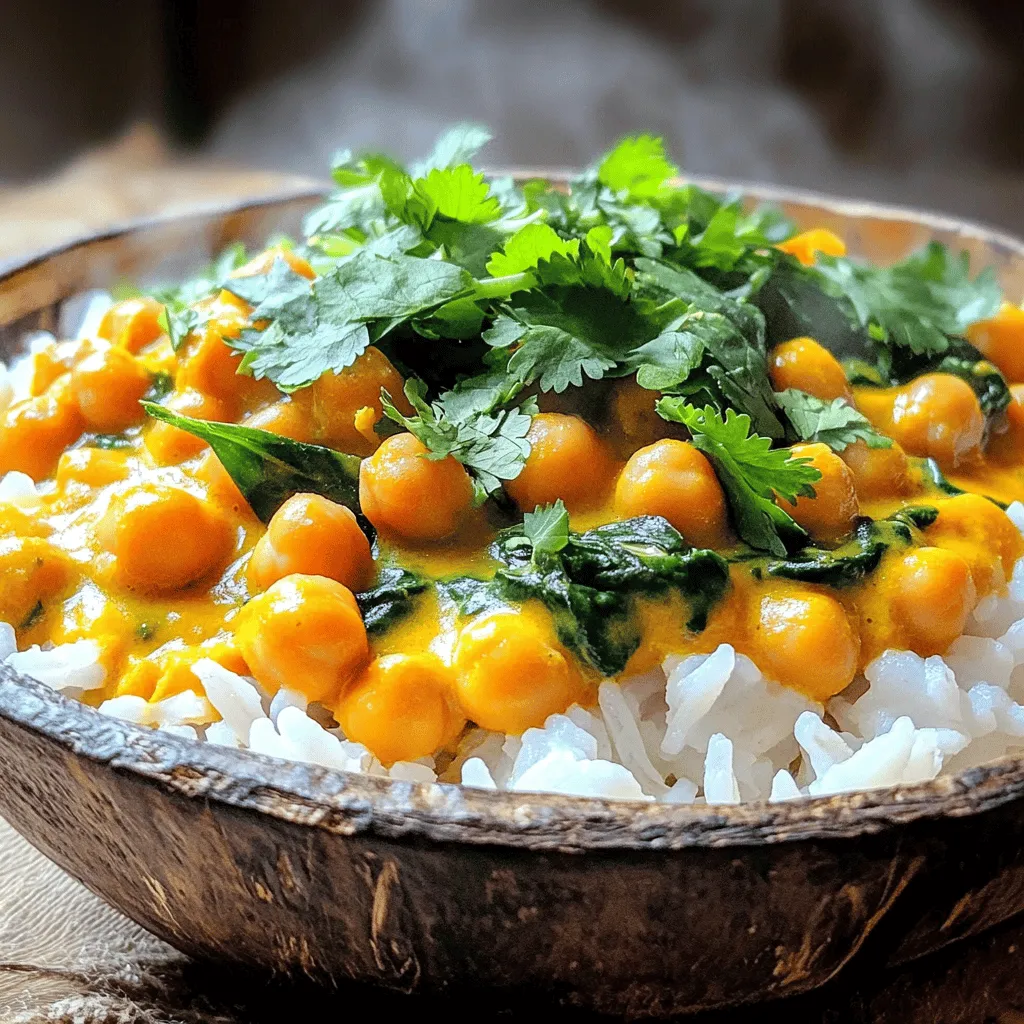
Looking for an easy, delicious recipe? Vegan Chickpea Curry is your answer! It’s filled with wholesome ingredients like chickpeas, coconut milk, and vibrant spices. This comforting dish is perfect for anyone wanting a warm meal packed with flavor. Follow my simple steps to create this delightful curry. You’ll impress everyone at the dinner table, and you won’t break a sweat! Let’s dive into the tasty world of vegan cooking!
Ingredients
Main Ingredients
– 2 cans chickpeas (15 oz each), thoroughly rinsed and drained
– 1 can coconut milk (13.5 oz)
– 2 tablespoons curry powder
– 1 teaspoon ground cumin
– 1 teaspoon ground turmeric
– 1 teaspoon chili powder
Chickpeas are the star here. They add protein and a nice texture. Coconut milk gives the dish a creamy base. It balances the spices well. You can adjust the spice levels with chili powder. Each spice adds flavor and warmth to the curry.
Additional Ingredients
– 1 large onion, finely chopped
– 3 cloves garlic, minced
– 1-inch piece of fresh ginger, grated
– 1 can diced tomatoes (14.5 oz)
– 2 tablespoons olive oil
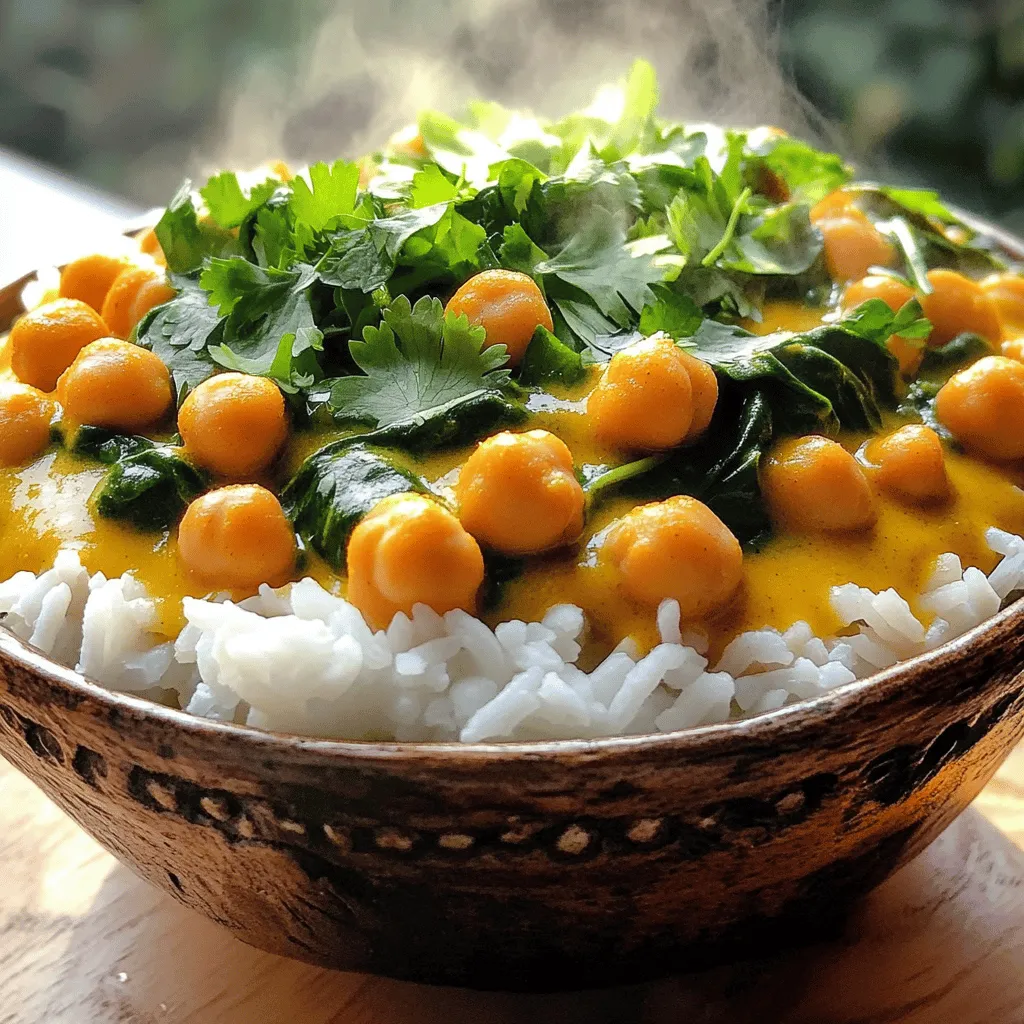
– 2 cups fresh spinach, packed
– Fresh cilantro, chopped (for garnish)
– Cooked rice or naan bread (for serving)
Onions, garlic, and ginger build a flavor base. Diced tomatoes add moisture and sweetness. Fresh spinach adds color and nutrition. Serve with rice or naan for a filling meal. Cilantro adds a fresh finish.
Necessary Kitchen Tools
– Large pot
– Chopping board and knife
– Measuring cups and spoons
A large pot is key for cooking the curry. Use a chopping board and knife for prepping ingredients. Measuring cups and spoons help ensure accuracy in your recipe. This setup makes cooking easier and more fun.
Step-by-Step Instructions
Preparation Phase
1. Sautéing onions and aromatics
Start by heating the olive oil in a large pot over medium heat. Add the finely chopped onion. Cook it for about 5 minutes. You want the onion to get soft and turn translucent. This step builds the base flavor of your curry. Next, add the minced garlic and grated ginger. Cook for another 2 minutes. The aroma will fill your kitchen, making you eager to dive in!
2. Blooming the spices
Now, it’s time to add the spices. Sprinkle the curry powder, ground cumin, ground turmeric, and chili powder into the pot. Stir well to mix everything. Cook for one more minute. This helps the spices release their full flavor. Blooming the spices is a key step to a rich taste.
Cooking Process
1. Combining liquids
Carefully pour in the diced tomatoes and coconut milk. Mix well until you have a smooth blend. Increase the heat a bit. Bring the mixture to a gentle simmer. This is where the magic happens, as all the flavors begin to meld together.
2. Incorporating chickpeas
Now, fold in the rinsed chickpeas. They add protein and texture. Season with salt and freshly ground black pepper. Let the curry simmer for 15 to 20 minutes. Stir occasionally to ensure even cooking. The chickpeas should soak up all the delicious flavors.
Final Touches
1. Adding spinach
In the last few minutes of cooking, add the fresh spinach. Stir it in until it wilts. This adds freshness and color to your dish. It’s a simple way to make your curry even more nutritious.
2. Adjusting seasoning
Taste your curry and adjust the seasoning if needed. You may want to add a pinch more salt or pepper. This step is important to ensure every bite is full of flavor. Once you’ve achieved the perfect taste, remove the pot from heat. Let it rest for a few moments before serving.Enjoy this easy comfort food dish that warms the heart and pleases the palate.
Tips & Tricks
Perfecting the Texture
To cook chickpeas, use canned ones for ease. Rinse and drain them well. If you cook dried chickpeas, soak them overnight. Boil them for about 1-2 hours until soft.
Balancing flavors is key. You want sweet, salty, and spicy notes. Adjust salt and spices as you taste. If it’s too hot, add a touch of sugar or more coconut milk to mellow the heat.
Serving Suggestions
Serve your chickpea curry over warm rice. Naan bread is also a great choice. Both soak up the rich sauce well.
For presentation, use a deep bowl to showcase the vibrant colors. Add a sprinkle of fresh cilantro on top for a pop of green. It makes the dish look fresh and inviting.
Enhancing Nutritional Value
Add more veggies to boost nutrition. Spinach is a great addition, but you can also use bell peppers or carrots. They add color and crunch.
Consider adding superfoods like kale or quinoa. They increase fiber and protein. You can mix in cooked lentils for extra heartiness. These additions make your meal even healthier and more filling.
Variations
Different Spice Profiles
For a unique twist, you can change the spices. If you want an Indian-inspired flavor, use spices like garam masala or cardamom. These spices add warmth and depth. You can also try a Thai-inspired version. Use red curry paste and fresh basil. This will give your dish a fresh kick and a new flavor.
Additions of Protein or Fiber
You can boost the nutrition of your curry by adding protein or fiber. Tofu or tempeh works well. They soak up the curry flavors and add a nice texture. Lentils or beans are another great choice. They make the dish heartier and more filling. Mixing these proteins keeps your meal exciting and healthy.
Alternative Cooking Methods
You can cook this curry in different ways. The Instant Pot is a fast option. It saves time and keeps the chickpeas tender. Simply set it to the “manual” setting for about 10 minutes. A slow cooker is perfect if you want to set it and forget it. Cook on low for about 6 hours. Both methods create delicious results.
Storage Info
Refrigeration
For storage, I recommend using airtight glass containers. These keep the curry fresh and safe. When properly stored, Vegan Chickpea Curry lasts up to five days in the fridge. If you plan to eat it later, store it in smaller portions. This helps with quick meals.
Freezing Tips
Freezing is a great way to save your curry. Use freezer-safe containers or bags. Make sure to leave some space for expansion. To thaw, put the container in the fridge overnight. For reheating, simply warm it on the stove or in the microwave. Add a splash of water if it gets too thick.
Meal Prep Ideas
Batch cooking is smart for busy weeks. Make a large pot of curry and divide it into servings. You can enjoy it over rice or with bread. Got leftovers? Use them in wraps or salads. This way, you minimize waste and maximize flavor.
FAQs
Can I make Vegan Chickpea Curry without coconut milk?
Yes, you can make vegan chickpea curry without coconut milk. Many options work well. You can use vegetable broth for a lighter taste. Almond milk also adds creaminess without coconut. If you want thickness, try cashew cream. This gives a rich flavor. Each choice changes the taste a bit, so choose what you like best.
Is this recipe gluten-free?
Yes, this recipe is gluten-free! Chickpeas are naturally gluten-free. Just ensure all spices and canned goods are labeled gluten-free. Some curry powders may have gluten, so check the label. If you serve it with rice or gluten-free naan, it stays gluten-free. This makes it safe for those with gluten sensitivities.
How can I spice up my Vegan Chickpea Curry?
To spice up your vegan chickpea curry, start with the chili powder. Adjust it to match your heat level. Add fresh chili peppers for a kick. Try cayenne for more heat. You can also use garam masala for warmth and depth. Don’t forget to add fresh herbs like cilantro for brightness. Taste as you go, and make it your own!
This blog post covered how to make a delicious vegan chickpea curry. We explored the main ingredients like chickpeas and coconut milk, plus spices that make it tasty. I shared step-by-step instructions from prepping to cooking. You learned about tips for texture, serving ideas, and variations to try. Finally, we discussed storage methods and FAQs to help. Enjoy making this dish and feel free to get creative. Your kitchen journey starts now!