Maple Pecan Granola Crunchy and Nutritious Snack
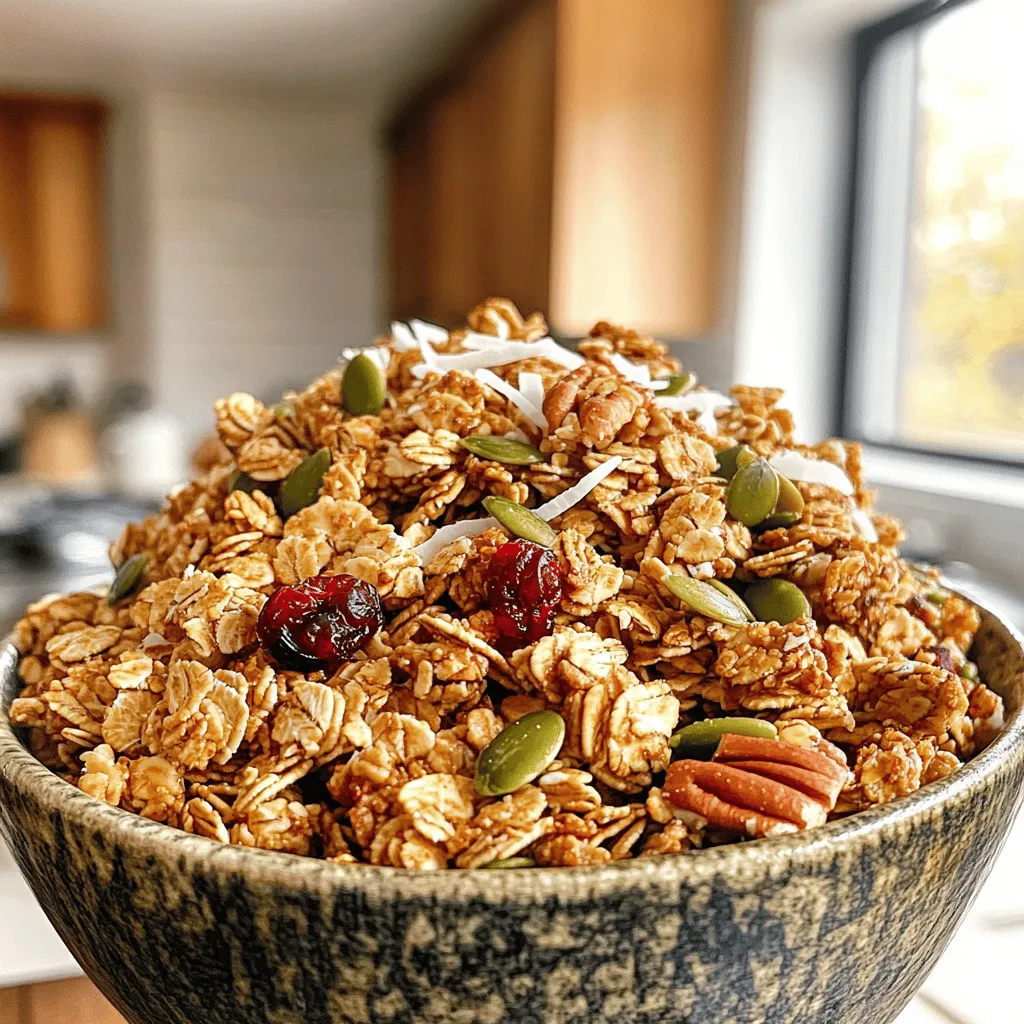
Looking for a snack that’s both tasty and healthy? Let me introduce you to Maple Pecan Granola! This crunchy delight
Looking for a snack that’s both tasty and healthy? Let me introduce you to Maple Pecan Granola! This crunchy delight
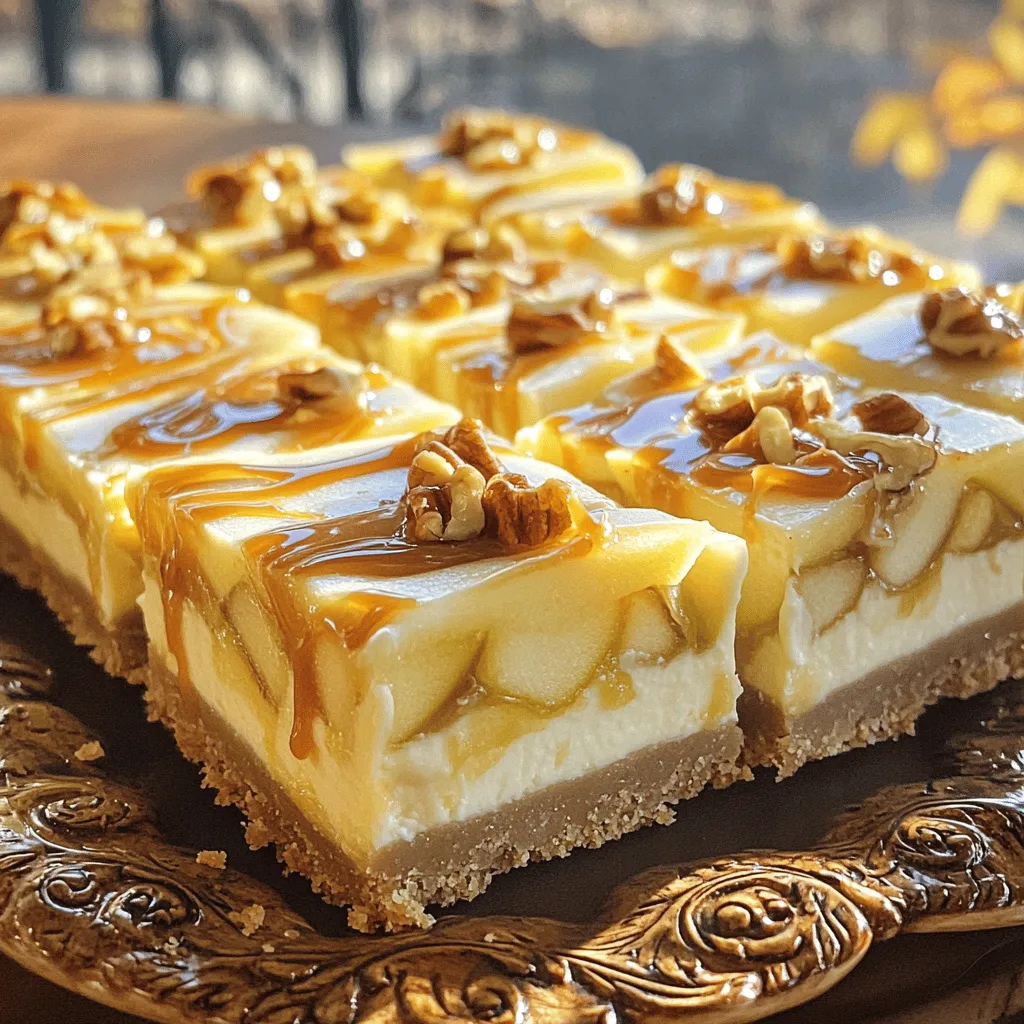
Indulge your sweet tooth with my Caramel Apple Cheesecake Bars—an easy, yet scrumptious dessert! Imagine buttery graham cracker crust, creamy
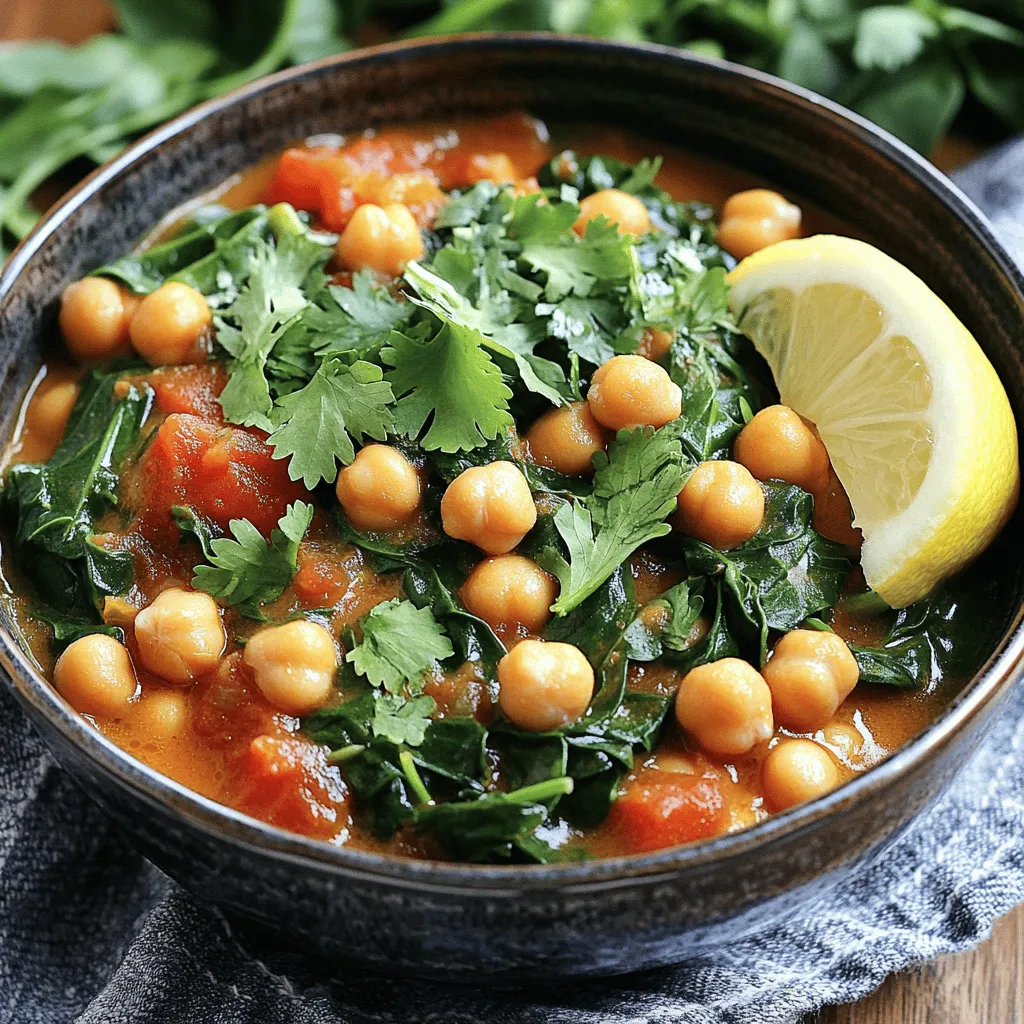
Looking for a warm and filling dish that’s simple to make? This Chickpea and Spinach Stew is just what you

Are you ready to bring fall into your kitchen with a fun twist? These Pumpkin Spice Latte Cupcakes are simple
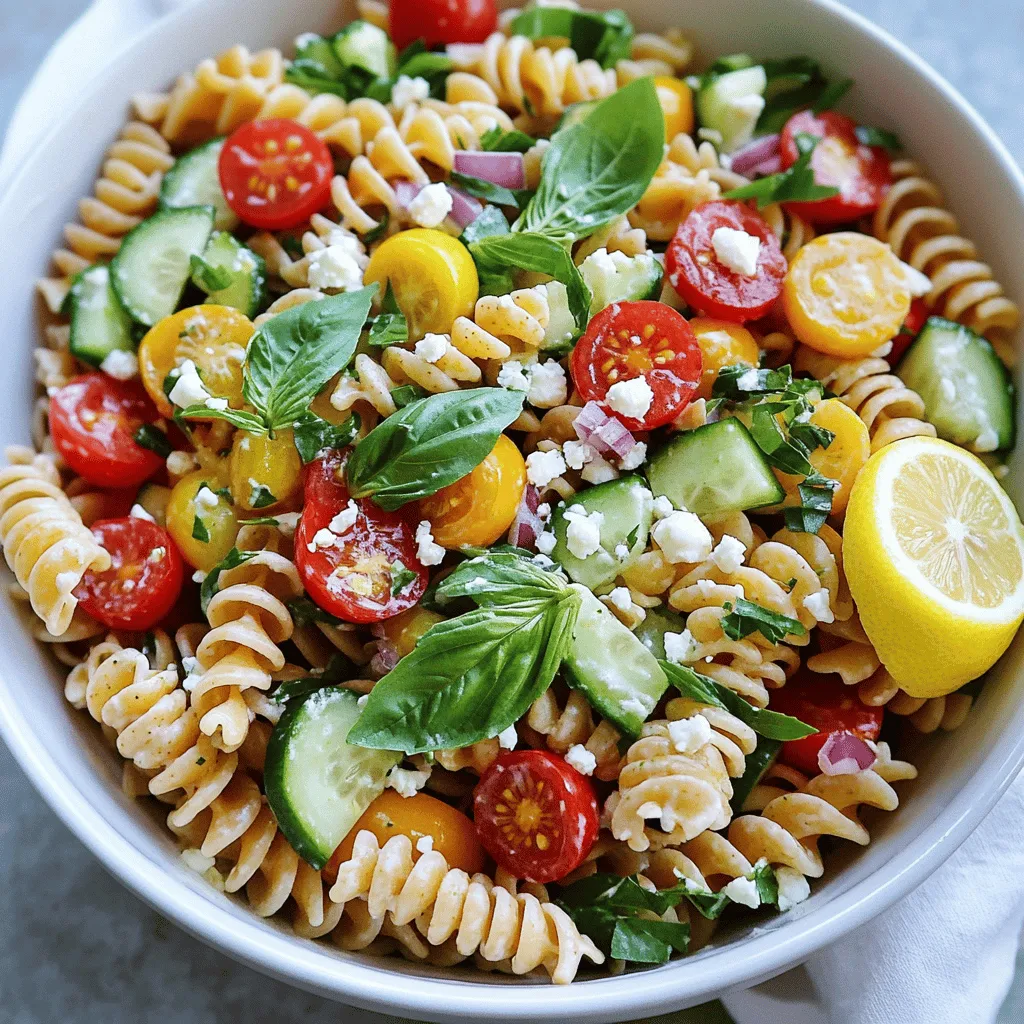
Looking for a dish that’s fresh, light, and packed with flavor? Look no further! My Lemon Basil Pasta Salad combines
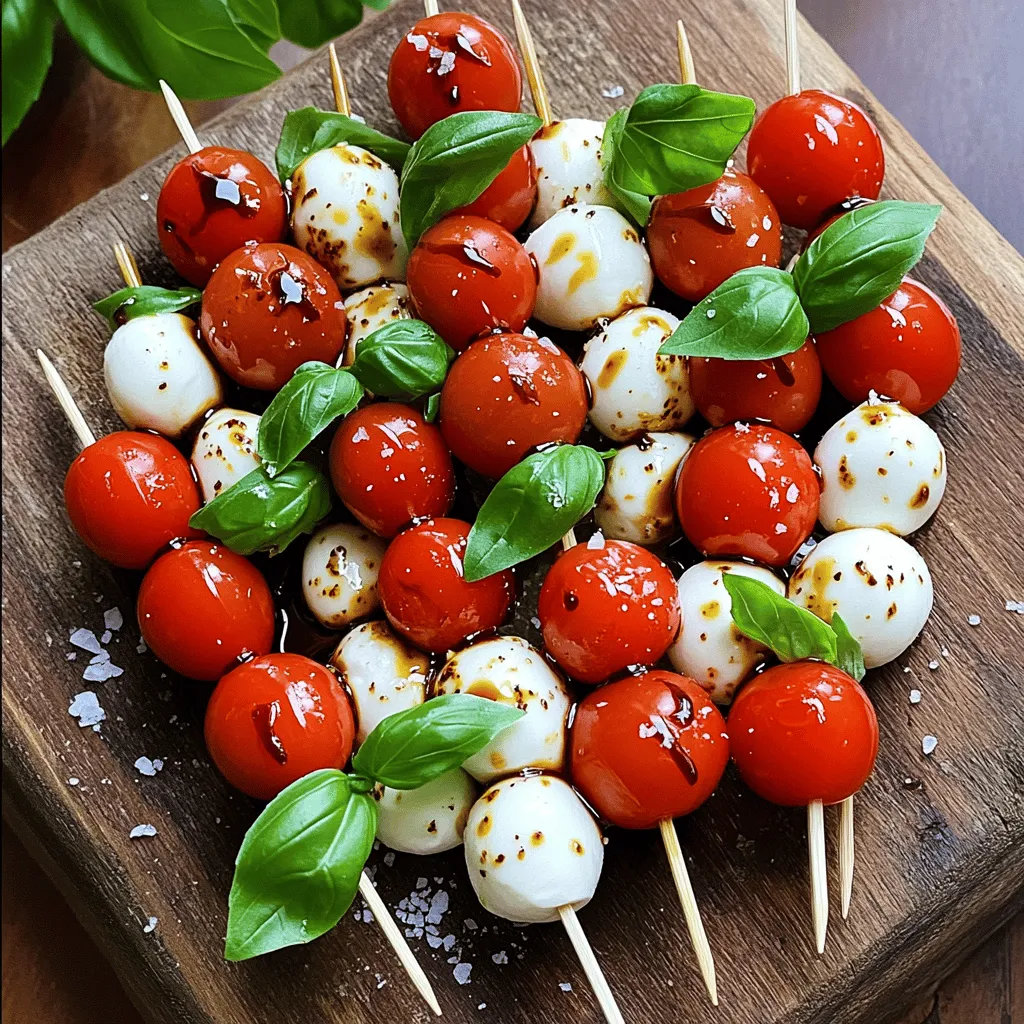
Looking for a fun and quick appetizer? Mini Caprese Skewers are your answer! They’re easy to make and packed with
![- 1 can (15 oz) chickpeas, thoroughly drained and rinsed - 1 tablespoon olive oil - 1 teaspoon smoked paprika - 1 teaspoon ground cumin - 1/2 teaspoon cayenne pepper - 1/2 teaspoon garlic powder - 1/2 teaspoon salt - 1/4 teaspoon freshly cracked black pepper - 8 small corn or flour tortillas - 1 ripe avocado, sliced - 1 cup finely shredded red cabbage - 1/2 cup fresh cilantro, chopped - 1 lime, cut into wedges - Hot sauce for extra spice These core ingredients create a tasty base for your tacos. The chickpeas pack a protein punch. The spices add warmth and flavor. You can always adjust the cayenne to fit your heat preference. If you want extra zing, a dash of hot sauce will do the trick. Serve your spicy chickpea tacos with lime wedges on the side. The lime juice adds a fresh twist. Arrange the tacos on a colorful platter. Garnish with cilantro sprigs and lime wedges. This makes your dish look appealing and fun. You can also serve them with a side of rice or a fresh salad to round out the meal. For a simple dessert, try fresh fruit to keep things light and refreshing. This recipe is quick and easy, so you can whip it up in no time. For the full recipe, check out the detailed instructions that follow. Enjoy your cooking! To start, I heat olive oil in a large skillet. I use medium heat until the oil shines. Next, I add the drained and rinsed chickpeas. This lets them sizzle and get warm. I then sprinkle smoked paprika, cumin, cayenne pepper, garlic powder, salt, and black pepper over the chickpeas. Stir the chickpeas well so they soak in the spices. I cook them for about 5-7 minutes, stirring often. This gives them a warm, crispy texture. While the chickpeas cook, I warm the tortillas. I either use a separate skillet or a microwave. I want them soft and easy to fold. This step is key for tasty tacos. When the chickpeas are ready, they should smell amazing and be slightly crispy. I check the seasoning and adjust if needed. Now it’s time to build the tacos! I take each tortilla and place a spoonful of the spicy chickpea mix in the center. Next, I add sliced avocado for creaminess. Then, I layer on shredded red cabbage for a nice crunch. Finally, I sprinkle fresh cilantro on top for brightness. I serve lime wedges on the side. A squeeze of lime adds a zesty finish. If you like heat, offer hot sauce for an extra kick. For the full recipe, check out the Zesty Spicy Chickpea Tacos section. To save time, use canned chickpeas. Rinse them well to remove the canning liquid. This step helps reduce sodium and enhances flavor. If you prefer dried chickpeas, soak them overnight. Cook them until tender, which takes about one hour. Soaking and cooking dried chickpeas takes longer but adds a nice touch. Warm your tortillas before using them. You can do this in a skillet or microwave. Heat them for about 20 seconds on each side in the skillet. This makes them soft and easy to fold. If you’re using corn tortillas, consider warming them until slightly charred for extra flavor. Add more spices to give your tacos a unique twist. Try chili powder or coriander for warmth. Fresh herbs like mint or parsley can add a refreshing note. You can also mix in some sautéed onions or bell peppers for more texture. Don’t forget, a squeeze of lime brightens everything up! For the complete process, check the Full Recipe. {{image_4}} If you want a different base, try black beans or lentils. Both are great sources of protein. They soak up flavors well and add a nice twist. You can add them in the same way as chickpeas. Just cook them until warm and mix in your spices. Taco toppings can change the whole dish. Try adding fresh tomatoes for sweetness or jalapeños for extra heat. You can use shredded carrots for crunch or corn for sweetness. Adding cheese or a dollop of sour cream can also make it richer. Each topping adds a new layer of flavor and texture. Adjusting the spice level is easy. If you like it mild, cut back on the cayenne pepper. You can also try using sweet paprika instead of smoked. For a spicy kick, add more cayenne or even some diced fresh chilies. Taste as you go to find your perfect heat level. For the full recipe and details, check out the [Full Recipe]. To keep your tacos fresh, store them in an airtight container. Place the chickpea mix and toppings separate from the tortillas. This way, the tortillas stay soft and do not get soggy. You can store them in the fridge for up to three days. When you want to enjoy the leftovers, reheat the chickpea mixture in a skillet over medium heat. Stir it for about five minutes until it's hot. Warm the tortillas quickly in the microwave for about 30 seconds. This keeps them soft and easy to fold. If you want to save the chickpea mix for later, freezing is a great option. Let the mixture cool down first. Then, place it in a freezer-safe bag or container. It will keep well for up to three months. When you’re ready to eat, thaw it in the fridge overnight and reheat as mentioned earlier. For the full recipe, check the details above. Yes, you can use dried chickpeas. Start by soaking them overnight. Rinse and cook them until they are soft. This process takes longer but adds a fresh taste. Canned chickpeas are quicker but less fresh. Both options work well in spicy chickpea tacos. You can serve many sides with spicy chickpea tacos. Here are some great ideas: - Mexican rice for a filling side. - Black beans for extra protein. - A fresh salad with lime dressing. - Grilled corn on the cob for a sweet touch. - Guacamole for creamy goodness. These sides add variety and flavor to your meal. To make these tacos gluten-free, use corn tortillas. They provide a nice texture and flavor. Always check the label to ensure they are gluten-free. You can also add gluten-free toppings like fresh veggies or avocado. Enjoy your tacos without worry! For the full recipe, check out the Zesty Spicy Chickpea Tacos. Spicy chickpea tacos are fun and tasty. This guide covered ingredients, preparation, tips, and variations. You can customize flavors and adjust spice levels. You learned how to store leftovers and make these tacos gluten-free. I hope you feel ready to make your own spicy chickpea tacos at home. Enjoy the cooking process and the delicious outcome!](https://recipesstation.com/wp-content/uploads/2025/05/d1e00700-206d-40b5-ba51-791df2a2ea2e.webp)
Craving a quick dinner that’s packed with flavor? Look no further than Spicy Chickpea Tacos! This simple meal brings together
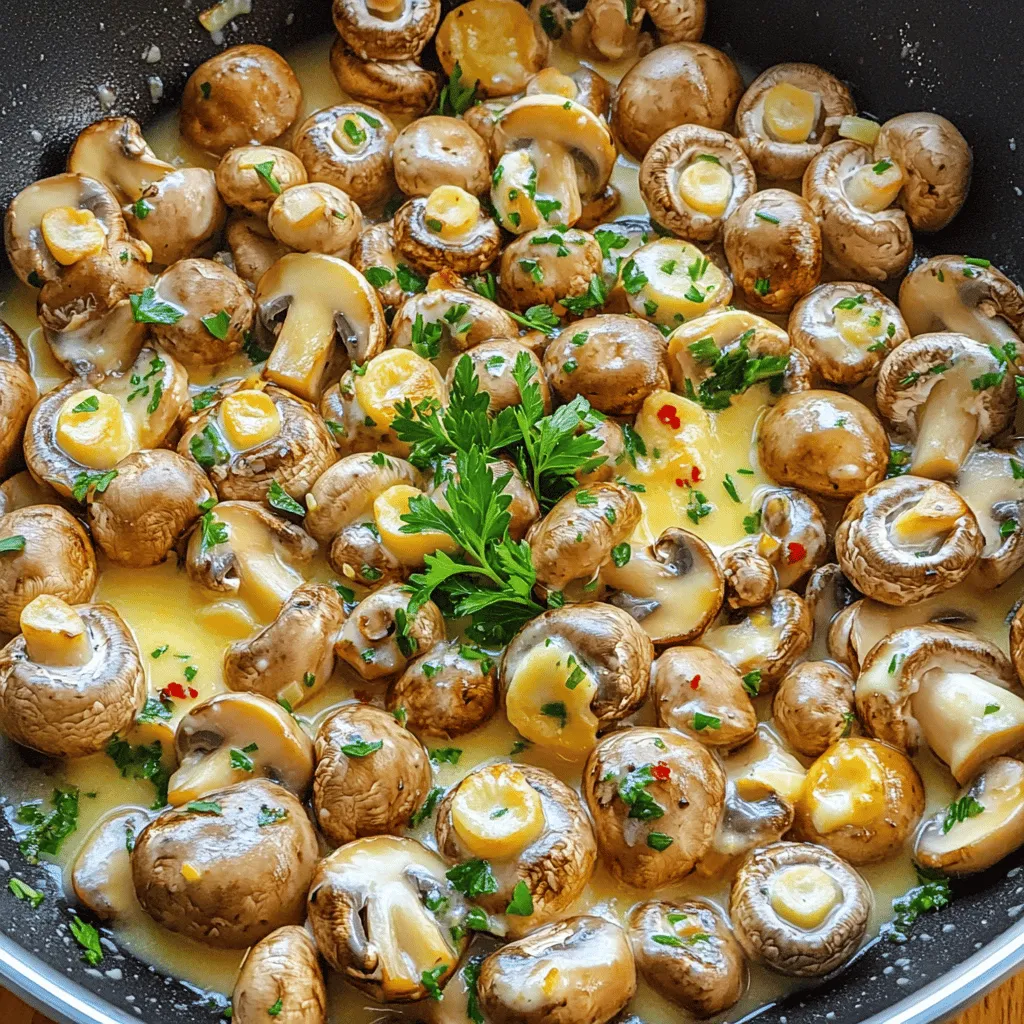
Are you ready for a dish that bursts with flavor? Herbed garlic butter mushrooms are simple to make and oh
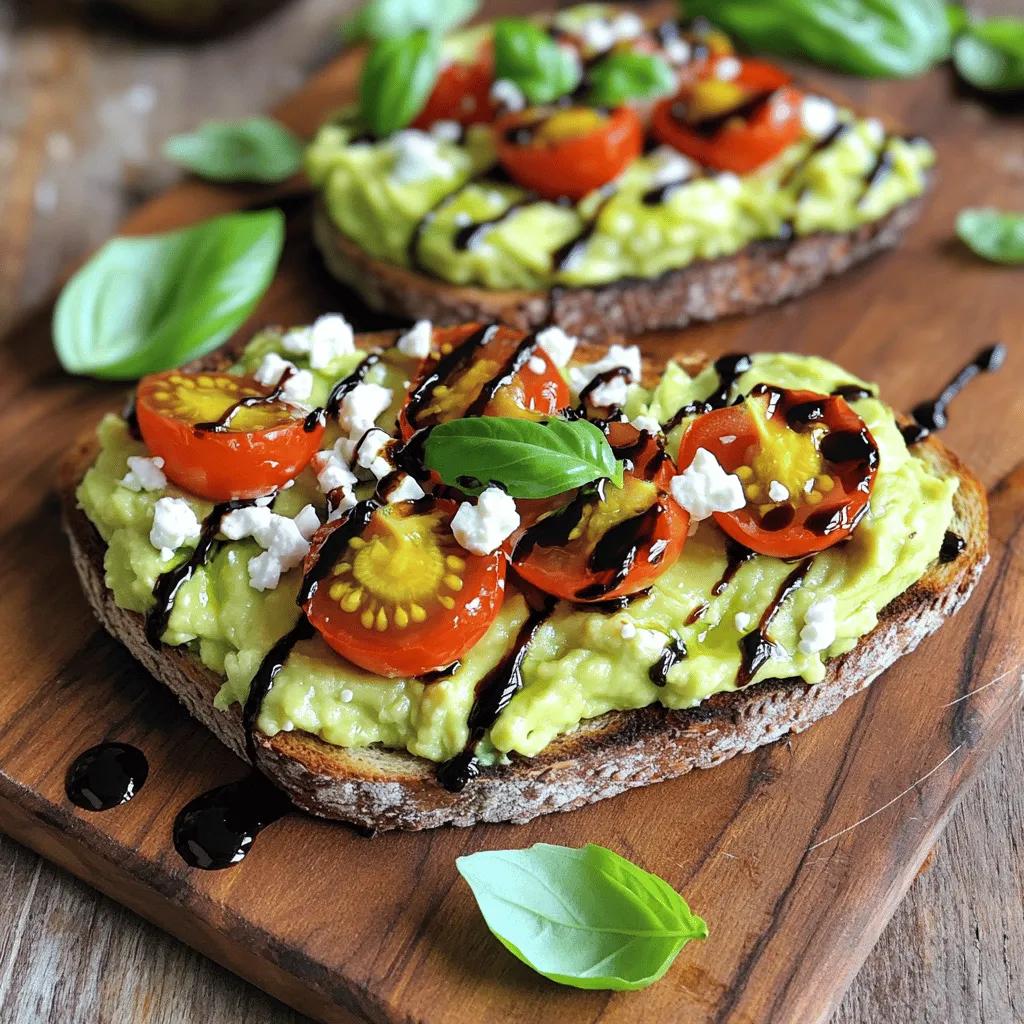
Looking for a quick, tasty meal? My Savory Avocado Toast with Feta and Tomatoes will hit the spot! This dish

Looking for a quick snack that’s both tasty and nutritious? Peanut butter chocolate chip energy bites are your answer! With
