![- 8 oz noodles (rice noodles or egg noodles) - 1 lb boneless, skinless chicken breast, thinly sliced - 2 cups mixed vegetables (bell peppers, carrots, snap peas, etc.) - 3 tablespoons soy sauce (low sodium) - 1 tablespoon oyster sauce - 1 tablespoon hoisin sauce - 1 teaspoon sesame oil - 2 green onions, thinly sliced - Toasted sesame seeds - Bring a large pot of salted water to a boil. - Add the noodles and cook until al dente, following package instructions. - Drain the noodles and toss them with a little oil to keep them from sticking. - Heat vegetable oil in a large skillet over medium-high heat. - Add thinly sliced chicken to the skillet and stir-fry until cooked through. - Once done, remove the chicken from the skillet and set it aside. - In the same skillet, add mixed vegetables, minced garlic, and grated ginger. - Stir-fry the mixture until the vegetables are tender but still crisp. - Be sure to stir constantly to avoid burning the garlic. - Return the cooked chicken to the skillet with the vegetables. - Add the drained noodles into the pan, mixing all components together. - Drizzle in soy sauce, oyster sauce, hoisin sauce, and sesame oil. - Toss everything together until the noodles and chicken are well coated. - Heat the stir-fry for about 2 minutes to warm through. - Gently fold in the sliced green onions for added flavor and crunch. - Serve the stir-fry noodles on plates or in bowls. - Top with toasted sesame seeds for a nice finish. Enjoy this recipe for a quick and tasty meal! For the full recipe, check [Full Recipe]. When choosing noodles, you can pick between rice noodles and egg noodles. Rice noodles are light and soak up sauce well. They are perfect for a gluten-free option. Egg noodles add a nice chew and richness. They hold up well in stir-fries. *Cooking tips for different types:* - Rice Noodles: Soak in hot water for 10 minutes. Drain and rinse before use. - Egg Noodles: Boil for 3-5 minutes until al dente. Drain and toss with oil. Stir-frying is all about high heat. Use a wok or large skillet for best results. Preheat the pan until it's hot. This helps cook the chicken quickly. It also gives the veggies a nice crunch. *Avoiding overcooking vegetables:* - Cook vegetables for only 3-4 minutes. They should stay crisp and colorful. Stir constantly to prevent burning. Spices and herbs can really boost flavor. Consider adding garlic, ginger, or a pinch of chili flakes. Each adds a unique taste. *Balancing sweetness and saltiness:* - Use soy sauce for saltiness. - Hoisin sauce brings sweetness. - Taste as you go to find the right mix. Try these tips to elevate your 15-Minute Chicken Stir Fry Noodles. For more details, check the Full Recipe. {{image_4}} You can change the protein in this dish easily. Shrimp or tofu work great. Shrimp cooks fast and adds a nice flavor. Tofu gives a hearty texture and absorbs sauces well. Just cut the tofu into cubes and stir-fry it like chicken. If you want beef, thinly slice flank steak. Cook it for a few minutes until brown. Each protein adds its own unique taste. Mix up the veggies to fit the season. Try broccoli, zucchini, or snap peas for crunch. Seasonal veggies taste fresh and vibrant. You can also add leafy greens like spinach or bok choy. Just toss them in at the end. They will wilt slightly but still stay green and tasty. For gluten-free needs, use rice noodles instead of egg noodles. They cook fast and taste great. Check the sauce labels too. Some soy sauces contain gluten. Look for gluten-free soy sauce or tamari. This way, everyone can enjoy your 15-Minute Chicken Stir Fry Noodles Delight without worry. For gluten-free needs, make sure to check ingredients in the [Full Recipe]. Store your chicken stir fry noodles in an airtight container. Make sure to let them cool before sealing. These noodles stay fresh in the fridge for up to three days. After that, they may lose flavor and texture. The best way to reheat is in a skillet over medium heat. Add a splash of water or broth to help steam the noodles. This keeps them moist and tasty. Avoid using the microwave, as it can make the noodles soggy. You can freeze the chicken stir fry noodles for up to three months. Use freezer-safe bags or containers for storage. When ready to eat, thaw them overnight in the fridge. Then, reheat in a skillet, adding a bit of water to keep them from drying out. Yes, you can easily make this dish vegetarian. Just swap the chicken with plant-based options like tofu or tempeh. Both options hold flavor well and cook nicely in the stir fry. Simply cut them into bite-sized pieces and follow the same cooking steps for chicken. You can also use seitan or chickpeas for added protein. This gives you a filling meal while keeping it meat-free. If you want to add heat, there are several simple ways. You can add sliced fresh chilies or a pinch of red pepper flakes while you cook. Another option is to drizzle some chili oil over the dish just before serving. Sriracha sauce is also a popular choice. Mix it in with the sauces for a spicy kick. Adjust the level of heat to your taste. This stir fry pairs well with a few simple side dishes. Steamed rice is a classic choice, balancing the flavors of the noodles. You could also serve a fresh cucumber salad for a crunchy contrast. For a heartier option, try some egg rolls or spring rolls. These add a nice crunch and complement the stir fry well. In this post, we explored how to make a tasty stir-fry dish. We covered main ingredients like chicken, noodles, and mixed veggies, along with flavorful sauces. You learned the step-by-step process for cooking and mixing the components. Additionally, I shared tips on selecting the right noodles and how to enhance flavors. Remember, you can adapt this recipe with different proteins or vegetables. Enjoy your cooking and have fun experimenting with flavor combinations!](https://recipesstation.com/wp-content/uploads/2025/05/1b7f4fc1-2d79-49ae-9e8b-eda5e74de49f.webp)
Savory 15-Minute Chicken Stir Fry Noodles Delight
Are you craving a quick and tasty meal? My Savory 15-Minute Chicken Stir Fry Noodles are the answer! This recipe
Are you craving a quick and tasty meal? My Savory 15-Minute Chicken Stir Fry Noodles are the answer! This recipe
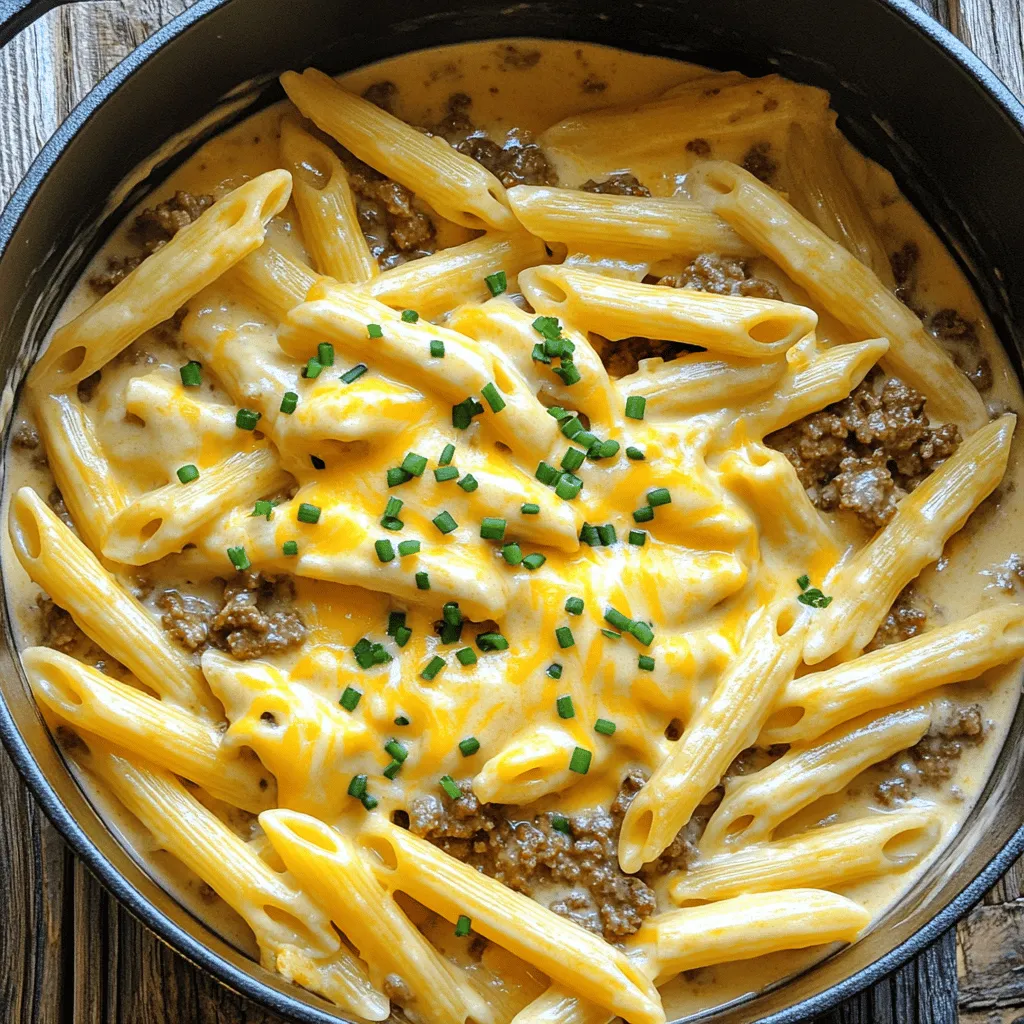
Looking for a quick, delicious meal that requires just one pot? You’re in the right place! My One-Pot Beef and
![To make these yummy chocolate chip mint Greek yogurt pops, you need: - 2 cups plain Greek yogurt - 1/2 cup honey or maple syrup (your choice) - 1 teaspoon pure peppermint extract - 1/4 teaspoon vanilla extract - 1/2 cup mini chocolate chips These simple ingredients create a creamy and refreshing treat. The Greek yogurt gives it a nice base. Honey or maple syrup adds sweetness. The peppermint extract brings a cool flavor, and the chocolate chips give a sweet crunch in every bite. You can add a few garnishes to make your pops even better. Fresh mint leaves look great on top. They add a bright green color and a fresh hint of mint. You can also drizzle a little chocolate sauce over the pops before serving. This makes them look fancy and taste even more delicious. If you have dietary needs, you can swap some ingredients. For a dairy-free option, use coconut yogurt instead of Greek yogurt. If you need a sugar-free treat, try using a sugar substitute like stevia. This keeps the sweetness without the extra sugar. Always check the labels to ensure they fit your needs. For those who dislike mint, you can skip the peppermint extract and use other flavors like vanilla or almond. This way, everyone can enjoy these tasty pops! Start by grabbing a medium bowl. Add 2 cups of plain Greek yogurt to it. Next, pour in 1/2 cup of honey or maple syrup. I like honey for its rich flavor, but maple syrup works too! Then, add 1 teaspoon of pure peppermint extract. This gives the pops their minty kick. Finally, stir in 1/4 teaspoon of vanilla extract for a nice balance. Use a whisk or spatula to mix until smooth and creamy. Now, it’s time to fold in the mini chocolate chips. Use 1/2 cup of these tiny treats. Gently mix them into the yogurt blend. Make sure they spread evenly for that chocolatey goodness in every bite. Next, take your popsicle molds. Carefully pour the yogurt mixture into each mold, filling them about three-quarters full. Leave space for the pops to expand. Then, place popsicle sticks into the molds, making sure they stay centered. Tap the molds lightly on the counter to remove any air bubbles. Transfer the molds to the freezer. Let them freeze for at least 4 hours or until solid. This step is key! To release the pops, run warm water over the outside of the molds for a few seconds. This helps loosen them. Pull gently on the sticks to slide the pops out easily. If you want, you can add fresh mint leaves on top for garnish. This adds color and flavor! Enjoy your homemade chocolate chip mint Greek yogurt pops. For the complete recipe, check [Full Recipe]. To get a creamy texture in your pops, start with good yogurt. I use plain Greek yogurt for the best results. Make sure it's fresh and not too watery. Mixing honey or maple syrup adds sweetness and keeps it smooth. Use a whisk to blend everything well. This step helps make your yogurt mixture light and fluffy. To stop the pops from sticking, fill your molds only three-quarters full. This gives the mixture room to expand. After pouring, gently tap the molds on the counter. This step removes air bubbles. If you still have trouble, run warm water over the outside of the molds before pulling the pops out. This quick fix helps loosen them. Choose molds that are easy to fill and clean. Silicone molds work well because they are flexible. For easy removal, look for molds with a built-in stick holder. Always remember to center the sticks before freezing. This keeps them straight and makes for a better presentation when you serve your pops. Follow all these tips for the best results with your Chocolate Chip Mint Greek Yogurt Pops. For the full recipe, check the previous section. {{image_4}} You can mix up the flavors in your pops. Try using different extracts. Almond or orange can add a fun twist. You can also switch the chocolate chips for peanut butter chips. This makes a yummy treat too! Experiment with your favorites to find the best combo. Adding fruit can bring a fresh taste to your pops. Try using mashed bananas or pureed strawberries. You can also fold in chopped nuts like walnuts or almonds. This gives your pops a nice crunch and extra flavor. Just make sure the pieces are small so they mix well. If you want a vegan option, swap the Greek yogurt for coconut yogurt. Use maple syrup instead of honey to keep it vegan. You can also find dairy-free chocolate chips to make it all plant-based. This way, everyone can enjoy a refreshing treat! For the full recipe, check out the Chocolate Chip Mint Greek Yogurt Pops. Store your chocolate chip mint Greek yogurt pops in the freezer. Keep them in an airtight container or a freezer bag. This will help prevent freezer burn. If you use a bag, seal it tightly to lock out air. Label the container with the date. This way, you know when you made them. To freeze your pops correctly, ensure they are fully solid. It takes about four hours. If you want to keep them longer, wrap each pop in plastic wrap. This adds extra protection and keeps them fresh. Place them back in the container or bag after wrapping. This helps maintain their lovely flavor and texture. These pops can last up to two months in the freezer. After that, they may start to lose taste. Check for any ice crystals or changes in texture. If they feel grainy or icy, it’s best to toss them. Always remember, for the best taste, enjoy them within the first month. Yes, you can use other sweeteners. Agave syrup or stevia works well too. Just remember that the flavor may change slightly. Adjust the amount to your taste. If you prefer less sweetness, start with less. You can always add more later. You need to freeze the pops for at least 4 hours. This time helps them become solid and enjoyable. I recommend leaving them in longer if you want them extra firm. If you are in a hurry, check them after about 3 hours. They should be solid enough to enjoy. Yes, you can add fresh mint leaves to the mixture. Just chop them finely before mixing in. This will give your pops a great minty flavor. But be careful not to add too many. Too much mint can make the flavor too strong. If you want a light taste, use just a few leaves. For detailed steps, check out the Full Recipe. You can make tasty Chocolate Chip Mint Greek Yogurt Pops with simple steps. We covered ingredients, mixing, and freezing techniques. I shared tips to keep your pops creamy and easy to remove from molds. You can explore different flavors or add fruits and nuts. Proper storage helps maintain their quality. Enjoy creating these refreshing treats! They are simple, healthy, and perfect for warm days.](https://recipesstation.com/wp-content/uploads/2025/05/fad0485a-f430-4b00-86a6-7d7106a29d8e.webp)
If you’re searching for a cool treat that’s both tasty and healthy, you’ve found it! These Chocolate Chip Mint Greek

If you crave a tasty snack that’s simple to make, you’ve found it! Garlic Chicken Puffs are packed with flavor

Are you ready for a meal that’s both easy and tasty? My Chicken Caesar Wrap is perfect for lunch or

If you crave a warm, hearty meal, you’re in for a treat! My Creamy Parmesan Sausage Ditalini Soup offers rich

If you want a dip that packs a punch, you’re in the right place! My Meaty Texas Trash Dip is

Are you craving a warm bowl of Thai noodle soup? This easy recipe brings comfort and flavor to your table

Ready to savor a delicious meal without the fuss? My One Pot Chicken and Dirty Rice is your answer! This
![For a rich and flavorful Indian pumpkin curry, you need some key ingredients. Here is what you will need: - 2 cups pumpkin, peeled and cubed - 1 cup canned coconut milk - 1 medium onion, finely chopped - 2 cloves garlic, minced - 1 tablespoon fresh ginger, grated - 1 ripe tomato, chopped - 1 teaspoon mustard seeds - 1 teaspoon cumin seeds - 1 teaspoon turmeric powder - 1 teaspoon garam masala - 1 teaspoon red chili powder (adjust based on your spice preference) - Salt to taste - 2 tablespoons vegetable oil - Fresh cilantro for garnish - 1 cup fresh spinach (optional) - 1 cup vegetable broth or water Each of these ingredients plays a vital role in building the dish's flavor. Pumpkin is the star of the show. It adds sweetness and creaminess. Coconut milk gives the curry a velvety texture, balancing the spices. Onion, garlic, and ginger create a delicious base. Their flavors blend well when sautéed together. The spices are essential too. Mustard seeds and cumin seeds add depth. Turmeric brings warmth and a golden color. Garam masala adds complexity, while red chili powder gives a kick. Adjust it to fit your taste. You can also add fresh spinach for a pop of color and nutrition. Cilantro makes a fresh garnish, brightening the dish. If you need more liquid, use vegetable broth or water to help cook the pumpkin. For the full recipe and cooking instructions, check out the [Full Recipe]. This curry is easy, tasty, and sure to please! First, grab a large pot and heat the vegetable oil over medium heat. Once the oil is hot, add the mustard seeds and cumin seeds. Listen for a crackling sound; this means the spices are toasting. Let them toast for about 30 seconds. This step brings out their flavors. Next, add the finely chopped onion, minced garlic, and grated ginger. Sauté them together for about 5 minutes. You want the onion to turn soft and translucent. This mix is the heart of your curry. Now, it’s time to add the chopped tomato to your pot. Stir well and let it cook for 3-4 minutes. The tomato should become soft and blend into the onion mixture. This step adds a nice tanginess. Sprinkle in the turmeric powder, garam masala, and red chili powder. Don’t forget the salt. Stir continuously for about a minute. This allows the spices to toast and deepen their flavors. Your kitchen will start to smell amazing! Gently fold the cubed pumpkin into the spiced mixture. Make sure each piece is coated with the spices. This ensures that every bite is full of flavor. Next, pour in the canned coconut milk and vegetable broth or water. Stir everything to combine. Bring the mixture to a gentle boil. This step helps to meld all the flavors together. Lower the heat to low and cover the pot. Let the curry simmer for about 20-25 minutes. Stir occasionally to prevent sticking. The pumpkin should become tender during this time. If you want to add spinach, do it in the last 5 minutes of cooking. After simmering, taste the curry. Adjust the seasoning with more salt if needed. For a creamier texture, use a potato masher to mash some pumpkin cubes. Keep others intact for a mix of textures. Before serving, garnish your curry with fresh cilantro. This adds a pop of color and freshness. Your Indian Pumpkin Curry is now ready to enjoy! Check out the [Full Recipe] for more details. To make the best Indian pumpkin curry, start by choosing the right pumpkin. I love using sugar pumpkins or kabocha for their sweet taste. They blend well with spices and give a rich flavor. Next, adjust the spice levels to fit your taste. If you like heat, add more red chili powder. For a milder dish, use less. Always taste as you go to find your perfect flavor. For a creamier curry, mash some pumpkin pieces with a potato masher. This gives the curry a nice thickness. You can keep some cubes whole for texture. If you want to boost nutrition, add fresh spinach during the last few minutes of cooking. It wilts nicely and adds color and vitamins. Serving is key to enjoying your dish. I recommend using deep bowls for the curry. Pair it with fluffy basmati rice or warm naan. This helps soak up the sauce. For a beautiful touch, garnish with fresh cilantro. A sprinkle of red chili flakes adds both color and a hint of spice. This makes your dish look as good as it tastes. For the full recipe, check out the Spiced Pumpkin Delight Curry. {{image_4}} You can easily make this Indian pumpkin curry vegan. Just ensure you use completely plant-based ingredients. For instance, use vegetable broth instead of chicken broth. This keeps the dish rich and creamy. To add extra variety, toss in other vegetables. Sweet potatoes, carrots, or bell peppers work well. They mix nicely with the pumpkin and spices. This not only boosts flavor but also adds color and nutrients. Spice blends can change the flavor of your curry. You can alter spices for regional flavor variations. For a milder taste, use less red chili powder. If you prefer a bolder flavor, add more garam masala. You can also use store-bought curry blends. They save time and provide great flavor. Look for blends that include turmeric, cumin, and coriander. These spices are key to a delicious curry. Pair your curry with different sides or condiments. Steamed basmati rice is a classic choice. Warm naan is also great for scooping up the curry. If you have leftover curry, get creative! Use it as a filling for wraps. You can also serve it over quinoa for a twist. The flavors stay rich and satisfying, making each meal unique. For the full recipe, check out the Spiced Pumpkin Delight Curry. To store your Indian pumpkin curry, let it cool first. Once cool, place it in an airtight container. This keeps it fresh in the fridge for up to three days. For longer storage, consider freezing it. Use freezer-safe bags or containers. Make sure to label them with the date. The curry can last in the freezer for about three months. When you’re ready to enjoy it again, just thaw it in the fridge overnight. Reheating your curry can be easy and tasty. The best way to reheat it is on the stove. Pour the curry into a pot and heat it over low to medium heat. Stir often to avoid sticking. If it seems too thick, add a splash of water or coconut milk. For a fresh touch, add some chopped cilantro or a squeeze of lime juice while reheating. This little boost can brighten the flavors and make it feel fresh again. You can find the full recipe for this delightful dish [Full Recipe]. Indian pumpkin curry lasts about 3 to 5 days in the fridge. Store it in an airtight container to keep it fresh. Always let it cool before putting it away. When reheating, heat it until hot, stirring well. Yes, fresh pumpkin is great! It gives the curry a bright flavor and better texture. Fresh pumpkin can taste sweeter and more vibrant than canned. Just peel, seed, and cube it before adding. It may take a little longer to cook, but it’s worth it. If you need a substitute for coconut milk, try almond milk or cashew cream for a non-dairy option. Regular milk can work too, but it will change the flavor. You can mix in some nut butter for richness. Each option provides a different taste, so choose what you like. The spice level can be adjusted. The red chili powder adds heat, but you can reduce it for a milder dish. If you want more spice, add more chili powder or fresh chilis. Taste the curry as you go, and make it just right for you. Indian Pumpkin Curry is a flavorful dish made with simple ingredients. We explored the essential components like pumpkin, spices, and coconut milk. I shared step-by-step instructions to build layers of flavor and enhance texture. You also learned tips for perfecting the taste, trying variations, and storing leftovers properly. In conclusion, making this curry is about balancing flavors and enjoying the process. Adjust the recipe to suit your taste, and serve it proudly!](https://recipesstation.com/wp-content/uploads/2025/04/521e2182-9c79-40c6-98a4-fb55748c18b7.webp)
Looking to spice up your dinner routine? This Indian Pumpkin Curry recipe is your answer! It’s simple, flavorful, and can
