Skip to content
DisclaimerTerms Of UseGDPR PolicyCookie Policy

recipesstation

  • Home
  • Drinks
  • Appetizers
  • Dinner
  • Dessert
  • About
  • Contact
  • Privacy Policy
DisclaimerTerms Of UseGDPR PolicyCookie Policy

Emily

- 1 pound ground chicken - 1 cup puff pastry, thawed - 4 cloves garlic, minced - 1 small onion, finely chopped - 1/2 cup ricotta cheese - 1/4 cup grated Parmesan cheese - 1 teaspoon Italian seasoning - 2 tablespoons fresh parsley, finely chopped - Salt and pepper to taste Garlic chicken puffs start with simple yet flavorful ingredients. Ground chicken serves as the main protein. It cooks up tender and juicy, making it perfect for these puffs. Puff pastry adds a delightful crunch. You can buy it frozen. Just thaw before using. Garlic and onion bring depth to the dish. Minced garlic adds a strong flavor, while onion gives sweetness. Together, they create a tasty base for your filling. For the cheese, I love using ricotta. It adds creaminess and richness. The grated Parmesan brings a savory kick. Mixing these cheeses with the chicken makes the filling irresistible. Seasoning is key. I use Italian seasoning for a burst of flavor. Fresh parsley adds a bright touch. Don’t forget to season with salt and pepper to elevate the taste. You can find the full recipe to guide you through making these delicious snacks. - Preheat the oven: Start by heating your oven to 400°F (200°C). Line a baking sheet with parchment paper or lightly coat it with cooking spray to prevent sticking. - Cook chicken with garlic and onion: In a medium skillet, add a drizzle of olive oil over medium heat. Add minced garlic and chopped onion. Cook them until the onion is soft and smells sweet, about 3-4 minutes. Then, add the ground chicken. Cook it until there’s no pink left, breaking it apart with a spoon. Season with salt, pepper, and Italian seasoning. After it cooks, take it off the heat and let it cool for a few minutes. - Mix chicken with cheeses and parsley: In a large bowl, combine the cooled chicken mix with ricotta cheese, grated Parmesan cheese, and chopped parsley. Stir well until everything blends nicely. - Prepare and fill puff pastry: On a floured surface, roll out the thawed puff pastry. Use a knife to cut it into squares about 4x4 inches. Place a generous spoonful of the chicken filling in the center of each square. - Seal and bake the puffs: Fold each square to form a triangle. Press the edges to seal. Crimp the edges with a fork for a nice finish. Brush the tops with beaten egg for a golden color. Arrange the puffs on the baking sheet, leaving space between them. Bake for 15-20 minutes, or until they turn golden brown and puffed. These garlic chicken puffs are a delight to make and eat! For the full recipe, check out the section above. Enjoy your cooking! - Avoid overfilling the puffs: Use just enough filling. If you add too much, they may burst while baking. Aim for a tablespoon of filling for each puff. - Best practices for sealing: First, press the edges of the pastry to remove any air. Then, crimp the edges with a fork. This keeps the filling inside and makes a nice design. - Suggested seasoning additions: Try adding a pinch of smoked paprika or cayenne pepper. This gives the puffs a nice kick. Fresh herbs like thyme or basil also add great flavor. - Pairing sauces for serving: Serve your puffs with marinara sauce or garlic aioli. Both sauces enhance the garlic flavor and add moisture. - Plating suggestions: Stack the garlic chicken puffs on a bright plate. This makes them stand out. You can also arrange them in a circle for a fun look. - Garnishing with herbs: Sprinkle fresh parsley or chives on top. This adds color and freshness. It makes your dish look even more appetizing. {{image_4}} You can easily swap proteins in this recipe. Ground turkey works well if you want a leaner option. For a plant-based choice, try crumbled tofu or tempeh. Both alternatives keep the meal light but still tasty. You can add your favorite spices to enhance the flavor. Want to spice things up? Add diced jalapeños or red pepper flakes to make spicy chicken puffs. This will give your puffs a warm kick. For a different twist, try a Mediterranean flair. Mix in herbs like dill or mint, and add feta cheese for a rich taste. These options keep the dish fresh and exciting! While puff pastry is classic, phyllo dough adds a nice crunch. Just layer it well, and you’ll create a beautiful texture. If you need gluten-free options, look for gluten-free puff pastry. This way, everyone can enjoy the treat! You can find these options in most grocery stores now. After you enjoy your garlic chicken puffs, you may have some left. Store them in an airtight container in the fridge. They stay fresh for about three days. You can also freeze them for later. To freeze, place the puffs on a baking sheet first. Freeze them for one hour, then put them in a freezer bag. This way, they won't stick together. To enjoy your puffs again, reheating is key. Preheat your oven to 350°F (175°C). Place the puffs on a baking sheet. Heat them for about 10-15 minutes. This keeps them crispy. You can also use an air fryer. Set the air fryer to 350°F and reheat for about 5 minutes. This method helps keep the puffs nice and crunchy. In the fridge, garlic chicken puffs last for about three days. After that, they may spoil. Signs of spoilage include a sour smell, strange texture, or discoloration. If you see any of these, it’s best to throw them away. Always check your food before eating to stay safe. To make Garlic Chicken Puffs, gather these ingredients: - 1 pound ground chicken - 1 cup puff pastry, thawed - 4 cloves garlic, minced - 1 small onion, finely chopped - 1/2 cup ricotta cheese - 1/4 cup grated Parmesan cheese - 1 egg, beaten (for egg wash) - 2 tablespoons fresh parsley, finely chopped - 1 teaspoon Italian seasoning - Salt and pepper to taste - Cooking spray or parchment paper for baking Start by preheating your oven to 400°F (200°C). In a skillet, heat oil and cook minced garlic and onion until soft. Then, add the ground chicken and cook until no longer pink. Mix in salt, pepper, and Italian seasoning. Once cooked, let the mixture cool. In a bowl, combine this with ricotta, Parmesan, and parsley. Roll out your puff pastry into 4x4 inch squares. Fill each square with the chicken mixture, fold, seal, and crimp the edges. Brush with egg wash and bake for 15-20 minutes until golden. For the full recipe, check out the details above. Yes, you can freeze Garlic Chicken Puffs before baking. Start by preparing the puffs as usual. After sealing them, place them on a baking sheet in a single layer. Freeze them for about 1-2 hours until firm. Once frozen, transfer them to a freezer bag or container. When you want to bake them, preheat your oven. You can bake them straight from the freezer, but add about 5-10 minutes to the baking time. They will taste fresh and delicious! Garlic Chicken Puffs taste great with various dipping sauces. Here are some suggestions: - Marinara sauce for a classic Italian touch - Ranch dressing for a creamy, zesty flavor - Sweet chili sauce for a hint of sweetness - Garlic aioli for extra garlic flavor These sauces enhance the dish and keep your guests coming back for more! This blog post covered how to make delicious Garlic Chicken Puffs. We discussed key ingredients like chicken, puff pastry, and the perfect cheeses. You learned how to prepare the filling and seal the pastry for baking. I offered tips for enhancing flavors and unique variations to suit your taste. Lastly, you received advice on storage and reheating. I hope you feel confident to try this recipe. Enjoy making your own tasty Garlic Chicken Puffs!

Garlic Chicken Puffs Flavorful and Easy Snack Recipe

If you crave a tasty snack that’s simple to make, you’ve found it! Garlic Chicken Puffs are packed with flavor

To make a tasty Chicken Caesar Wrap, gather these key items: - 2 cups cooked chicken breast, shredded - 4 large whole wheat tortillas - 1 cup romaine lettuce, chopped - ½ cup cherry tomatoes, halved - ½ cup grated Parmesan cheese - ¼ cup Caesar dressing (can be homemade or store-bought) - ½ teaspoon garlic powder - ½ teaspoon black pepper - 1 tablespoon olive oil - Fresh parsley, chopped (for garnishing) These ingredients create a balance of protein, fresh veggies, and creamy sauce. The chicken provides the main flavor, while the lettuce adds crunch. If you lack some ingredients, here are alternatives to use: - Use grilled turkey or tofu instead of chicken. - Swap whole wheat tortillas for spinach or corn tortillas. - Replace romaine with kale or mixed greens. - Use feta cheese instead of Parmesan for a different taste. - Opt for ranch dressing if you prefer a different flavor. Feel free to mix these substitutes based on what you have at home. Each change can give your wrap a new twist. To elevate your wrap, consider these garnishes: - Add sliced avocados for creaminess. - Sprinkle crushed red pepper for heat. - Top with extra grated cheese for richness. - Include fresh herbs like basil or cilantro for a fragrant touch. These garnishes can enhance flavor and make your wrap look appealing. For the full recipe, check the details provided earlier. Enjoy your cooking! Start by shredding your cooked chicken breast. In a medium bowl, mix the chicken with garlic powder, black pepper, and Caesar dressing. Stir until the chicken is coated well. This mix makes the wrap tasty and rich. You can add more dressing if you like it creamier. If you want, try using grilled chicken for extra flavor. Grab a warmed tortilla and lay it flat on a clean surface. Place a good amount of the chicken mixture in the center. Next, add the fresh filling of romaine lettuce, halved cherry tomatoes, and Parmesan cheese on top. Be sure to spread it evenly. This mix of flavors makes each bite exciting. Finally, roll the tortilla tightly, folding in the sides as you go. This keeps all the tasty filling inside. To warm the tortillas, heat a non-stick skillet over medium heat. Add a drizzle of olive oil to the skillet. Once it’s warm, add one tortilla. Heat it for about 30 seconds on each side. It should be soft and easy to bend. Remove it from the skillet and repeat with the other tortillas. Warming makes them more flexible and easier to wrap. To make a great Chicken Caesar Wrap, start with warm tortillas. Warm tortillas are easier to roll and less likely to tear. Use fresh ingredients for the best taste. Chop your lettuce and tomatoes just before using them. This keeps everything crisp. Don’t overfill your wrap. A little filling goes a long way. This helps you roll it tight and neat. If you have leftover wraps, wrap them in foil or plastic wrap. Keep them in the fridge for up to three days. To keep the lettuce fresh, store it separately. You can add it right before eating. If you want to reheat your wrap, use a skillet. Heat it on low for a few minutes until warm. For a quick meal, pair your wrap with a side of fruit. Sliced apples or grapes work well. You can also serve it with chips for crunch. Another fun idea is to serve it with extra Caesar dressing for dipping. This adds a nice touch to each bite. For a hearty meal, add a bowl of soup. A light tomato or minestrone soup goes great with it. {{image_4}} If you want a vegetarian wrap, swap chicken for chickpeas or grilled veggies. Both options add protein and flavor. For a vegan twist, use a plant-based Caesar dressing. This keeps the taste while making it meat-free. You can also use tofu for a nice protein boost. Just marinate and grill it for the best taste. While Caesar dressing is classic, you can try other sauces too. Ranch dressing gives a creamy twist. A yogurt-based sauce can also lighten the dish. If you love heat, add a spicy sauce or sriracha. Each sauce brings a new flavor to your wrap. Feel free to mix and match to find your favorite. Adding extra ingredients can make your wrap pop. Try tossing in sliced olives or avocado for creaminess. You can also add crispy bacon bits for a smoky flavor. Fresh herbs like basil or cilantro can brighten the dish. For a crunch, add nuts or seeds. Each add-in adds a different layer of taste and texture to your Chicken Caesar Wrap. For the full recipe, you can check out Zesty Chicken Caesar Wrap 🥗. To keep your Chicken Caesar Wrap fresh, store it in an airtight container. This helps prevent air from drying it out. If you have leftovers, you can wrap them tightly in plastic wrap. This method also works well for individual wraps. Always make sure to keep the dressing separate until you are ready to eat. This keeps the wrap from getting soggy. When stored properly, the Chicken Caesar Wrap lasts about 3 to 4 days in the fridge. If you notice any unusual smell or texture, it’s best to toss it. To enjoy the wrap at its best, eat it within the first two days. This way, you will savor the fresh flavors and textures. You can freeze Chicken Caesar Wraps if you want to keep them for longer. Wrap each one in plastic wrap, then place them in a freezer bag. Be sure to remove as much air as possible before sealing. They can last up to 2 months in the freezer. When you’re ready to eat, thaw them overnight in the fridge. Reheat in a skillet for a few minutes or enjoy them cold. A Chicken Caesar Wrap is tasty and can be healthy too. Each wrap gives you protein, fiber, and vitamins. Here’s a quick look at what you get: - Calories: About 350-400, depending on the dressing and tortilla. - Protein: Roughly 30 grams from the chicken and cheese. - Carbohydrates: Around 30-35 grams, mostly from the tortilla. - Fat: About 10-15 grams, depending on the dressing used. This wrap is a good choice for lunch or dinner. You get energy without too many empty calories. Yes, you can make Chicken Caesar Wrap ahead of time! This is great for meal prep. Just follow these tips: - Prep the filling: Mix the chicken, dressing, and spices. Store it in the fridge. - Keep veggies separate: Store the lettuce and tomatoes in another container. This keeps them fresh. - Assemble before eating: Wrap it just before you enjoy it. This way, the tortilla stays soft and the veggies stay crisp. Pair your Chicken Caesar Wrap with fun sides! Here are some tasty options: - Fresh fruit: Slices of apple or a fruit salad add sweetness. - Veggies and dip: Baby carrots or cucumber sticks with hummus work well. - Chips: Baked tortilla chips or potato chips for crunch. - Soup: A light soup like tomato or vegetable makes a nice combo. These sides enhance the meal and make it more filling. For the full recipe, check out the Zesty Chicken Caesar Wrap. This blog post covered how to make a Chicken Caesar Wrap. We discussed key ingredients, easy steps, and tips for a perfect wrap. I shared tasty variations, storage tips, and common questions. Remember, you can swap ingredients for your taste. Making this wrap can be fun and quick. Enjoy your homemade Chicken Caesar Wrap with friends or family. It's a meal that satisfies both hunger and taste. Now, go ahead and try it! You'll love it.

Savory Chicken Caesar Wrap Easy and Delicious Meal

Are you ready for a meal that’s both easy and tasty? My Chicken Caesar Wrap is perfect for lunch or

To make this tasty soup, gather these key ingredients: - 1 pound Italian sausage (choose mild or spicy according to your taste) - 1 medium onion, finely diced - 2 cloves garlic, minced - 3 medium carrots, peeled and diced - 2 celery stalks, diced - 6 cups chicken broth (preferably low-sodium) - 1 can (14 oz) diced tomatoes, undrained - 1 cup Ditalini pasta - 1 cup heavy cream - 1 cup freshly grated Parmesan cheese - 1 teaspoon dried oregano - 1 teaspoon dried basil - Salt and freshly ground black pepper to taste - Fresh parsley, chopped, for garnish These ingredients create a rich, savory base. The Italian sausage adds depth. The vegetables bring color and sweetness. Ditalini pasta gives it a hearty texture. You can tweak this recipe with some optional ingredients. Here are a few ideas: - Use turkey sausage for a leaner option. - Swap the heavy cream for half-and-half for a lighter soup. - Add spinach or kale for a boost of greens. - Use vegetable broth for a vegetarian twist. These substitutions keep the soup rich and delicious. You can customize it to fit your taste. Season the soup to enhance its flavor. Here are some great ideas: - Add a pinch of red pepper flakes for heat. - Stir in some fresh herbs like thyme or rosemary. - Top each bowl with more grated Parmesan for extra flavor. - Use a drizzle of olive oil before serving. These simple touches elevate the soup. They add layers of flavor and make it visually appealing. Enjoy the process of making this savory delight. For the full recipe, check out the recipe section above. Start by heating a large pot over medium heat. Add 1 pound of Italian sausage. Use a wooden spoon to break it up as it cooks. Stir occasionally for about 5-7 minutes. You want the sausage to be browned and cooked all the way through. If you see extra grease, drain it from the pot. This step gives the soup a great base of flavor. Next, add the diced onion, carrots, and celery to the pot. Stir this mixture for about 5 minutes. The goal is to soften the veggies and make the onion clear. After that, add 2 cloves of minced garlic. Stir it for 1 minute until you smell that wonderful aroma. Be careful not to burn the garlic. Now, pour in 6 cups of chicken broth and add the can of diced tomatoes. Increase the heat to bring everything to a gentle boil. Once the mix is boiling, it's time to add the Ditalini pasta. Add 1 cup along with 1 teaspoon each of dried oregano and dried basil. Reduce the heat to a simmer and cook for about 10-12 minutes. You want the pasta to be al dente, just firm enough to bite into. This pasta adds a fun texture to the soup. Lower the heat once more and stir in 1 cup of heavy cream and 1 cup of freshly grated Parmesan cheese. Mix everything well until the cheese melts and the soup becomes creamy. Season with salt and freshly ground black pepper to taste. Let it simmer for an additional 2-3 minutes to blend all the flavors. When it’s done, serve it hot in bowls. Don't forget to garnish with fresh chopped parsley for a lovely touch. For the full recipe, check the detailed instructions above. To get the best flavor in your creamy Parmesan sausage ditalini soup, start with high-quality Italian sausage. Choosing a mix of mild and spicy sausage gives a great balance. When you brown the sausage, make sure you let it get a nice color. This adds depth to the soup. Use fresh vegetables that are in season for the best taste. Don't skip the garlic; it brings out the flavors. Always taste and adjust the seasoning as you go. A squeeze of lemon before serving can also brighten the dish. One common mistake is overcooking the pasta. Ditalini should be al dente, so watch it closely. If you cook it too long, it can become mushy. Another mistake is not draining excess fat from the sausage. This can make the soup greasy. Also, be careful not to boil the soup after adding the cream. Boiling can cause it to separate and lose its smooth texture. Lastly, don’t forget the fresh parsley for garnish; it adds color and freshness. For this recipe, a large pot or Dutch oven is best. It helps cook everything evenly. A wooden spoon is great for stirring the sausage and vegetables. Use a sharp knife and cutting board for chopping the veggies. A measuring cup for the broth and cream will ensure accuracy. If you like to blend your soup, an immersion blender can help achieve a creamy texture. For a rustic touch, serve in wide bowls with crusty bread on the side. For the full recipe, check out the complete instructions above. {{image_4}} You can make this soup vegetarian or vegan with simple swaps. Instead of sausage, use lentils or mushrooms. Both add texture and flavor. For a vegan version, switch heavy cream with coconut milk or cashew cream. These options keep the soup rich and creamy but without animal products. If you want a different protein, consider ground turkey or chicken. They both work well in this recipe. You can also use plant-based sausages if you prefer. These alternatives give you variety while keeping the soup hearty and filling. To add some heat, include red pepper flakes or a dash of hot sauce. This small change can elevate the soup’s flavor. For a fresh twist, try adding fresh herbs like basil or thyme. They brighten up the dish and add depth. Experimenting with spices and herbs helps you create a unique version of Creamy Parmesan Sausage Ditalini Soup. After enjoying your Creamy Parmesan Sausage Ditalini Soup, let it cool. Place leftovers in an airtight container. This keeps the soup fresh. You can store it in the fridge for up to three days. If you want to keep it longer, freezing is the way to go. When you’re ready to reheat the soup, use the stove for best results. Pour the soup into a pot. Heat it over medium-low heat. Stir often to prevent sticking. This helps keep the creamy texture. You can also use the microwave. Just make sure to cover it loosely. Heat in short bursts, stirring in between. To freeze the soup, first cool it completely. Use freezer-safe containers or bags. Leave some space at the top for expansion. This soup can last up to three months in the freezer. When you’re ready to eat, thaw it overnight in the fridge. Reheat as explained before for delicious results. For the full recipe, check out the details above. Yes, you can make this soup in a slow cooker. Start by browning the sausage in a pan. Then, add all the ingredients to the slow cooker. Set it on low for about 6-8 hours or high for 3-4 hours. This method allows the flavors to blend nicely. To make the soup less creamy, you can reduce the amount of heavy cream. Try using half a cup instead of a full cup. You can also substitute with milk or low-fat cream. This change will still keep the soup rich but lighter. I love serving this soup with crusty bread. It’s perfect for dipping! You can also add a simple salad for some freshness. Garlic bread or a side of roasted veggies can be great choices too. This recipe is not gluten-free due to the Ditalini pasta. However, you can substitute it with gluten-free pasta. Just check the cooking time, as it may vary from regular pasta. To adjust servings, simply double or triple the ingredients. This soup is easy to scale up. If you want to make it for a big crowd, use a larger pot and ensure you have enough broth. The Full Recipe is easy to follow for larger quantities. This blog post explored how to make Creamy Parmesan Sausage Ditalini Soup. We covered key ingredients, step-by-step instructions, and tips for better flavor. You learned how to store leftovers and even ways to adapt the recipe for dietary needs. In the end, making this soup is easy and fun. With your creativity, you can enjoy this dish tailored to your taste. So get cooking, and enjoy a warm bowl of comfort!

Creamy Parmesan Sausage Ditalini Soup Savory Delight

If you crave a warm, hearty meal, you’re in for a treat! My Creamy Parmesan Sausage Ditalini Soup offers rich

- Ground beef and dairy ingredients - 1 pound ground beef - 1 cup cream cheese, softened - 1 cup sour cream - 1 cup shredded cheddar cheese (plus an extra ½ cup for topping) - Canned ingredients - 1 can (15 oz) black beans, rinsed and drained - 1 can (11 oz) sweet corn, drained - 1 can (10 oz) diced tomatoes with green chilies - Seasoning and toppings - 1 tablespoon taco seasoning - 1 tablespoon olive oil - ½ cup green onions, finely chopped - Tortilla chips, for serving When I make this Meaty Texas Trash Dip, I love how every ingredient adds to the flavor. The ground beef gives it a rich base. Cream cheese and sour cream make it creamy and smooth. Black beans and corn add texture and sweetness. The diced tomatoes with green chilies give it that kick we all crave. Taco seasoning ties everything together. You can feel the warmth of the spices in every bite. Green onions on top add freshness and color. Don't forget the tortilla chips! They are perfect for scooping up all that deliciousness. This dip is not just tasty; it’s a crowd-pleaser. Whether for a party or a cozy night in, this dip will shine. If you want to see how to prepare it, check out the Full Recipe. 1. Preparing the beef and draining fat Start by heating olive oil in a large skillet over medium heat. Add 1 pound of ground beef. Cook it for about 5-7 minutes. Break it up with a spatula until it is fully browned. Once cooked, remove the skillet from heat and drain any excess fat. This step keeps the dip from being greasy. 2. Mixing in the beans, corn, and tomatoes Return the skillet to the heat. Add 1 tablespoon of taco seasoning. Stir it into the beef to coat it evenly. Next, add 1 can of rinsed black beans, 1 can of drained sweet corn, and 1 can of diced tomatoes with green chilies. Mix everything well and let it heat through for about 3-4 minutes, stirring often. 3. Creating the creamy dip base Lower the heat to a gentle simmer. Add 1 cup of softened cream cheese and 1 cup of sour cream into the skillet. Stir continuously until the mixture is fully blended and smooth. This step forms a rich and creamy base for your dip. 4. Melting the cheese and final touches Incorporate 1 cup of shredded cheddar cheese into the mixture. Mix well until the cheese melts completely and blends evenly. After combining, remove the skillet from heat. Top the dip with ½ cup of freshly chopped green onions for color. Sprinkle with an extra ½ cup of shredded cheddar cheese for added richness. 5. Serving the dip Transfer the dip to a decorative serving dish or keep it in the skillet for a casual look. Serve warm with crispy tortilla chips for delightful dipping. Enjoy this meaty Texas Trash Dip as a tasty snack or appetizer! For the full recipe, check the recipe section above. - Ensuring a non-greasy dip After cooking the ground beef, always drain the fat. This step keeps your dip rich without being oily. Use a colander to let the fat flow away while keeping the beef intact. - Perfectly blending ingredients for creaminess Start with softened cream cheese. It mixes better and gives a smooth texture. Stir in the sour cream slowly until you achieve a creamy base. Keep mixing until there are no lumps. - Adjusting flavors with seasoning Taste as you go! After adding the taco seasoning, sample your dip. If you want it spicier, add a touch more seasoning. You can also mix in some hot sauce if you like a kick. - Ideal serving temperatures Serve your Meaty Texas Trash Dip warm for the best flavor. Heat helps the cheese melt and brings out the dip's rich taste. You can keep it warm in a slow cooker if you are serving a crowd. - Best accompaniments for dipping Tortilla chips are a classic choice. They add crunch and balance the dip's creaminess. You can also try fresh veggies like bell peppers and carrots for a healthier option. Enjoy the mix of textures! {{image_4}} You can make Meaty Texas Trash Dip your own with some fun twists. First, if you want a vegetarian option, swap the ground beef for lentils or mushrooms. Both options add great texture and flavor. If you love heat, add jalapeños. You can mix them in or top the dip with them. This extra spice gives your dip a nice kick. Cheese is another area to play with. You can try pepper jack for a spicy twist or cream cheese for a richer feel. Each cheese adds a different taste, so explore what you like best. This dip works well in other dishes, too. You can use it as a topping on baked potatoes or mix it into a pasta dish. It adds a creamy, meaty flavor that can elevate any meal. For parties, presentation matters. Use a colorful dish to serve the dip. Add fresh herbs like cilantro or parsley on top to make it pop. Serve with a variety of chips, like tortilla or pita, to give your guests options. These twists and serving ideas can make your Meaty Texas Trash Dip even more fun and tasty! For the full recipe, check out the detailed instructions above. To keep your Meaty Texas Trash Dip fresh, store leftovers in an airtight container. Place it in the fridge within two hours of serving. This dip is best eaten within three to four days. For longer storage, freeze the dip. Make sure to use a freezer-safe container. Leave some space at the top for expansion. This dip can last in the freezer for up to three months. When you're ready to enjoy it again, just thaw it in the fridge overnight. To reheat this dip, use a microwave or a stovetop. If using a microwave, place the dip in a microwave-safe bowl. Heat it in short bursts, stirring in between, until it's hot throughout. For stovetop reheating, transfer the dip to a saucepan. Heat it over low heat, stirring often. This method helps keep the texture creamy. Avoid high heat, as it can cause the dip to separate. Enjoy your warm dip with crispy tortilla chips! How to make Meaty Texas Trash Dip spicier? You can add chopped jalapeños or hot sauce for extra heat. Stir them in with the beef and beans. Another option is to use pepper jack cheese instead of cheddar. This will give your dip a nice kick. Can I make this dip ahead of time? Yes, you can prepare the dip a day before. Just follow the full recipe, then store it in the fridge. When you're ready to serve, heat it in the oven or microwave until warm. This makes it super easy for parties or gatherings. What other chips can I use for serving? Tortilla chips are great, but don’t stop there! You can use pita chips, veggie sticks, or even pretzel crisps. Each option adds a unique crunch and taste to your dip. What is the best cheese for this dip? Shredded cheddar cheese is a classic choice, but you can mix it up! Try using Monterey Jack or a blend of cheeses for a more complex flavor. Creamy cheese helps balance the savory meat and beans. How can I reduce the calories in this recipe? To cut calories, use lean ground beef or turkey. You can also swap cream cheese and sour cream for low-fat versions. Lastly, serving with veggie sticks instead of chips lowers the overall calorie count while still being tasty. This blog post covered all you need to make a tasty Meaty Texas Trash Dip. We discussed ingredients, step-by-step cooking tips, and fun variations. Remember to choose the right cheese and spice it up to fit your taste. You can even make veggie options or serve it in creative ways. Properly storing leftovers keeps the dip fresh for later. Dive into those FAQs for more helpful advice. Enjoy your dip-making journey. You’re now ready to impress at your next gathering!

Meaty Texas Trash Dip Irresistible Flavor Explosion

If you want a dip that packs a punch, you’re in the right place! My Meaty Texas Trash Dip is

This Easy Thai Noodle Soup is quick and tasty. It takes only 25 minutes to make. You can serve four people with this recipe. The soup is warm and packed with flavors. To make this soup, you need: - 200g rice noodles - 4 cups vegetable broth - 1 can (400ml) coconut milk - 1 tablespoon red curry paste - 1 tablespoon soy sauce - 1 tablespoon freshly squeezed lime juice - 1 cup carrots, julienned - 1 cup bell peppers, sliced - 1 cup snap peas, trimmed - 4 green onions, thinly sliced - Fresh cilantro leaves for garnish - Salt and freshly ground pepper to taste These ingredients create a creamy and colorful dish. They blend well to give a delicious taste. You can add extra ingredients for more flavor: - Sliced mushrooms for an earthy taste - Spinach for added greens - Chopped chili for spice lovers - Peanuts for a crunchy texture Feel free to mix and match these options. Each choice adds a unique twist to your Easy Thai Noodle Soup. To start, soak the rice noodles in hot water. Follow the package instructions, usually about 10-15 minutes. You want them soft but not mushy. Once they are tender, drain them. Set the noodles aside for later. Next, grab a large pot and pour in the vegetable broth. Heat it on medium until it simmers gently. This step brings out the flavors. Do not rush; let it warm up slowly. Now, stir in the coconut milk. Mix it well with the broth. Add the red curry paste and soy sauce next. This combo creates a rich, creamy base. Keep stirring until everything blends together. Then, toss in the julienned carrots, sliced bell peppers, and snap peas. Let the soup simmer for 5-7 minutes. This cooks the veggies while keeping them crisp. After that, squeeze lime juice into the pot. Season with salt and pepper to taste. Adjust the flavors as needed. Finally, add the soaked rice noodles. Gently fold them into the soup. Warm them for another 2-3 minutes. Once ready, ladle the soup into bowls. Top each bowl with green onions and fresh cilantro. This soup is not just quick; it is comforting and packed with flavor. For the full recipe, check out the previous section. To get the best flavor in your Thai noodle soup, start with the broth. Use a good vegetable broth as your base. The broth should be rich and warm. Add coconut milk to bring in creaminess. The red curry paste adds heat and depth. Adjust the flavors with lime juice, soy sauce, and salt. Taste as you go to find your perfect mix. One common mistake is overcooking the noodles. They should be tender but firm. Soak them just until soft, then drain. If you add them too early, they can become mushy. Also, don't skip the lime juice. It brightens the soup and balances the richness. Lastly, avoid using too much salt at first. You can always add more later. A beautiful presentation makes your soup more inviting. Serve it in deep, colorful bowls. Top with sliced green onions and fresh cilantro for color. A lime wedge on the side adds a zesty touch. Consider using chopsticks and a soup spoon for fun. This adds to the experience and makes it feel special. {{image_4}} You can easily change the protein in your soup. For chicken, use cooked, shredded meat. It adds great flavor and heartiness. Tofu is a perfect choice for plant lovers. Use firm or extra-firm tofu. Cut it into cubes and add it to the soup. Shrimp is another tasty option. Use peeled and deveined shrimp. Add them for the last few minutes of cooking. They cook quickly and bring a lovely taste. If you want a vegetarian or vegan version, skip the animal products. Use vegetable broth and tofu or mushrooms for protein. You can also add more veggies like broccoli or zucchini. They add color and texture. Use soy sauce or tamari for flavor. If you want creaminess, stick with coconut milk. It makes the soup rich and satisfying. You can adjust the spice level to suit your taste. For milder soup, reduce the red curry paste. You can start with one teaspoon and taste as you go. If you love heat, add more curry paste or fresh chili peppers. Sliced jalapeños can also bring a nice kick. Remember to balance the heat with lime juice to keep the flavors bright. For the full recipe, check out the detailed instructions above. After you enjoy your Easy Thai Noodle Soup, you might have some left. To store leftovers, let the soup cool down first. Then, pour it into an airtight container. It will stay fresh in the fridge for up to three days. Make sure to label the container with the date. This way, you’ll remember when you made it. When you’re ready to enjoy your soup again, reheating is simple. Pour the soup into a pot and heat it over medium heat. Stir it often to prevent sticking. You can also use the microwave. Just place it in a microwave-safe bowl and heat in one-minute intervals. Stir in between until it’s hot. Adding a splash of water or broth can help keep it from getting too thick. If you want to save the soup for later, freezing is a great choice. Allow the soup to cool completely. Then, transfer it to freezer-safe bags or containers. Be sure to leave some space at the top, as the soup will expand when frozen. It can last in the freezer for up to three months. When you’re ready to eat it, thaw it in the fridge overnight. Then, reheat as mentioned above for the best taste. Yes, you can use different noodles. Rice noodles work best for this soup, but you can try egg noodles or udon noodles. Just make sure to adjust the cooking time. Follow the package instructions for the noodles you choose. This way, they cook perfectly and blend well with the soup. If you want to skip coconut milk, try using almond milk or soy milk. These can give a similar creamy texture. For a richer taste, you can mix in some peanut butter or cashew cream. This will add depth to your soup while keeping it tasty and smooth. Feel free to add any veggies you like. Broccoli, zucchini, or spinach can work well. Just chop them into small pieces so they cook quickly. You can even mix in some mushrooms for an earthy flavor. This soup is flexible, so get creative and make it your own! This blog post covered how to make a tasty soup with rice noodles. We explored essential and optional ingredients for added flavor. I shared step-by-step instructions on preparing noodles and simmering broth. You learned tips to balance flavors and avoid mistakes. We also discussed variations for proteins and spice levels. Lastly, I showed how to store leftovers for later enjoyment. Enjoy crafting your soup and remember, cooking is fun and creative!

Easy Thai Noodle Soup Comforting and Quick Recipe

Are you craving a warm bowl of Thai noodle soup? This easy recipe brings comfort and flavor to your table

- 1.5 lbs chicken thigh fillets, diced - 1 cup long-grain rice, rinsed - 1 medium onion, finely chopped - 2 cloves garlic, minced - 1 teaspoon smoked paprika - 1 teaspoon Cajun seasoning - 1/2 teaspoon dried thyme - Salt and black pepper to taste - 2 green onions, chopped - Fresh parsley, chopped When making One Pot Chicken and Dirty Rice, using the right ingredients is key. I love chicken thighs because they stay juicy as they cook. Dice them into bite-sized pieces for even cooking. Rinsing the rice helps remove excess starch, keeping the dish from getting sticky. Onions and garlic form the base of flavors. They add sweetness and depth. Don't skip the spices! Smoked paprika gives a rich, smoky taste. Cajun seasoning adds a kick of heat. Dried thyme brings a lovely earthy note. For garnish, green onions and parsley not only add color but also freshness. They brighten the dish right before serving. For the full recipe, you can refer to the detailed instructions above. First, heat olive oil in a large pot over medium heat. Once hot, add the diced chicken. Season it with salt and black pepper. Sear the chicken for about 5 to 7 minutes. Stir occasionally until it’s browned on all sides. After cooking, transfer the chicken to a plate and set it aside. In the same pot, add the chopped onion and diced bell pepper. Cook for about 3 to 4 minutes. You want the onions to turn translucent and the peppers to soften. Then, add the minced garlic. Sauté for another minute until it smells fragrant. Now, stir in the rinsed rice, smoked paprika, Cajun seasoning, and dried thyme. Toast the rice with spices for about 1 minute. This helps the rice absorb the flavors. Next, pour in the diced tomatoes and chicken broth. Don’t forget to return the browned chicken to the pot. Stir everything to combine well. Bring the mixture to a gentle boil. Once it starts boiling, reduce the heat to low. Cover the pot with a lid. Simmer for 25 to 30 minutes. The rice should be tender and have absorbed most of the liquid. Avoid lifting the lid during cooking for even steam. After cooking, remove the pot from heat. Let it sit, covered, for an additional 5 minutes. This resting time helps the flavors meld together. Afterward, use a fork to fluff the rice gently. Adjust the seasoning with more salt or pepper as needed. Serve the chicken and dirty rice hot. Garnish it with freshly chopped green onions and parsley for a pop of color. Enjoy your flavorful meal! For the full recipe, check out the detailed instructions included. To get the best rice, avoid lifting the lid while it cooks. Each time you lift the lid, steam escapes. This steam helps cook the rice fully and evenly. Follow the recipe's liquid amounts for the right texture. If you want softer rice, add a bit more broth. For firmer rice, use a bit less. If you don’t have chicken thighs, you can try chicken breasts or drumsticks. Just remember that drumsticks take a bit longer to cook. For chicken breasts, reduce the cooking time by a few minutes. Always check that the chicken is cooked through before serving. Want to kick up the flavor? Add more spices or herbs to the mix. Fresh thyme, basil, or even a touch of cayenne can give it a nice kick. You can also throw in extra vegetables like carrots, celery, or green beans. These add color and nutrition, making the dish even better. {{image_4}} You can switch up the protein in this dish easily. If you want a seafood twist, use shrimp. Just add them during the last few minutes of cooking. They will cook quickly and add a nice flavor. You could also try sausage. Slice it up and add it with the chicken. The sausage will lend a smoky taste to the rice. For a vegetarian option, consider using beans. Black beans or kidney beans work great. They add protein and fiber. Just stir them in when you add the rice. This way, you keep the dish hearty and satisfying without meat. To change the flavor profile, play with spices. Try adding cumin or coriander for a warm kick. You can also mix in some cayenne pepper for heat. Fresh herbs like cilantro or parsley can brighten the dish. Add them right before serving for a fresh touch. You can also incorporate tropical fruits, like pineapple or mango. Dice them and stir them in during cooking. The sweetness from the fruit balances the savory chicken and spices. It’s a fun twist that will surprise your taste buds. If you want a healthier option, switch to brown rice. It has more fiber and nutrients. However, it will need more cooking time, so adjust the broth as needed. This will keep your dish flavorful and nutritious. Another great alternative is quinoa. It cooks faster than rice and adds a nutty flavor. Rinse the quinoa before adding it to the pot. Use the same amount as rice, but cut back on the broth slightly. This will keep the dish from getting too watery. Feel free to mix and match these variations to create your perfect One Pot Chicken and Dirty Rice. For the full recipe, check out the earlier section! After enjoying your One Pot Chicken and Dirty Rice, store leftovers in the fridge. Use airtight containers to keep them fresh. Glass or BPA-free plastic containers work well. Make sure to let the food cool before sealing it. This helps avoid moisture buildup inside the container. Leftovers can last for about 3 to 4 days in the refrigerator. To enjoy your leftovers, you can reheat them in several ways. The microwave is quick and easy. Place the food in a microwave-safe bowl and cover it with a damp paper towel. Heat it in 1-minute intervals, stirring in between, until hot. You can also use the stovetop. Heat a pan over low heat, add a splash of broth or water, and stir in the chicken and rice. This method ensures even heating and keeps the dish moist. For long-term storage, you can freeze your One Pot Chicken and Dirty Rice. Allow it to cool completely before freezing. Portion the food into freezer-safe bags or containers. Squeeze out as much air as possible before sealing. This helps prevent freezer burn. When you want to eat it, thaw the dish overnight in the fridge. Reheat it on the stovetop or microwave until hot. Enjoy your meal again with great flavor! Yes, you can make this dish ahead of time. To prep, cook the chicken and rice as usual. Once cooked, let it cool. Then, store it in an airtight container in the fridge. This method keeps the flavors locked in. You can reheat it on the stove or in the microwave. Just add a splash of chicken broth to keep it moist. For this dish, long-grain rice works best. It cooks evenly and stays fluffy. Short-grain rice can become sticky and mushy. If you use brown rice, increase the cooking time and liquid. This change will give you a heartier texture. Yes, you can easily add heat. Use more Cajun seasoning or add hot sauce. Fresh jalapeños or crushed red pepper also work well. Start with a small amount and taste as you go. It’s easier to add than to take away. Leftovers can last up to three days in the fridge. Store them in a sealed container. For longer storage, freeze the dish for up to three months. Just thaw it overnight before reheating. This way, you keep the flavors fresh for later enjoyment. This blog covered ingredients, steps, and tips for making One Pot Chicken and Dirty Rice. We explored the main components, cooking techniques, and helpful variations. You learned how to enhance flavors and how to store leftovers smartly. Cooking this dish is easy and fun, with room for your own twist. I hope you feel excited to try it. Enjoy creating a delicious meal that brings joy to your table!

One Pot Chicken and Dirty Rice Flavorful Meal Guide

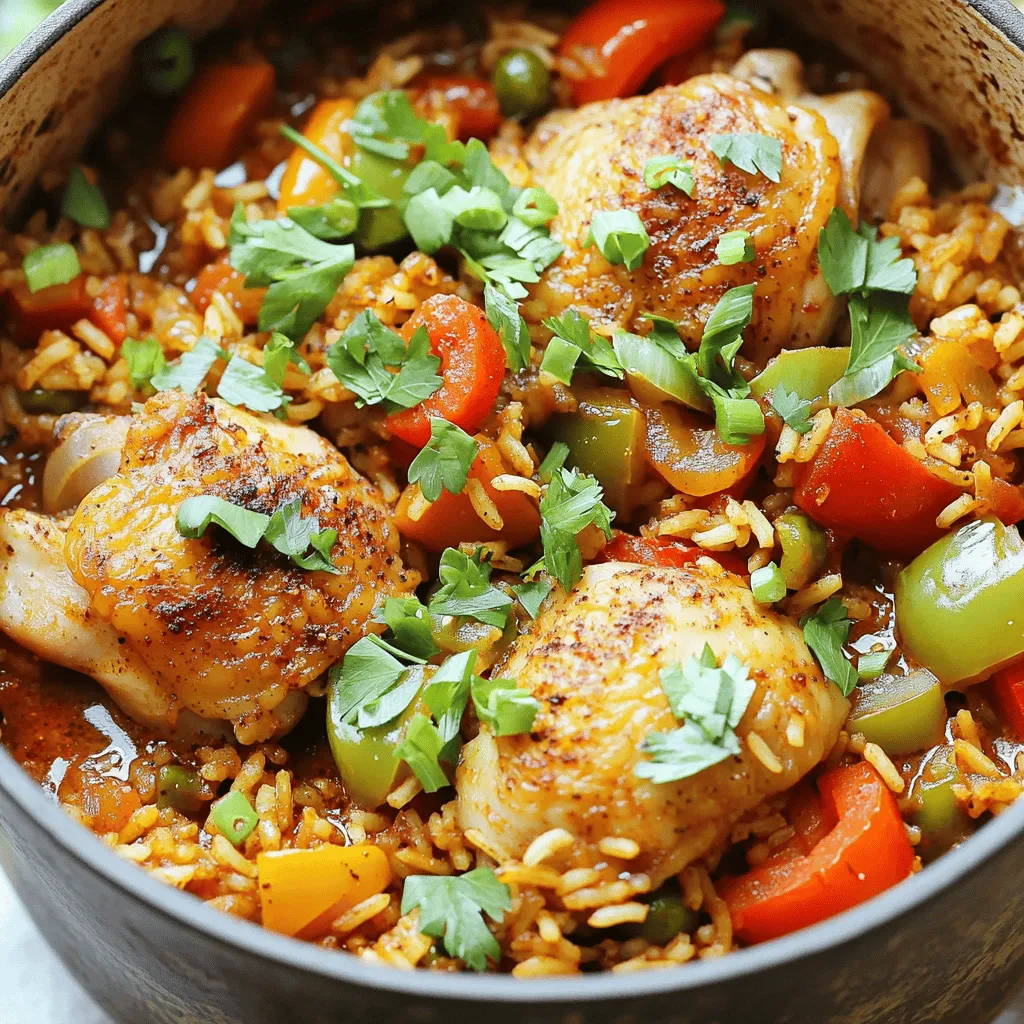
Ready to savor a delicious meal without the fuss? My One Pot Chicken and Dirty Rice is your answer! This

For a rich and flavorful Indian pumpkin curry, you need some key ingredients. Here is what you will need: - 2 cups pumpkin, peeled and cubed - 1 cup canned coconut milk - 1 medium onion, finely chopped - 2 cloves garlic, minced - 1 tablespoon fresh ginger, grated - 1 ripe tomato, chopped - 1 teaspoon mustard seeds - 1 teaspoon cumin seeds - 1 teaspoon turmeric powder - 1 teaspoon garam masala - 1 teaspoon red chili powder (adjust based on your spice preference) - Salt to taste - 2 tablespoons vegetable oil - Fresh cilantro for garnish - 1 cup fresh spinach (optional) - 1 cup vegetable broth or water Each of these ingredients plays a vital role in building the dish's flavor. Pumpkin is the star of the show. It adds sweetness and creaminess. Coconut milk gives the curry a velvety texture, balancing the spices. Onion, garlic, and ginger create a delicious base. Their flavors blend well when sautéed together. The spices are essential too. Mustard seeds and cumin seeds add depth. Turmeric brings warmth and a golden color. Garam masala adds complexity, while red chili powder gives a kick. Adjust it to fit your taste. You can also add fresh spinach for a pop of color and nutrition. Cilantro makes a fresh garnish, brightening the dish. If you need more liquid, use vegetable broth or water to help cook the pumpkin. For the full recipe and cooking instructions, check out the [Full Recipe]. This curry is easy, tasty, and sure to please! First, grab a large pot and heat the vegetable oil over medium heat. Once the oil is hot, add the mustard seeds and cumin seeds. Listen for a crackling sound; this means the spices are toasting. Let them toast for about 30 seconds. This step brings out their flavors. Next, add the finely chopped onion, minced garlic, and grated ginger. Sauté them together for about 5 minutes. You want the onion to turn soft and translucent. This mix is the heart of your curry. Now, it’s time to add the chopped tomato to your pot. Stir well and let it cook for 3-4 minutes. The tomato should become soft and blend into the onion mixture. This step adds a nice tanginess. Sprinkle in the turmeric powder, garam masala, and red chili powder. Don’t forget the salt. Stir continuously for about a minute. This allows the spices to toast and deepen their flavors. Your kitchen will start to smell amazing! Gently fold the cubed pumpkin into the spiced mixture. Make sure each piece is coated with the spices. This ensures that every bite is full of flavor. Next, pour in the canned coconut milk and vegetable broth or water. Stir everything to combine. Bring the mixture to a gentle boil. This step helps to meld all the flavors together. Lower the heat to low and cover the pot. Let the curry simmer for about 20-25 minutes. Stir occasionally to prevent sticking. The pumpkin should become tender during this time. If you want to add spinach, do it in the last 5 minutes of cooking. After simmering, taste the curry. Adjust the seasoning with more salt if needed. For a creamier texture, use a potato masher to mash some pumpkin cubes. Keep others intact for a mix of textures. Before serving, garnish your curry with fresh cilantro. This adds a pop of color and freshness. Your Indian Pumpkin Curry is now ready to enjoy! Check out the [Full Recipe] for more details. To make the best Indian pumpkin curry, start by choosing the right pumpkin. I love using sugar pumpkins or kabocha for their sweet taste. They blend well with spices and give a rich flavor. Next, adjust the spice levels to fit your taste. If you like heat, add more red chili powder. For a milder dish, use less. Always taste as you go to find your perfect flavor. For a creamier curry, mash some pumpkin pieces with a potato masher. This gives the curry a nice thickness. You can keep some cubes whole for texture. If you want to boost nutrition, add fresh spinach during the last few minutes of cooking. It wilts nicely and adds color and vitamins. Serving is key to enjoying your dish. I recommend using deep bowls for the curry. Pair it with fluffy basmati rice or warm naan. This helps soak up the sauce. For a beautiful touch, garnish with fresh cilantro. A sprinkle of red chili flakes adds both color and a hint of spice. This makes your dish look as good as it tastes. For the full recipe, check out the Spiced Pumpkin Delight Curry. {{image_4}} You can easily make this Indian pumpkin curry vegan. Just ensure you use completely plant-based ingredients. For instance, use vegetable broth instead of chicken broth. This keeps the dish rich and creamy. To add extra variety, toss in other vegetables. Sweet potatoes, carrots, or bell peppers work well. They mix nicely with the pumpkin and spices. This not only boosts flavor but also adds color and nutrients. Spice blends can change the flavor of your curry. You can alter spices for regional flavor variations. For a milder taste, use less red chili powder. If you prefer a bolder flavor, add more garam masala. You can also use store-bought curry blends. They save time and provide great flavor. Look for blends that include turmeric, cumin, and coriander. These spices are key to a delicious curry. Pair your curry with different sides or condiments. Steamed basmati rice is a classic choice. Warm naan is also great for scooping up the curry. If you have leftover curry, get creative! Use it as a filling for wraps. You can also serve it over quinoa for a twist. The flavors stay rich and satisfying, making each meal unique. For the full recipe, check out the Spiced Pumpkin Delight Curry. To store your Indian pumpkin curry, let it cool first. Once cool, place it in an airtight container. This keeps it fresh in the fridge for up to three days. For longer storage, consider freezing it. Use freezer-safe bags or containers. Make sure to label them with the date. The curry can last in the freezer for about three months. When you’re ready to enjoy it again, just thaw it in the fridge overnight. Reheating your curry can be easy and tasty. The best way to reheat it is on the stove. Pour the curry into a pot and heat it over low to medium heat. Stir often to avoid sticking. If it seems too thick, add a splash of water or coconut milk. For a fresh touch, add some chopped cilantro or a squeeze of lime juice while reheating. This little boost can brighten the flavors and make it feel fresh again. You can find the full recipe for this delightful dish [Full Recipe]. Indian pumpkin curry lasts about 3 to 5 days in the fridge. Store it in an airtight container to keep it fresh. Always let it cool before putting it away. When reheating, heat it until hot, stirring well. Yes, fresh pumpkin is great! It gives the curry a bright flavor and better texture. Fresh pumpkin can taste sweeter and more vibrant than canned. Just peel, seed, and cube it before adding. It may take a little longer to cook, but it’s worth it. If you need a substitute for coconut milk, try almond milk or cashew cream for a non-dairy option. Regular milk can work too, but it will change the flavor. You can mix in some nut butter for richness. Each option provides a different taste, so choose what you like. The spice level can be adjusted. The red chili powder adds heat, but you can reduce it for a milder dish. If you want more spice, add more chili powder or fresh chilis. Taste the curry as you go, and make it just right for you. Indian Pumpkin Curry is a flavorful dish made with simple ingredients. We explored the essential components like pumpkin, spices, and coconut milk. I shared step-by-step instructions to build layers of flavor and enhance texture. You also learned tips for perfecting the taste, trying variations, and storing leftovers properly. In conclusion, making this curry is about balancing flavors and enjoying the process. Adjust the recipe to suit your taste, and serve it proudly!

Indian Pumpkin Curry One Pot Recipe Flavor Boost

Looking to spice up your dinner routine? This Indian Pumpkin Curry recipe is your answer! It’s simple, flavorful, and can

- 8 oz rotini pasta - 1 cup cherry tomatoes - 1 cup sweet corn - 1 red bell pepper - 1 cup black beans - 1/2 cup red onion - 1/4 cup ranch dressing - 2 tablespoons lime juice - Salt and pepper to taste Cowboy Pasta Salad is colorful and full of flavor. Each ingredient adds a special touch. First, the rotini pasta forms the base. It holds the dressing well and gives a nice bite. Cherry tomatoes add sweetness, while sweet corn brings a crunchy texture. Next, the red bell pepper adds a crisp and fresh taste. Black beans give the salad protein and fiber. Red onion brings a sharp bite, balancing the other flavors. For the dressing, ranch dressing is creamy and zesty. Lime juice adds brightness, making the salad lively. Don't forget to season with salt and pepper to enhance all these tasty elements. These ingredients come together beautifully in the full recipe. Enjoy preparing this fun and easy dish! 1. Start by boiling a large pot of salted water. Make sure it’s rolling before you add anything. 2. Add 8 oz of rotini pasta to the boiling water. Cook it until it is al dente. This usually takes about 7-9 minutes. 3. Once the pasta is cooked, drain it in a colander. Rinse it under cold water right away. This helps stop the cooking and cools it down quickly. 1. In a big mixing bowl, combine your cooled pasta with the other ingredients. 2. Add in 1 cup of halved cherry tomatoes, 1 cup of cooked sweet corn, 1 diced red bell pepper, and 1 cup of rinsed black beans. 3. Next, toss in 1/2 cup of finely chopped red onion and 1/2 cup of crumbled bacon if you want that smoky flavor. 4. Stir everything gently to mix. Be careful not to mash the ingredients. 1. Grab a small bowl and whisk together your dressing. Combine 1/4 cup of ranch dressing with 2 tablespoons of freshly squeezed lime juice. 2. Add a pinch of salt and a sprinkle of black pepper to the bowl. Whisk until everything is blended. 3. Pour the dressing over the pasta mixture. Gently toss everything together until it's well coated. You can find the full recipe for Cowboy Pasta Salad in this article. Enjoy every bite! For a great presentation, serve your Cowboy Pasta Salad in a large bowl. The bright colors of the ingredients make it look fun and fresh. To add a special touch, garnish the top with extra chopped cilantro and a sprinkle of shredded cheddar cheese. Place lime wedges around the bowl for a pop of color and a zesty kick. You can adjust the flavors to suit your taste. Start by tasting the salad once it’s mixed. If you want it saltier, add more salt. If you want more spice, add black pepper. You can also adjust the acidity by adding more lime juice. This will brighten the dish and enhance the flavors. To cool your pasta quickly, rinse it under cold water right after cooking. This stops the cooking process and helps it cool fast. You can also prep your ingredients ahead of time. Chop your veggies and cook the bacon the day before. This makes it easy to mix everything when you are ready to serve. {{image_4}} You can easily change the pasta shape in this salad. Try penne or farfalle for a fun twist. The different shapes add texture and make the dish more fun to eat. For protein, add grilled chicken or shrimp. Both options boost the salad's heartiness. You can also use diced ham or even tofu for a different taste. To make this salad vegetarian, skip the bacon and add more veggies. You could use zucchini or diced avocado for creaminess. This keeps the taste rich without meat. For gluten-free options, use gluten-free pasta. Many brands make great alternatives. They cook just like regular pasta and taste delicious too. You can spice up this salad with fresh herbs. Try adding basil or parsley for a fresh taste. A hint of cumin or smoked paprika adds a nice kick. Different dressings can change the flavor too. Instead of ranch, use Italian or a creamy avocado dressing. Each dressing brings its own unique flair to the salad. Explore these variations to make your Cowboy Pasta Salad your own. For the full recipe, check out the details above. To store your Cowboy Pasta Salad, use airtight containers. Glass or plastic containers work well. This salad lasts for about 3 to 5 days in the fridge. Just make sure it stays cold before serving. You can freeze Cowboy Pasta Salad, but it may change texture. If you choose to freeze it, store it in freezer-safe bags or containers. Remove as much air as possible. When you're ready to eat it, thaw it in the fridge overnight. For reheating, the best method is to use the microwave. Heat it in short bursts and stir often. This helps keep your salad moist. Avoid reheating more than once. If you notice any ingredients looking off, it’s best not to reheat. Enjoy your meal fresh for the best taste! Cowboy Pasta Salad is a fun and vibrant dish. It mixes pasta with fresh veggies and beans. This salad has roots in the American West. It reflects the hearty and bold flavors of cowboy culture. The dish often uses ingredients that are easy to find. You will see lots of colors and textures in this salad. The combination of ranch dressing and lime gives it a zesty kick. It’s perfect for picnics, potlucks, or just a family meal. Yes, you can make Cowboy Pasta Salad ahead of time. It tastes even better after sitting for a while. To prepare, follow the recipe steps, but stop before adding the cheese and cilantro. Cover the salad tightly with plastic wrap and store it in the fridge. You can make it up to a day in advance. When you're ready to serve, stir in the cheese and cilantro for freshness. This way, the flavors blend well, and it stays crunchy. Cowboy Pasta Salad pairs well with many dishes. You can serve it with grilled chicken for a hearty meal. It also goes great with burgers or hot dogs at a cookout. For lighter options, try it with a vegetable platter or fresh fruit. If you want something simple, serve it with crusty bread. This salad is versatile and adds a colorful touch to any meal. This blog post covers the tasty Cowboy Pasta Salad. We explored its key ingredients, step-by-step cooking instructions, helpful tips, and fun variations. You can tweak this salad to suit your taste and dietary needs. In summary, make it your own with swaps and add-ins. Enjoy serving it at parties or simple dinners. This salad shines with its fresh flavors and easy prep. Try it out and impress your friends and family!

Cowboy Pasta Salad Simple and Flavorful Recipe

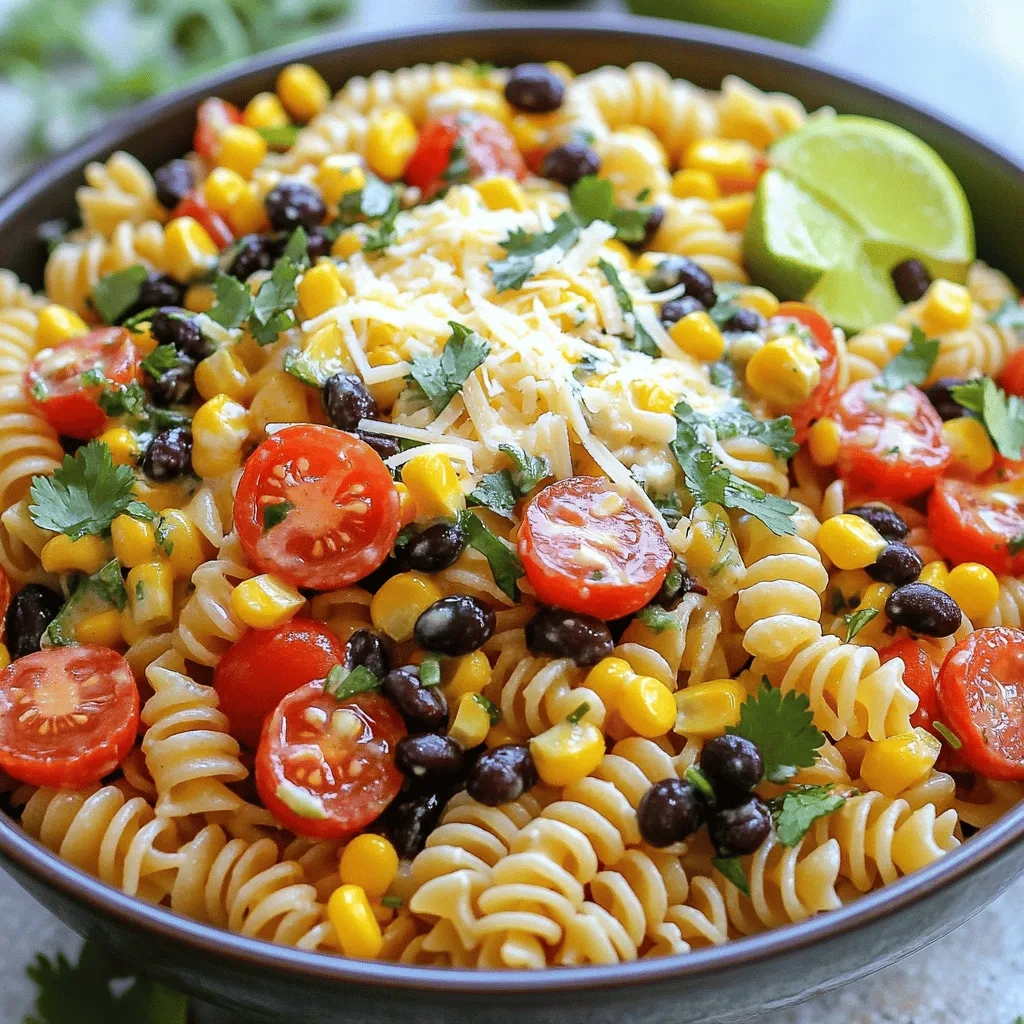
Welcome to the world of Cowboy Pasta Salad! This simple and flavorful dish is perfect for any gathering. With rotini

To make a Tropical Paradise Poke Cake, you need these main items: - 1 box yellow cake mix - 3 large eggs - 1/2 cup unsalted butter, melted - 1 cup coconut milk These ingredients create a soft and moist base for your cake. The yellow cake mix gives it flavor, while eggs and butter add richness. Coconut milk adds a tropical twist that enhances the taste. For the filling, gather the following: - 1 cup crushed pineapple, drained - 1 package (3 oz) instant coconut cream pudding mix - 1/4 cup milk (for the pudding) The crushed pineapple adds a juicy burst. The pudding mix provides creaminess, making every bite special. The milk helps the pudding thicken and blend well with the pineapple. For the finishing touches, you’ll need: - 1 container (8 oz) whipped topping - 1/2 cup sweetened shredded coconut - 1/2 cup maraschino cherries, drained - 1/4 cup chopped macadamia nuts (optional) Whipped topping gives a light and fluffy layer. Shredded coconut adds texture and a sweet taste. Cherries on top make it look lovely, while macadamia nuts offer a crunchy surprise. For the full recipe, check out the Tropical Paradise Poke Cake section. Enjoy delighting your friends and family with this easy, fun dessert! 1. First, preheat your oven to 350°F (175°C). This helps the cake bake evenly. 2. Next, grease and flour a 9x13-inch baking pan. This step keeps the cake from sticking. 3. In a large bowl, mix together the yellow cake mix, eggs, melted butter, and coconut milk. 4. Use an electric mixer to beat the mixture for about two minutes. You want it smooth and well combined. 1. Pour the batter into the prepared baking pan. Use a spatula to spread it evenly. 2. Bake the cake for 25-30 minutes. Check if it's done by inserting a toothpick. It should come out clean. 3. After baking, let the cake cool in the pan for about 10 minutes. 4. Once it cools a bit, take a wooden spoon and poke holes in the cake. Space them about two inches apart. 1. In a separate bowl, whisk the instant coconut cream pudding mix with 1/4 cup of milk. Make sure it thickens well. 2. Now, fold in the drained crushed pineapple until it mixes evenly. 3. Carefully pour this mixture over the cake. Make sure it fills the holes well. 4. Finally, cover the cake and chill it in the refrigerator for at least two hours. This helps the flavors blend nicely. For the complete recipe, check the [Full Recipe]. To make a perfect poke cake, focus on a few key details. First, ensure your cake is baked well. Use a toothpick to check doneness. If it comes out clean, your cake is ready. This step is crucial for the right texture. Next, poke holes evenly for the best flavor. I suggest using the handle of a wooden spoon. Space the holes about two inches apart. This spacing allows the filling to soak in well, adding moisture and taste. Serving temperature matters for poke cakes. I recommend serving it chilled. This enhances the flavors and makes it refreshing. If you let it sit at room temperature, the cake may lose some of its coolness. For garnishing, think about fun and colorful toppings. You can add fresh fruit, like sliced strawberries or a sprinkle of nuts. A cherry on top always adds a nice touch. Serve each piece on a bright plate for a cheerful presentation. Experimenting with flavors can elevate your poke cake. Try mixing different cake flavors, like chocolate or lemon. You can also use various pudding flavors to change things up. For an extra treat, think about adding toppings. Consider crushed cookies, fresh fruit, or even a drizzle of chocolate sauce. These options can transform your cake into a unique dessert. For a great starting point, check out the Full Recipe for Tropical Paradise Poke Cake. It offers a delightful mix of flavors that can inspire your next baking adventure. {{image_4}} Poke cakes are fun and easy to make. You can change them up in many ways. Here are some ideas to help you create your own delicious poke cake. - Chocolate poke cake recipe: Start with a chocolate cake mix. After baking, poke holes and fill them with chocolate pudding. Top with whipped cream and chocolate shavings for a rich treat. - Strawberry poke cake recipe: Use a vanilla or strawberry cake mix. Fill the holes with strawberry puree or Jell-O. Top with fresh strawberries and whipped cream for a refreshing dessert. - Lemon poke cake recipe: Choose a lemon cake mix. Poke holes and fill them with lemon curd. Finish with whipped cream and lemon zest for a bright flavor. - Gluten-free cake mix options: Many brands offer gluten-free cake mixes. Look for ones made with rice flour or almond flour. This allows those with gluten issues to enjoy poke cakes too. - Dairy-free alternatives for toppings: You can use coconut whipped cream or almond-based yogurt instead of regular whipped cream. These options are great for those who can't have dairy. - Fall-themed poke cake ideas: Use pumpkin spice cake mix for a cozy fall flavor. Fill it with cinnamon pudding and top with whipped cream and crushed graham crackers. - Holiday recipes for festive occasions: For Christmas, try a red velvet cake mix. Poke it with cream cheese filling and top with festive sprinkles for a cheerful look. These variations will make your poke cake exciting and perfect for any occasion. You can find the Full Recipe for a Tropical Paradise Poke Cake to get started on your next baking adventure! To store your poke cake in the refrigerator, cover it well. Use plastic wrap or foil to keep it fresh. Place it on a flat surface to avoid spills. If you have leftovers, you can freeze them. Cut the cake into squares and wrap each piece. Use freezer-safe bags or containers for best results. How long does the cake last in the fridge? A well-stored poke cake lasts about 3 to 5 days in the fridge. Make sure to check for freshness after a few days. Signs your poke cake has gone bad include a sour smell or mold on the surface. If you notice any of these signs, it’s best to toss it. When reheating your poke cake, the best method is to use the microwave. Heat it for about 10 to 15 seconds. This warms it without drying it out. You can also enjoy it cold, straight from the fridge. For serving suggestions, try adding a drizzle of chocolate sauce or a scoop of ice cream on the side. This adds a fun twist to your poke cake experience. For the full recipe and more details, check out the Tropical Paradise Poke Cake. To make a poke cake, follow these steps: 1. Prep the Cake: Preheat your oven to 350°F. Grease a 9x13-inch pan. 2. Make the Cake Batter: Mix yellow cake mix, eggs, melted butter, and coconut milk in a bowl. Beat for two minutes. 3. Bake the Cake: Pour the batter into the pan. Bake for 25-30 minutes. Check with a toothpick. 4. Poke the Cake: Let the cake cool for 10 minutes. Use a wooden spoon handle to poke holes in it. 5. Prepare the Filling: Whisk pudding mix with 1/4 cup of milk. Mix in the crushed pineapple. 6. Fill the Holes: Pour the pudding mixture over the cake. Spread it evenly. 7. Chill the Cake: Cover and refrigerate for at least 2 hours. 8. Top with Whipped Cream: Spread whipped topping on the cake. Add coconut, cherries, and nuts. 9. Serve and Enjoy: Cut into squares and serve chilled or at room temperature. Yes, you can use many cake mixes for poke cake. Here are some fun ideas: - Chocolate Cake Mix: For a rich, chocolatey twist, use chocolate cake mix. - Strawberry Cake Mix: Strawberry adds a fruity flavor and pairs well with cream. - Lemon Cake Mix: This gives a bright, zesty taste, perfect for summer. Feel free to experiment with different flavors. Each mix brings its unique taste to your poke cake. Toppings can make your poke cake shine. Here are great options: - Whipped Cream: A classic choice that adds creaminess. - Fresh Fruit: Strawberries, blueberries, or bananas add freshness. - Nuts: Chopped nuts like pecans or walnuts add a nice crunch. - Chocolate Sauce: Drizzle for extra sweetness and flavor. - Caramel Sauce: This adds a rich, buttery taste. Mix and match these toppings to make your poke cake even more delightful. You can find the full recipe for a Tropical Paradise Poke Cake with these ideas! You now have all the tools to make a great poke cake. We covered key ingredients, easy steps, and helpful tips. Plus, you learned about different flavors and how to store your cake. A poke cake is simple, fun, and can wow any crowd. Experiment with flavors and enjoy your tasty results. Happy baking!

Easy Poke Cake Recipes That Delight Every Baker

If you’re looking for a fun and simple dessert, poke cakes are your answer! These delicious cakes are easy to

- 1 cup dried red kidney beans (or 2 cans, drained and rinsed) - 1 tablespoon olive oil - 1 medium onion, diced - 2 cloves garlic, minced - 1 green bell pepper, diced - 1 stalk celery, diced - 1 teaspoon smoked paprika - 1/2 teaspoon dried thyme - 1/2 teaspoon cayenne pepper (adjust to taste) - 1 bay leaf - 4 cups vegetable or chicken broth - 1 cup long-grain white rice - Salt and pepper to taste - Fresh parsley, chopped (for garnish) When I make red beans and rice, I love using dried kidney beans. They have a wonderful texture. If you are short on time, canned beans work just as well. Just be sure to rinse them well. The base of this dish is rich in flavor. I start with olive oil, onion, garlic, green bell pepper, and celery. These veggies bring a fresh taste and aroma. For seasoning, I add smoked paprika and dried thyme. They give the dish depth. Cayenne pepper adds a kick, while a bay leaf infuses the broth with flavor. For the liquid, use vegetable or chicken broth. It makes the dish hearty and satisfying. Don't forget the rice! Long-grain white rice is my go-to. It absorbs the flavors perfectly. Finally, I like to finish with salt, pepper, and fresh parsley. This adds a nice pop of color and taste. For the full recipe, check the link to create this comforting dish! 1. Rinse and soak dried beans overnight in a large bowl of water. This helps them soften. If you don’t have dried beans, use two cans of red kidney beans. 2. Drain and rinse the canned beans under cold water. This removes extra salt and helps with flavor. 3. In a large pot, heat one tablespoon of olive oil over medium heat. When hot, add the diced onion, minced garlic, diced green bell pepper, and diced celery. 4. Cook the mixture for about 5 to 7 minutes. The veggies will soften and smell great. 5. Stir in one teaspoon of smoked paprika, half a teaspoon of dried thyme, half a teaspoon of cayenne pepper, and one bay leaf. Cook for one minute to toast the spices. 6. Now, add the soaked beans and four cups of vegetable broth to the pot. If using canned beans, wait to add them later. Bring the mixture to a boil. 7. Once boiling, reduce the heat and let it simmer uncovered for about 30 minutes. This gives the beans time to soften and the flavors to blend. 8. Stir in one cup of long-grain white rice, cover the pot, and cook for 20 to 25 minutes. The rice will absorb most of the liquid and become tender. If you used canned beans, add them in the last five minutes to heat through. 9. When finished, taste the dish. Season with salt and pepper to your liking. Don’t forget to remove the bay leaf before serving. For the full recipe, check out the detailed instructions. To make your red beans tender, soak dried beans overnight. This softens them and helps them cook evenly. If you forget to soak, you can use canned beans instead. They save time and still taste great. When using cayenne pepper, start with a little. You can always add more if you like heat. Adjust it based on your spice comfort level. Everyone has different tastes, so find what works for you. For a pretty plate, ladle the beans and rice into bowls. Sprinkle chopped parsley on top for color. This simple step makes your dish look fancy without much work. Pair your red beans and rice with cornbread or a fresh salad. The cornbread adds a nice crunch, while the salad brings freshness. Together, these sides create a well-rounded meal. Use a heavy pot or Dutch oven for even cooking. These pots retain heat and help your beans cook perfectly. They also keep the flavors rich and deep. Helpful tools include a good knife for chopping and measuring cups. Accuracy in measuring spices and broth is key to great taste. These tools make cooking fun and easy! {{image_4}} You can easily make red beans and rice vegan. Just swap in vegetable broth for the chicken broth. This choice keeps the dish tasty and plant-based. You can also add more veggies like carrots, zucchini, or spinach. Each adds color and flavor. If you want plant-based protein, consider using lentils or chickpeas. They will make your meal filling and nutritious. Want more heat? Add jalapeños or your favorite hot sauce. This will spice things up! You can also play with spices. Try adding cumin or coriander. These spices will add depth to the flavor. Adjust the cayenne pepper to your taste, too. A little goes a long way, so taste as you go! Red beans and rice has roots in many cultures. You can bring in Caribbean flavors by adding coconut milk or spices like allspice. For a traditional New Orleans twist, include andouille sausage. Cut it into slices and sauté with the veggies. This addition makes the dish hearty and rich. Each variation gives you a chance to explore new tastes and traditions. To keep your red beans and rice fresh, store them in airtight containers. Let the dish cool to room temperature before sealing. Place the containers in the fridge. Use them within four days for the best taste. If you want to save some for later, freezing is a great option. - For freezing, divide the dish into single portions. - Use freezer-safe containers or bags to avoid freezer burn. - Label each container with the date for easy tracking. When you want to enjoy the leftovers, reheating is simple. You can use the microwave or stovetop. If using the microwave, place a portion in a bowl. Add a splash of water to keep it moist. Heat on medium power for about two to three minutes. Stir halfway through for even heating. On the stovetop, pour the beans and rice into a pan. Add a small amount of broth or water to help with moisture. Heat over medium-low, stirring often. This will keep the flavors and texture just right. Enjoy your meal again, just like the first time! Red beans and rice comes from Louisiana. It has deep roots in Creole and Cajun culture. The dish became popular in the 18th century. It often used leftover beans and rice from Sunday meals. Families would cook it on Mondays with the leftover ham from the weekend. This dish shows the resourcefulness of the people in New Orleans. It also reflects the mix of African, French, and Spanish influences in the region. Today, it's a staple in many homes and restaurants, bringing warmth and comfort to all who eat it. Yes, you can use other beans. While red kidney beans are classic, you can try black beans, pinto beans, or navy beans. Each bean adds a different taste and texture. If you want a creamier dish, navy beans work well. Black beans can add a nice color contrast. Pinto beans are also a good option for a similar flavor profile. Just make sure to adjust cooking times based on the bean you choose. To make red beans and rice gluten-free, pick the right broth. Use vegetable or chicken broth that says "gluten-free" on the label. Check all spice labels, as some might contain gluten. Avoid using any pre-made mixes that may have gluten. Ensure your rice is also gluten-free. Most long-grain white rice is safe, but it’s best to check. By following these steps, you can enjoy this dish without worry. For a complete recipe, check out the Full Recipe link. Red beans and rice combine simple ingredients for a delicious meal. We covered the recipe steps, from prepping beans to simmering the dish. Remember, spices and presentation make a difference. You can tweak this dish to suit your taste or diet. Store leftovers well and easily reheat to enjoy again. Red beans and rice is more than a meal; it’s tradition and comfort. I hope you feel inspired to create your version at home. Enjoy your cooking journey!

Red Beans and Rice Flavorful Comfort Dish Recipe

Are you craving a warm, hearty meal? Discover the joy of making Red Beans and Rice, a truly comforting dish.

Older posts
Newer posts
← Previous Page1 … Page25 Page26 Page27 … Page34 Next →

dsad

© 2025 recipesstation • Built with GeneratePress

Our Policies

  • Copyright Policy
  • Cookie Policy
  • GDPR Policy
  • Privacy Policy
  • Disclaimer
  • Terms Of Use

More Information

  • Home
  • About
  • Contact
  • Appetizers
  • Dessert
  • Dinner
  • Drinks
©2025, recipesstation About Back To Top