Skip to content
DisclaimerTerms Of UseGDPR PolicyCookie Policy

recipesstation

  • Home
  • Drinks
  • Appetizers
  • Dinner
  • Dessert
  • About
  • Contact
  • Privacy Policy
DisclaimerTerms Of UseGDPR PolicyCookie Policy

Emily

To make a delicious blueberry chia seed jam, you need a few key ingredients: - 2 cups fresh blueberries (or frozen, fully thawed) - 1/4 cup maple syrup (or honey, depending on your preference) - 2 tablespoons chia seeds - 1 tablespoon freshly squeezed lemon juice - 1 teaspoon pure vanilla extract - A pinch of salt These ingredients work together to create a sweet and tangy jam. Blueberries are the star, bringing a burst of flavor. You can add more depth to your jam with optional ingredients: - A dash of cinnamon for warmth - A splash of orange juice for brightness - Fresh herbs like mint for a twist Feel free to experiment with these options to make the jam your own. Each addition can change the flavor profile in fun ways. Using fresh blueberries gives you the best flavor and texture. They are juicy and sweet. However, frozen blueberries work just as well. They are often picked at peak ripeness, so they retain their taste. Just let them thaw before using. Choose the type that suits your pantry. Both options will lead to a tasty blueberry chia seed jam. Start by adding your blueberries to a medium-sized saucepan. Use a fork or potato masher to mash them. This should take about 1-2 minutes. You want the berries to start breaking down and releasing their juices. The more you mash, the more flavor you get! Once your blueberries are nicely mashed, let’s make it sweet! Stir in maple syrup or honey, lemon juice, and a pinch of salt. Mix everything well. This is where the magic begins. The flavors blend, and the jam starts to take shape. Next, bring the heat up a bit to get your mixture boiling. Once it’s bubbling, reduce the heat and let it simmer for about 5 minutes. Stir occasionally to keep it from sticking. The heat helps thicken the jam and deepen the flavor. After simmering, take the saucepan off the heat. Now, add chia seeds and vanilla extract. Stir well to mix everything together. Let it sit for about 10 minutes. This is important! The chia seeds will absorb liquid and thicken the jam. When the jam has the thickness you like, transfer it to a clean glass jar. Let it cool completely at room temperature before sealing. Store your jam in the fridge for up to two weeks. If you’re sharing, I bet it won’t last that long! For the complete recipe, check out the Full Recipe. To check the jam's consistency, use a simple spoon test. Dip a spoon into the jam and lift it out. If it drips off slowly, it is ready. If it runs off quickly, simmer it a bit longer. The chia seeds will help thicken the jam, so give it time. Remember, it will thicken more as it cools. Sweetening your jam is easy. After your jam cools, taste it. If you want it sweeter, add more maple syrup or honey. Stir well to mix in the sweetener. You can adjust as you like. Everyone's taste is different, so make it yours. Use a non-stick saucepan for easy cleanup. If any jam sticks, soak the pan in warm water. Rinse and scrub gently to remove the residue. Having a clean workspace is key. Keep a damp cloth handy for quick spills. This will make your cooking experience more enjoyable. {{image_4}} You can make your jam even better by adding other fruits. Try mixing in strawberries, raspberries, or even peaches. Each fruit brings its own taste and color. For example, strawberries add a sweet touch and a lovely pink hue. Just mash them with the blueberries at the start. You can also use a mix of berries for a colorful jam that's full of flavor. If you want a sugar-free jam, you have options. Replace maple syrup with a natural sweetener like stevia or monk fruit. These sweeteners keep the jam sweet without added sugar. Just remember to check the package for the right amount to use. This way, you can enjoy your jam without the extra calories. Adding spices can take your jam to the next level. A pinch of cinnamon or nutmeg adds warmth and depth. You can also try adding a splash of almond extract for a nutty flavor. Experiment with these spices in your jam to find what you love best. Remember, a little goes a long way! To keep your blueberry chia seed jam fresh, store it in a clean glass jar. Make sure the jar is airtight to prevent air from spoiling the jam. Always use a clean spoon when scooping out the jam. Avoid cross-contamination to keep it safe from bacteria. Your homemade blueberry chia seed jam will last in the fridge for up to two weeks. After two weeks, check for any signs of spoilage before using it. If it develops an off smell or unusual texture, it's best to toss it. If you want to keep your jam longer, freezing is a great option. Pour the jam into freezer-safe containers, leaving some space at the top for expansion. You can also use ice cube trays for smaller portions. When ready to use, thaw the jam in the fridge overnight. This way, you can enjoy your blueberry chia seed jam anytime! Yes, you can use frozen blueberries. Just make sure they are fully thawed. Frozen blueberries work well and still taste great. They may take a bit longer to break down during mashing. Chia seeds are small but mighty! They are packed with fiber, protein, and omega-3 fatty acids. They help with digestion and keep you feeling full longer. Plus, they add a nice texture to the jam. You can spread this jam on toast, pancakes, or yogurt. It also works well in smoothies or as a topping for desserts. Try it in oatmeal for a tasty breakfast twist! Yes, you can can this jam. Make sure to follow safe canning practices. Use sterilized jars and a boiling water bath to seal them. This way, you can enjoy your jam even longer. To adjust sweetness, simply add more maple syrup or honey. Start with a little at a time and taste as you go. This way, you get the perfect sweetness for your taste buds. For the full recipe, check out the complete instructions above. We covered the main ingredients for blueberry chia seed jam, including tips and variations. You learned how to make it, from mashing to storing. Remember to use fresh or frozen blueberries for the best taste. Experiment with different fruits and spices to find your perfect flavor. This jam is healthy and easy to make, enhancing your meals or snacks. Enjoy the fun of creating a tasty treat that fits your taste!

Blueberry Chia Seed Jam Easy and Tasty Recipe

If you love a sweet spread with a healthy twist, you’ll adore this Blueberry Chia Seed Jam recipe! It’s easy

- 1 cup all-purpose flour - 1/2 cup unsalted butter - 1/2 cup packed light brown sugar - 1/4 cup granulated sugar - 2 tablespoons cream cheese - 1 teaspoon pure vanilla extract - 1/4 teaspoon fine sea salt - 1/2 cup mini chocolate chips - 1/2 cup whipped topping To make this tasty dip, you need simple ingredients. Start with flour, butter, and sugars. The butter gives a creamy base. The sugars add sweetness. Cream cheese makes it rich and smooth. Vanilla adds flavor, while sea salt balances it. Don't forget the mini chocolate chips for that classic cookie taste. Finally, whipped topping gives lightness. - Alternative sweeteners (e.g., coconut sugar, honey) - Gluten-free flour options - Vegan cream cheese substitutes Feel free to swap out some ingredients. Use coconut sugar or honey instead of regular sugars. If you need a gluten-free option, try almond flour or oat flour. For a vegan version, pick a dairy-free cream cheese. These swaps keep the dip delicious. They help fit different diets too. - Mixing the butter and sugars Start by putting the softened butter, brown sugar, and granulated sugar in a bowl. Beat them together using an electric mixer for about 2-3 minutes. You want it to be creamy and smooth. - Incorporating cream cheese and vanilla Next, add the softened cream cheese and vanilla extract. Mix until everything combines well and looks fluffy. This adds a nice richness. - Gradually adding flour Now, add the sifted all-purpose flour. Mix gently until it all comes together. Be sure to scrape down the bowl's sides to mix evenly. - Folding in chocolate chips Gently fold in the mini chocolate chips using a spatula. Make sure they spread evenly throughout the dip. Avoid overmixing to keep it light. - Adding whipped topping Carefully fold in the whipped topping. This step makes the dip fluffy and light. Mix until just combined for the best texture. - Refrigerating the dip Transfer your dip to a nice serving bowl and cover it. Place it in the fridge for at least 30 minutes. This chilling time helps the flavors come together. - Suggested images or videos to include Capture each step with clear pictures or short videos. Show the mixing process, the fluffy texture, and final presentation. - Tips for capturing the preparation process Use natural light to enhance your photos. Focus on the textures of the dip. This makes the process look more appealing and fun. For the full recipe, follow the provided instructions carefully to create your delicious Chocolate Chip Cookie Dough Dip! - Overmixing the dough: Mix just enough to blend the ingredients. Overmixing can make the dip dense and tough. - Using too much flour: Measure flour carefully. Too much flour makes the dip dry and crumbly. - Skipping refrigeration: Don’t skip chilling the dip. Refrigerating it helps the flavors mix well and improves texture. - Using high-quality chocolate chips: Select good chocolate chips. They add rich flavor and a nice texture. - Chilling time tips for better flavor: Chill for at least 30 minutes. This wait will deepen the taste. - Adjusting sweetness levels: Taste the dip before serving. You can add more sugar if you want it sweeter. - Ideal dippers for the dip: Serve with graham crackers, sliced fruits, or pretzels. They add fun and crunch. - Creative presentation ideas: Use a bright bowl for your dip. Arrange dippers around it for a colorful look. - Pairing with drinks or other desserts: Try serving it with milk, coffee, or even ice cream. This mix is sure to please everyone. {{image_4}} You can make your chocolate chip cookie dough dip even more fun! Here are some tasty ideas: - Adding nuts: Toss in some chopped walnuts or pecans for a crunchy bite. The nuts add a nice texture and flavor. - Incorporating different chocolates: Try using dark or white chocolate chips. This change can give your dip a new taste twist. - Experimenting with spices: A pinch of cinnamon or nutmeg can bring warmth and depth. Just a little can make a big difference! If you have dietary needs, you can still enjoy this dip. Here’s how to modify it: - Vegan Chocolate Chip Cookie Dough Dip: Replace butter with vegan butter. Use vegan cream cheese and ensure the chocolate chips are dairy-free. - Gluten-free variations: Swap all-purpose flour for gluten-free flour. This ensures everyone can enjoy the dip without worry. - Low-sugar options: Use a sugar substitute like stevia or monk fruit. This way, you can enjoy the dip without too much sugar. You can serve cookie dough dip in many fun ways! Here are some ideas: - Transforming into a sundae topping: Drizzle the dip over ice cream for a sweet treat. It adds a yummy layer to your sundae. - Incorporating into dessert parfaits: Layer the dip with yogurt and fruits in a glass. This makes for a pretty and delicious dessert. - Using as a filling for pastries: Spread the dip inside puff pastry or croissants. It creates a delightful surprise in every bite. For the full recipe and more tips, check the Full Recipe section! To keep your chocolate chip cookie dough dip fresh, use an airtight container. Glass containers work best as they do not absorb odors. For longer storage, you can freeze the dip. Just scoop it into a freezer-safe container and cover it well to avoid freezer burn. In the refrigerator, the dip lasts about 5 days. Always check for signs of spoilage. If you see mold or an off smell, it’s best to throw it out. To thaw the dip, place it in the fridge overnight. If you're in a hurry, you can leave it out for about an hour. You can also repurpose leftover dip by using it as a topping for ice cream or mixing it into yogurt for a sweet treat. You can store Chocolate Chip Cookie Dough Dip in the fridge for about 3 to 5 days. Keep it in an airtight container. This will help keep it fresh and tasty. If you see any changes in color or smell, it's best to throw it away. Yes, you can prepare this dip a day ahead. Make it and store it in the fridge. This way, the flavors blend nicely. Just remember to cover it well so it doesn't dry out. Raw flour can sometimes carry germs, so it's good to be careful. You can heat the flour in the oven at 350°F for about 5 minutes to kill any germs. Another option is to use heat-treated flour that is safe to eat raw. There are many tasty options for dipping! Here are a few ideas: - Fresh fruit slices (like strawberries, apples, or bananas) - Graham crackers - Pretzels - Mini cookies - Rice cakes To make a lighter dip, try these tips: - Use less sugar or swap in a natural sweetener. - Use low-fat cream cheese or yogurt instead. - Swap in whole wheat flour or a gluten-free option. These changes can help cut calories while keeping it delicious. Enjoy your Chocolate Chip Cookie Dough Dip! For the Full Recipe, check the earlier sections. In this blog post, we covered how to make Chocolate Chip Cookie Dough Dip from scratch. We discussed required ingredients, possible substitutions, and step-by-step instructions. I shared tips to avoid common mistakes and ways to enhance flavor. We explored variations, serving ideas, and best storage practices. This dip is easy to make and fun to share. Whether it's for a party or a simple treat, enjoy this sweet delight your way. Try it out and impress your friends!

Delicious Chocolate Chip Cookie Dough Dip Recipe

If you love the sweet taste of cookie dough, you’re in for a treat! My Delicious Chocolate Chip Cookie Dough

- 1 cup cooked quinoa - 1 can (15 oz) black beans, rinsed and drained - 1/2 cup breadcrumbs (preferably whole grain) - 1/4 cup red onion, finely chopped - 1/2 red bell pepper, diced - 2 cloves garlic, minced - 1 teaspoon ground cumin - 1 teaspoon chili powder - 1/2 teaspoon smoked paprika - 1/4 cup fresh cilantro, chopped - Salt and pepper to taste - 2 tablespoons olive oil (for cooking) - Whole grain burger buns - Toppings: crisp lettuce, ripe tomato slices, creamy avocado, and your favorite condiments Quinoa is a great source of protein and fiber. It helps keep you full and satisfied. Black beans add more protein and fiber, too. They also bring iron and magnesium, which are good for your body. Whole grain breadcrumbs boost your meal with extra fiber. They support healthy digestion. Fresh veggies like red bell pepper and onions add vitamins and minerals. They also give your burger bright flavors and colors. If you're allergic to gluten, use gluten-free breadcrumbs. You can also swap in oats instead. For a nut-free option, skip the avocado or choose a different topping. If you prefer a different bean, try chickpeas or lentils. These can also work well in this recipe. For a soy-free option, avoid any soy sauce in your condiments. Enjoy customizing your burger to fit your needs! For the full recipe, check out the Ultimate Quinoa Black Bean Veggie Burger . To make the ultimate quinoa black bean veggie burger, follow these steps. First, mash the black beans with a fork or potato masher. You want it mostly smooth but keep some chunks for texture. Next, mix in cooked quinoa, breadcrumbs, red onion, red bell pepper, garlic, cumin, chili powder, smoked paprika, cilantro, and a sprinkle of salt and pepper. Stir until all is well combined. Let the mixture rest for about 10 minutes. This helps it firm up, making it easier to shape into patties. Now, divide the mixture into four equal parts. Shape each part into a patty. If it feels sticky, wet your hands to shape them better. Heat olive oil in a large skillet over medium heat. Once hot, add the patties. Cook for 5 to 6 minutes on each side. You want a golden-brown color and the patties heated through. If you like toasted buns, place them on a pan or grill until golden. Shaping patties can be tricky. Here are some tips to help. First, dampen your hands if the mixture sticks. This makes the process smoother. Second, make the patties slightly thicker in the center. They will cook evenly this way. When cooking, avoid overcrowding the skillet. This allows for even cooking and browning. Use medium heat for best results. If the heat is too high, the outsides may burn before the insides cook through. Assemble your veggie burger with care. Start with the bottom half of the bun. Place a patty on it. Then, layer on fresh lettuce, juicy tomato slices, and creamy avocado. Don’t forget your favorite condiments, like mustard or ketchup, for more flavor. Finally, add the top half of the bun. To make it more inviting, serve the burgers on a wooden board. Add colorful toppings beside them. A side of sweet potato fries pairs nicely too, making for a delightful meal. For the full recipe, check the earlier sections. You can cook veggie burgers in several ways. Each method has its perks. - Pan-Frying: This method gives you crispy edges. Use a non-stick skillet. Heat olive oil over medium heat. Cook patties for 5-6 minutes on each side. - Baking: Preheat your oven to 400°F (200°C). Place the patties on a lined baking sheet. Bake for about 20-25 minutes. Flip halfway for even cooking. - Grilling: This adds a smoky flavor. Use a grill or grill pan. Preheat it well. Cook each patty for 5-6 minutes per side. Many people face issues when making veggie burgers. Here are some tips to avoid mishaps. - Too Crumbly: If your patties fall apart, add more binding agents like breadcrumbs or mashed beans. - Too Sticky: Dampen your hands when shaping the patties. This helps prevent sticking. - Overcooking: Keep an eye on the time. Overcooked patties can dry out quickly. You can boost the taste and texture of your veggie burgers in many ways. - Season Well: Use spices like cumin and paprika for depth. Fresh herbs like cilantro can brighten the flavor. - Add Texture: Mix in chopped nuts or seeds for crunch. This adds a fun twist. - Experiment with Toppings: Try different combinations. Avocado, jalapeños, or pickled onions can add new layers of flavor. For a full recipe, check the Ultimate Quinoa Black Bean Veggie Burger recipe above. Enjoy the process of making your veggie burger delightful and wholesome! {{image_4}} Veggie burgers come in many great types. Each one brings its own taste and texture. Lentil burgers are hearty and filling. They mix well with spices and herbs. Chickpea burgers offer a nutty flavor. They are also great for adding creamy tahini or zesty lemon juice. You can try black bean burgers too. They have a rich taste and pair well with smoky spices. Each type of veggie burger can be a satisfying meal. Want to kick up the flavor? Try adding different ingredients to your veggie burger mix. You can use grated carrots for sweetness. Chopped spinach adds color and nutrients. Sun-dried tomatoes bring a tangy bite. You can also mix in chopped nuts or seeds for crunch. Fresh herbs like basil or parsley add a bright taste. Don't forget cheese if you like it! Adding a bit of feta or cheddar creates creaminess. Each add-in makes the burger unique and delicious. Making a vegan or gluten-free burger is easy. You can swap breadcrumbs for ground oats or almond flour. This keeps your burger gluten-free and tasty. For a vegan option, use flaxseed and water to bind the patties. Just mix one tablespoon of flaxseed with three tablespoons of water and let it sit. This creates a great egg substitute. You can still enjoy the same flavors and textures. No one will miss the meat! These options make your veggie burger nice for everyone. For the full recipe, check out the Ultimate Quinoa Black Bean Veggie Burger. It’s a delightful way to enjoy wholesome ingredients! Storing leftover veggie burgers is easy. First, let the patties cool down to room temperature. Place them in an airtight container. If you have extra toppings, store them separately. This keeps everything fresh and tasty. Store the container in the fridge. Leftover veggie burgers last about three days. When you are ready to eat, you can reheat them easily. Freezing your veggie burger patties can save time. After shaping them, place the patties on a baking sheet. Make sure they are not touching. Freeze them for about two hours. Once they are solid, transfer them to a freezer bag. Label the bag with the date. Frozen patties can last for up to three months. This method keeps them fresh and ready for a quick meal. Reheating veggie burgers can be tricky. To get the best texture, use a skillet. Heat a little olive oil over medium heat. Add the patties and cook for about 5 minutes on each side. This method helps them stay crispy. You can also reheat them in the oven. Set the oven to 350°F (180°C) and bake for about 10-15 minutes. Check that they are heated all the way through. Enjoy your delicious veggie burger just like when it was fresh! If you need a substitute for breadcrumbs, try using oats. Just blend them into a fine powder. You can also use crushed nuts or seeds for a crunchy texture. Other options include cooked rice or ground flaxseed mixed with water. These alternatives work well in keeping your veggie burger firm. You can tell if the patties are fully cooked by checking their color. They should be golden brown on the outside. Use a food thermometer to check the inside temperature. It should reach at least 165°F (74°C). A firm texture will also show they are done. Yes, you can absolutely grill these veggie burgers! First, make sure to preheat your grill. Lightly oil the grill grates to prevent sticking. Place the patties on the grill and cook for about 5-6 minutes on each side. This method gives them a lovely smoky flavor. Enjoy your homemade veggie burger delight! This blog post covered the key parts of making veggie burgers. We discussed the main ingredients, their health benefits, and possible substitutes. I shared step-by-step cooking instructions, plus tips for shaping and serving. You learned about different variations and how to properly store leftovers. Finally, I answered common questions. Enjoy making your veggie burgers. They are tasty, healthy, and fun to prepare. Keep experimenting with flavors and ingredients to find your perfect mix!

Homemade Veggie Burger Delightful and Wholesome Meal

Looking for a delicious meal that’s also good for you? You’ve come to the right place! I’ll show you how

- 1 cup rolled oats - 1 cup almond flour - 1/2 cup finely grated carrots These main ingredients form the base of your energy bites. Rolled oats give texture and fiber. Almond flour adds a nutty flavor and healthy fats. Finely grated carrots bring sweetness and moisture. - 1/4 cup honey or pure maple syrup - 1/4 cup unsweetened shredded coconut - 1/4 cup chopped walnuts (optional) - 1/4 cup raisins For sweetness, you can use honey or maple syrup. Shredded coconut adds a tropical flair. If you like a crunch, add walnuts. Raisins bring a chewy texture and extra sweetness. - 1/2 teaspoon ground cinnamon - 1/4 teaspoon ground nutmeg - 1/4 teaspoon ground allspice - A pinch of sea salt The spices make these bites pop with flavor. Cinnamon offers warmth, while nutmeg and allspice give depth. A pinch of sea salt balances the sweetness. This recipe is easy to follow. You can find the full recipe above. Enjoy your tasty and healthy snack! - In a large mixing bowl, combine: - 1 cup rolled oats - 1 cup almond flour - 1/2 cup finely grated carrots - 1/4 cup unsweetened shredded coconut - A pinch of sea salt Use a wooden spoon to mix until all dry ingredients blend well. - In a separate bowl, whisk together: - 1/4 cup honey or pure maple syrup - 1/2 teaspoon ground cinnamon - 1/4 teaspoon ground nutmeg - 1/4 teaspoon ground allspice Make sure this mixture is smooth with no lumps. - Pour the wet mixture into the bowl with dry ingredients. - If you want, add: - 1/4 cup chopped walnuts - 1/4 cup raisins Stir everything together until the mixture is sticky and evenly mixed. - With clean hands, take small bits of the mixture. - Roll them into bite-sized balls, about 1 inch wide. This will make around 15 bites. - Line a baking sheet with parchment paper. Place the energy bites on it, leaving space between them. - Refrigerate for 30 minutes to let them set. Once they firm up, you can enjoy your tasty and healthy snack anytime! For the full recipe, you can refer to the recipe section above. Mixing your ingredients right is key for tasty energy bites. Start by blending the dry items well. This includes the rolled oats, almond flour, and shredded coconut. Make sure there are no clumps. Then, whisk the wet ingredients in a separate bowl. This helps to combine the honey or maple syrup with spices smoothly. When you add the wet mix to the dry one, stir until it feels sticky. If it's too dry, add a bit more honey or syrup. The right texture should be moldable but not too wet. To keep your energy bites fresh, store them in an airtight container. This prevents them from drying out. Place them in the fridge for the best taste. They can last up to one week when stored this way. If you want to keep them longer, try freezing them. Just make sure to wrap each bite tightly to avoid freezer burn. Presentation adds fun to your snacks! When serving your energy bites, use a decorative plate. This makes them look inviting. You can sprinkle shredded coconut or chopped walnuts around them for extra flair. It creates a lovely display that tempts anyone to try them. Remember, we eat with our eyes first! {{image_4}} To make your carrot cake energy bites even more fun, you can add chocolate chips. This sweet twist gives a delightful surprise in every bite. You might also try different nuts or seeds. Pecans or sunflower seeds can add nice crunch and flavor. If you need a gluten-free option, you can swap almond flour for gluten-free flour. This small change keeps the taste and texture great. For a vegan version, use maple syrup instead of honey. Both options keep your bites tasty and suitable for everyone. You can also change the spices based on the season. In winter, add more cinnamon for warmth. In spring, try fresh herbs like mint for a light touch. If you want a fall flavor, mix in pumpkin puree. It gives a lovely color and taste to your bites. Feel free to explore these variations to make the recipe your own. For the full recipe, check out the details above! To keep your carrot cake energy bites fresh, refrigerate them right after making them. Place them in an airtight container. This keeps moisture in and air out. You can enjoy them for up to a week. If you want to store them for longer, freezing is a great option. Just place your bites in a freezer-safe bag or container. They can last for about three months in the freezer. When you're ready to eat, thaw them in the fridge overnight. Carrot cake energy bites stay fresh for about a week in the fridge. If you freeze them, they last up to three months. Signs that your energy bites have gone bad include a change in smell or a slimy texture. If they look or smell off, it's best to throw them away. Always trust your senses to keep your snacks safe. For snacking, a suggested serving size is about two bites. This gives you a good energy boost without overindulging. Portion control helps you enjoy treats while keeping a balanced diet. These energy bites offer healthy fats, fiber, and natural sugars. Eating in moderation helps maintain your energy levels throughout the day. Yes, you can substitute oat flour for almond flour. Oat flour gives a different texture, but it works well. You may need to adjust the liquid in the recipe. Oat flour is gluten-free, making it a great option for those with gluten issues. If you use oat flour, the bites may be softer. Each energy bite has about 90 calories. This can vary based on the exact ingredients you use. For example, adding more nuts or sweetener will increase the calorie count. These bites are a great snack that gives you energy without too many calories. They are a healthy option for a quick treat. Yes, you can make these bites nut-free. Just leave out the almond flour and optional walnuts. You can replace almond flour with sunflower seed flour or pumpkin seed flour. These options provide great texture and flavor. Remember to check for nut allergies when sharing these bites! Carrot cake energy bites are simple and tasty. We covered the key ingredients like oats, almond flour, and carrots. You learned how to mix and form these bites, plus great tips on storage. Don’t forget to add your favorite twists, like chocolate chips or spices! These bites are not just fun to make; they are a healthy snack too. Enjoy your tasty creations and feel good about your healthy choices!

Carrot Cake Energy Bites Tasty and Healthy Snack

Looking for a snack that’s both tasty and healthy? Carrot Cake Energy Bites tick all the boxes! These little bites

- 1 cup water - 2 tablespoons granulated sugar - 1/2 teaspoon salt - 2 tablespoons vegetable oil - 1 cup all-purpose flour - 2 large eggs - 1 teaspoon vanilla extract - 1 cup granulated sugar (for coating) - 2 teaspoons ground cinnamon - Oil for frying (enough for deep frying) To make the best cinnamon sugar churros, you need simple ingredients. Start with water, sugar, salt, and vegetable oil to form the base. The all-purpose flour gives the dough its structure. Eggs and vanilla extract add richness and flavor. For the sweet coating, you’ll mix granulated sugar with ground cinnamon. Lastly, you need oil for frying. Make sure you have enough oil to submerge the churros for even cooking. These ingredients are easy to find, and they come together to create a delicious treat you can't resist. For the full recipe, see the link above. First, you need to bring the water, sugar, salt, and oil to a boil. In a medium saucepan, combine: - 1 cup water - 2 tablespoons granulated sugar - 1/2 teaspoon salt - 2 tablespoons vegetable oil Stir the mix well, then heat it over medium heat. Once it reaches a rolling boil, remove it from heat. Next, mix in 1 cup of all-purpose flour. Stir with a wooden spoon until it forms a smooth dough. It should pull away from the sides of the pan easily. Let the dough cool for about 5 minutes. Then, add 2 large eggs and 1 teaspoon of vanilla extract. Mix until the dough is smooth and cohesive. Now it's time to fry! Heat oil in a deep frying pan or heavy pot. You need enough oil to submerge the churros, about 2-3 inches deep. The oil should be around 350°F (175°C). Carefully pipe strips of dough, about 6 inches long, directly into the hot oil. Use scissors to trim the dough as you pipe it. Fry the churros until they turn golden brown, about 2-3 minutes on each side. After frying, lift the churros out with a slotted spoon. Place them on a plate lined with paper towels to soak up excess oil. In a shallow dish, mix together 1 cup of granulated sugar and 2 teaspoons of ground cinnamon. While the churros are still warm, roll them in this cinnamon-sugar mixture. This step gives them their signature sweet and spicy flavor. For the best presentation, stack the churros in a tall glass or serve with warm chocolate sauce for dipping. Enjoy your delicious treat! For the full recipe, check out the detailed steps I shared earlier. To make great churros, dough consistency is key. You want a smooth and thick mixture. If your dough is too wet, your churros will fall apart. If it’s too dry, they won’t puff up. Here are some tips to help you achieve that crispy texture: - Use the right flour: All-purpose flour works best for churros. - Rest the dough: Let it cool for five minutes before adding eggs. This helps the dough hold its shape. - Pipe with care: Use a star-shaped nozzle to create ridges. This gives the churros a better crunch. - Fry in batches: Avoid overcrowding the pan. This keeps the oil temperature stable and helps them fry evenly. Frying churros can be fun, but safety is important. Hot oil can be dangerous if not handled properly. Here are some safety tips: - Use a deep pot: This helps prevent oil splashes. - Check oil temperature: Use a thermometer to ensure the oil is around 350°F (175°C) before frying. - Stay alert: Keep children away from the frying area. - Wear an apron: This protects you from any hot oil splatters. Common frying mistakes can lead to soggy churros. Make sure to avoid these: - Not waiting for the oil to heat: Always wait until it's hot enough to fry. - Piping too long: Keep churros around 6 inches to prevent them from becoming too thick. - Frying too long: Watch them closely to avoid burning. These tips will help you create delicious churros with the right texture and safety! For the full recipe, check out the link. {{image_4}} You can get creative with churros! One fun twist is chocolate-filled churros. To make these, pipe your dough into strips, then fill them with warm chocolate before sealing them shut. The chocolate oozes out when you take a bite, making it a rich treat. Another great option is pumpkin spice churros. Add pumpkin puree and pumpkin spice to your dough. This gives your churros a warm flavor that’s perfect for fall. If you need gluten-free churros, swap out regular flour for a gluten-free mix. It works just as well and keeps the taste delightful. For vegan churros, replace eggs with flaxseed meal mixed with water. Use plant-based milk instead of regular milk to keep it creamy. These options let everyone enjoy churros! To keep your churros fresh, store them in an airtight container. Place parchment paper between layers to prevent sticking. This method helps maintain their crispiness. Churros are best enjoyed within 1 to 2 days at room temperature. After that, they may lose their crunch and flavor. For long-term storage, you can freeze churros. Allow them to cool completely first. Then, place them in a single layer on a baking sheet and freeze for 1-2 hours. After freezing, transfer them to a freezer bag. Make sure to press out as much air as possible. Churros can be stored this way for up to 2 months. When you're ready to enjoy your churros again, reheat them. Preheat your oven to 350°F (175°C). Place the frozen churros on a baking sheet. Bake for about 10-12 minutes, or until they are heated through and crispy again. This method keeps them tasty and enjoyable. For the full recipe, check out the Crispy Cinnamon Sugar Churros section! To make churros crispy, follow these tips: - Heat oil properly: Ensure your oil is around 350°F (175°C). Too cool oil can make churros soggy. - Fry in small batches: This helps maintain the oil temperature. - Drain excess oil: Use a slotted spoon and place churros on paper towels right after frying. - Roll in sugar while warm: This adds a nice crunch and flavor. These steps help churros get that perfect, crispy exterior. You’ll enjoy the contrast with the soft center. Yes, churros can be made in advance. Here’s how: - Storage: Let them cool completely. Store in an airtight container at room temperature for up to two days. - Reheating: To enjoy them warm, heat in an oven at 350°F (175°C) for about 5-7 minutes. This keeps them tasty and fresh even when made ahead of time. Churros have a rich history. They likely originated in Spain. They are popular in many Spanish-speaking countries. - Churros were made by shepherds. They could easily cook them over an open fire. - In Mexico, churros are often enjoyed with hot chocolate. This treat is now loved worldwide. They symbolize comfort and joy in many cultures. You can find churros at: - Local bakeries: Many bakeries make fresh churros daily. - Food trucks: Look for trucks that specialize in sweets or desserts. - Popular chains: Places like Disneyland or fairs often sell churros. These spots are great for grabbing a sweet treat on the go. For the complete recipe of "Crispy Cinnamon Sugar Churros," check out the [Full Recipe]. In this blog post, we explored how to make delicious churros from scratch. We covered all the ingredients needed, detailed each step, and shared tips for perfect texture. Remember, safety while frying is key to enjoying your treat. Variations like chocolate-filled options can add fun twists. For storage, follow the best practices to enjoy churros later. With these insights, you can create tasty, crispy churros to share and enjoy. Just follow the steps, and you'll impress everyone with your skills. Happy frying!

Cinnamon Sugar Churros Irresistible and Easy Treat

Who can resist warm, crispy cinnamon sugar churros? In this post, I’ll guide you through an easy recipe that turns

To make Lemon Blueberry Overnight Oats, gather these simple ingredients: - 1 cup rolled oats - 1 cup unsweetened almond milk (or any milk of your choice) - 1/2 cup Greek yogurt (choose plain or vanilla for added flavor) - 1/2 cup fresh blueberries (plus extra for garnishing) - Zest of 1 lemon - 2 tablespoons fresh lemon juice - 2 tablespoons honey or maple syrup (adjust for your preferred level of sweetness) - 1/2 teaspoon vanilla extract - A pinch of salt You can easily adapt this recipe for different diets. Here are some options: - For vegan oats, swap Greek yogurt with coconut yogurt. - If you are lactose intolerant, use lactose-free yogurt. - Replace honey with agave syrup for a vegan-friendly sweetener. - Use rolled oats for gluten-free oats. Just ensure they are certified gluten-free. - Try using any fruit you like instead of blueberries, such as strawberries or raspberries. Each serving of Lemon Blueberry Overnight Oats is packed with nutrition. Here’s a quick overview: - Calories: Approximately 300 - Protein: About 10 grams - Carbohydrates: Roughly 50 grams - Dietary Fiber: Around 8 grams - Sugars: About 15 grams (natural sugars from fruit and sweeteners) - Fats: Approximately 7 grams (mostly healthy fats from yogurt and milk) This recipe provides a good balance of nutrients, making it a great start to your day. For the full recipe, check the details above. To make lemon blueberry overnight oats, gather your ingredients first. You will need rolled oats, almond milk, Greek yogurt, blueberries, lemon zest, lemon juice, honey or maple syrup, vanilla extract, and salt. Start by mixing rolled oats with almond milk in a medium bowl or a large mason jar. This step helps the oats soak up the liquid and soften overnight. Next, add the Greek yogurt. It adds creaminess and protein to your breakfast. Then, mix in the lemon zest and lemon juice for that fresh, zesty flavor. Sweeten your oats with honey or maple syrup. Adjust the sweetness to your taste. Finally, stir in the vanilla extract and a pinch of salt for balance. When you mix the ingredients, stir vigorously. Make sure all the oats are coated well. This ensures even flavor throughout. After mixing, gently fold in most of the blueberries. Reserve a few for garnishing later. If you want to layer your oats, alternate layers of oats and blueberries in your jar or bowl. This adds a nice visual appeal. After letting your oats sit overnight, check the consistency. If they seem too thick, add a splash of almond milk. Stir well to combine. You want your oats creamy but not runny. Serving them in bowls is great, or you can keep them in the jar for a quick meal. Garnish with extra blueberries and a drizzle of honey or syrup for a sweet finish. For the full recipe, refer to the provided instructions. For the best flavor, use fresh ingredients. Fresh blueberries pop with taste. Fresh lemon juice adds a bright zing. Feel free to adjust the lemon juice. More juice gives more tartness. Less lemon juice makes it sweeter. You can also mix in herbs like mint for a fun twist. Store leftover oats in an airtight container. This keeps them fresh in the fridge. They last for up to three days. If they get thick, add a splash of milk. This helps restore the creamy texture. You can also top with extra blueberries or a drizzle of honey when serving. You can prepare your overnight oats in advance. Make a batch for the week. Just layer the oats in jars. Customize each jar with different toppings. This makes breakfast fun and varied. Try adding chia seeds for extra nutrients. You can also switch up the fruits for a new flavor each time. For the full recipe, check out the earlier section. {{image_4}} You can change up the fruits in your Lemon Blueberry Overnight Oats. Try using strawberries, raspberries, or blackberries. Each fruit brings its own taste. For a tropical twist, add pineapple or mango. You can also mix in dried fruits like cranberries or raisins for added sweetness. To make this dish vegan, swap Greek yogurt for coconut yogurt. Use almond milk or any plant-based milk. Replace honey with maple syrup or agave for sweetness. This way, you can enjoy the same great taste without any animal products. Top your oats with nuts or seeds for crunch. Chia seeds or flax seeds add healthy fats. You can also sprinkle granola on top for extra texture. Consider adding a dollop of nut butter for creaminess and flavor. Fresh herbs like mint can add a refreshing touch. For more ideas, check out the full recipe and get creative! You can store your lemon blueberry overnight oats in a mason jar or a bowl. Make sure to cover it well. This keeps the oats fresh and tasty. I like using jars because they are easy to grab. These oats will stay good in the fridge for about 3 to 5 days. The flavors mix better as they sit. However, they are best eaten within the first couple of days. After that, the texture can change. You can freeze your overnight oats for up to 3 months. Use airtight containers or freezer bags. Just remember to leave space, as the oats will expand when frozen. To enjoy, thaw them overnight in the fridge. You can also heat them in the microwave. Just add a splash of almond milk if they seem dry. For more tips, check the Full Recipe. Yes, you can use quick oats. They will soak up liquid faster. This change may alter the texture, making it creamier. Rolled oats provide a chewier bite. If you prefer quick oats, adjust the soak time. Start with 2-4 hours and check for taste. These oats can last up to five days in the fridge. Store them in a sealed container. If you notice any change in smell or texture, discard them. Freshness is key for taste and safety. You can use any yogurt you like. Try coconut yogurt for a dairy-free option. If you need a lower-fat choice, use low-fat yogurt. Silken tofu blended can also work. These options still give creaminess. Yes, making overnight oats without dairy is perfectly fine. Use plant-based milk like almond or oat milk. You can also replace yogurt with non-dairy alternatives. This keeps your oats tasty and suitable for vegan diets. Absolutely! You can make a batch for several days. Just store each serving in its own container. This makes mornings easier and saves time. Preparing multiple servings also helps maintain freshness. For the best flavor, eat within five days. For the full recipe, check the detailed instructions. Lemon blueberry overnight oats are easy to make and delicious. We've covered the key ingredients, steps for preparation, and tips for storage. You can mix and match flavors to suit your taste. Remember, you can prep several servings at once for the week. Enjoy experimenting with the recipe. With these tips, you’ll create a tasty, healthy meal that fits your diet. Get started on your healthy journey today!

Lemon Blueberry Overnight Oats Energizing Breakfast Idea

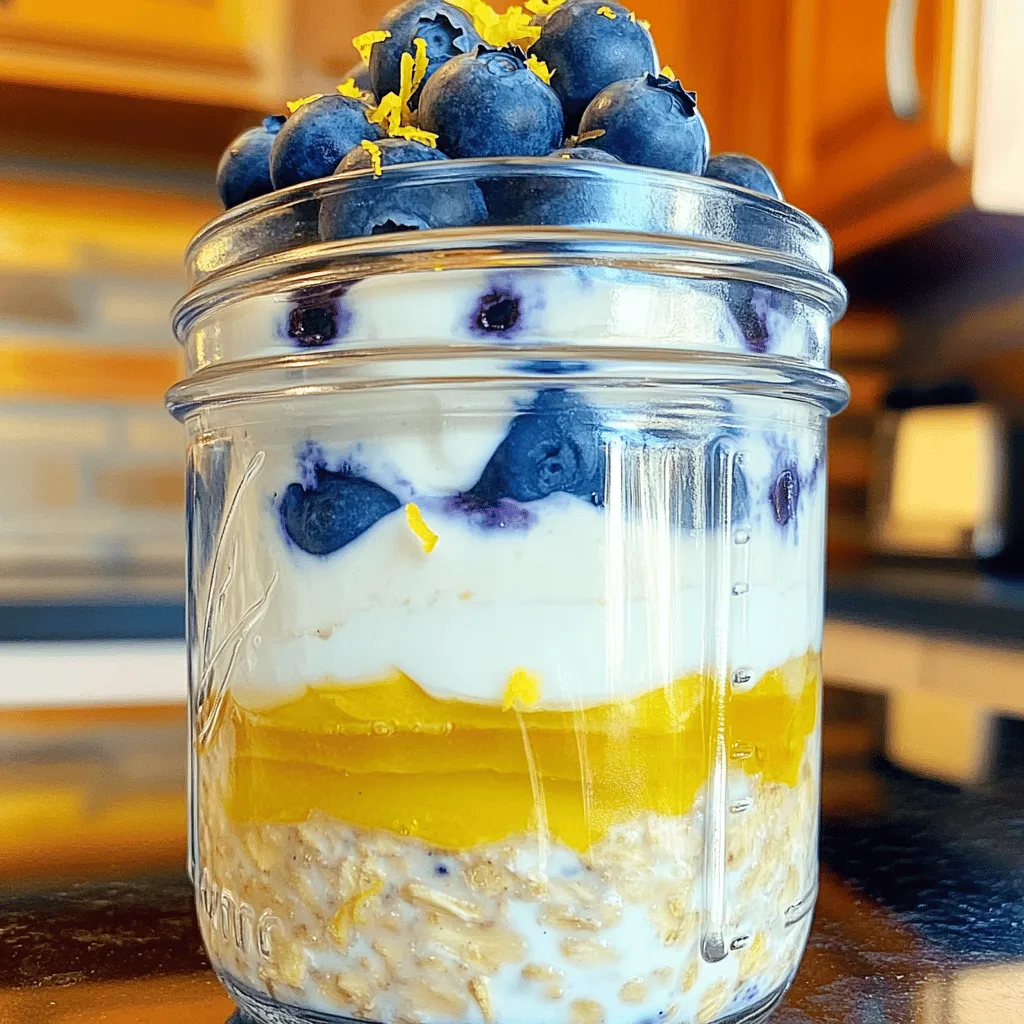
Start your day with a burst of sunshine! These Lemon Blueberry Overnight Oats are a bright and tasty breakfast. You’ll

- 1 medium head of cauliflower - 1 cup all-purpose flour (or gluten-free alternative) - 1 cup unsweetened almond milk (or preferred plant-based milk) - Garlic powder - Onion powder - Smoked paprika - Sea salt - Black pepper - Buffalo sauce - Fresh parsley, finely chopped To make these Air Fryer Cauliflower Buffalo Bites, you need fresh cauliflower. I love using a medium head, as it gives you enough florets to share. Next, all-purpose flour works best for the batter, but feel free to swap it with your favorite gluten-free flour if needed. Unsweetened almond milk blends well, but any plant-based milk you like will work just fine. For the exciting flavor, grab garlic powder, onion powder, and smoked paprika. These spices add depth and warmth to the bites. Don't forget sea salt and black pepper; they enhance all the flavors. Finally, buffalo sauce is what turns these bites into a spicy treat. Adjust the amount based on your heat preference. To garnish, I love using fresh parsley. It adds a pop of color and freshness to your dish. You can find the full recipe [here](insert link). - Preheat air fryer to 400°F (200°C). - In a bowl, mix flour, garlic powder, onion powder, smoked paprika, sea salt, and pepper. - Dip each cauliflower floret into the batter. - Make sure each piece is fully coated for great flavor. - Place the florets in a single layer in the air fryer. - Air fry for 10-12 minutes, shaking halfway through. - Once they are golden and crispy, transfer them to a bowl. - Drizzle with buffalo sauce and olive oil. Toss to coat. - For extra crispiness, put them back in the air fryer for 5 more minutes. - Remove and let them cool for a minute. - Sprinkle with parsley before serving. These bites are bold and flavorful, perfect for any gathering! For detailed instructions, check the Full Recipe. To get that perfect crunch, coat each floret well. The batter should stick evenly. Space is key during air frying. Do not crowd the basket; this helps them cook evenly. Every air fryer is different, so you might need to adjust your cooking time. Keep an eye on them after 10 minutes. Looking to spice things up? Try adding a pinch of cayenne for extra heat. You can also use different seasonings like cumin or chili powder for a twist. If the sauce feels too spicy, mix in some maple syrup or honey. This balances the heat while keeping the flavor bold. Serve these bites in a rustic bowl for a cozy feel. Pair them with crunchy celery sticks. Don’t forget the dips! Creamy ranch or tangy blue cheese dressing works great. For a pop of color, sprinkle fresh parsley on top. It makes the dish inviting and fresh. For the full recipe, check out the details above. {{image_4}} You can switch up the recipe with gluten-free flour. Almond flour or rice flour work well. If you want a different taste, try using different sauces. BBQ sauce or teriyaki sauce adds a sweet twist. Spicy chili sauce can heat things up. Experiment with seasonings like cayenne or Italian herbs for a new flavor profile. For a vegan option, use plant-based milk in the batter. Replace the buffalo sauce with a vegan-friendly brand. You can also make a low-carb version. Try almond flour or coconut flour instead of all-purpose flour. Serve the bites with a low-carb dipping sauce to keep it healthy. These bites pair well with fresh salads or crunchy veggies. Serve them with celery sticks for a classic touch. A side of creamy ranch or tangy blue cheese dressing enhances the flavor. You might also enjoy them with a light cucumber salad for a refreshing balance. Check out the Full Recipe for more ideas! Store your leftover cauliflower bites in an airtight container. This keeps them fresh and tasty. They can stay good in the fridge for about 3 to 5 days. To freeze cauliflower bites, let them cool completely first. Then, place them in a freezer-safe bag or container. Make sure to remove as much air as possible. For best taste, eat them within 2 to 3 months. When ready to eat, reheat in the air fryer. This helps keep them crispy! Look for signs of spoilage before eating. If the bites smell off or have a slimy texture, it's best to toss them. Freshness is key for great flavor and safety! Yes, you can make these bites ahead of time. To store them, let the bites cool completely. Place them in an airtight container. They will stay fresh in the fridge for up to 3 days. If you want to reheat them, use your air fryer at 350°F (175°C) for about 5 minutes. This keeps them crispy. You can also reheat them in the oven for the same time and temperature. These bites taste great with dips. Here are some options to consider: - Creamy ranch dressing - Tangy blue cheese dressing - Spicy sriracha mayo - A fresh veggie platter with celery sticks These pairings enhance the flavor and add a crunchy texture. You can also serve them as a part of a game day spread or a fun snack for a movie night. Air Fryer Cauliflower Buffalo Bites are a healthier choice compared to traditional fried snacks. Cauliflower is low in calories and high in fiber. It also provides vitamins C and K. The batter uses almond milk and a small amount of flour, which adds some carbohydrates. Adjust the buffalo sauce to manage the heat. You can also make them gluten-free with a substitute flour. Enjoy them as a snack or appetizer without the guilt! You now have all you need to make tasty Air Fryer Cauliflower Buffalo Bites. Remember to prepare the batter, season the florets, and air fry them for the best results. Don’t forget to toss them in buffalo sauce for that spicy kick! You can customize the recipe with different sauces and sides, too. These bites are great for sharing or enjoying alone. Have fun experimenting with flavors and enjoy your healthier snack!

Air Fryer Cauliflower Buffalo Bites Bold and Flavorful

Get ready to take your snacking to the next level with Air Fryer Cauliflower Buffalo Bites! Bursting with bold flavors

To make these tasty tacos, you need: - 2 medium sweet potatoes, peeled and diced into 1-inch cubes - 1 can (15 oz) black beans, rinsed thoroughly and drained - 1 tablespoon extra virgin olive oil - 1 teaspoon ground cumin - 1 teaspoon smoked paprika - ½ teaspoon chili powder - Salt and freshly ground black pepper to taste - 8 small corn tortillas (preferably fresh or homemade) The sweet potatoes are the star here. They add a natural sweetness and creamy texture. The black beans bring protein and fiber, making these tacos filling. Feel free to customize your tacos with these toppings: - 1 ripe avocado, sliced - ½ cup red cabbage, finely shredded - ¼ cup fresh cilantro, roughly chopped - Lime wedges for serving These toppings add color and crunch. The avocado gives a creamy feel, while the lime juice adds a zesty kick. These tacos pack a punch in nutrition. They are rich in vitamins, minerals, and fiber. One serving has about: - Calories: 350 - Protein: 12g - Carbs: 60g - Fat: 10g This makes them a great choice for a healthy meal. You get energy from the carbs and protein from the beans. Enjoy your Sweet Potato Black Bean Tacos with the full recipe to guide you! First, I preheat the oven to 425°F (220°C). This step is key for roasting the sweet potatoes. I take two medium sweet potatoes and peel them. Next, I dice them into 1-inch cubes. In a mixing bowl, I add the diced sweet potatoes, one tablespoon of extra virgin olive oil, one teaspoon of ground cumin, one teaspoon of smoked paprika, and half a teaspoon of chili powder. I sprinkle in salt and pepper to taste. I then toss everything together until the sweet potatoes are well-coated with the spices. Once they are ready, I spread the sweet potatoes on a large baking sheet lined with parchment paper. I make sure the cubes are in a single layer. This helps them roast evenly. I place the baking sheet in the oven and roast for 25-30 minutes. Halfway through, I stir the sweet potatoes to ensure they brown evenly and become tender. While the sweet potatoes roast, I focus on the black beans. I pour one can of black beans, rinsed and drained, into a small saucepan. I heat them over medium heat, stirring occasionally. In about 5-7 minutes, the beans warm through completely. I taste them and add a bit more salt and pepper if needed. Now, it's time to put everything together. I warm eight small corn tortillas in a dry skillet over medium heat. Each side gets about 30 seconds. This makes them flexible and easier to fold. On a plate, I place a warm tortilla and add a generous scoop of the roasted sweet potatoes. Then, I add a spoonful of the warmed black beans. To finish it off, I top with slices of ripe avocado, a handful of finely shredded red cabbage, and a sprinkle of fresh cilantro. Finally, I serve the tacos with lime wedges on the side. A squeeze of lime juice adds a fresh zing. For the full recipe, check out the details above. To get sweet potatoes just right, cut them into 1-inch cubes. This size helps them cook evenly. Toss them in olive oil and spices like cumin and smoked paprika. Roast at 425°F for 25 to 30 minutes. Halfway through, stir them to ensure they brown nicely. You want them soft inside and slightly crispy outside. This gives your tacos great texture and flavor. For the best tacos, use small corn tortillas. They have a nice flavor and hold up well. You can also try fresh or homemade tortillas for a special touch. Warm them in a skillet for about 30 seconds on each side. This makes them soft and easy to fold. A good tortilla is key to a tasty taco experience. Serve your tacos with lime wedges. Squeezing fresh lime juice adds brightness. You can also add creamy avocado and crunchy red cabbage. These toppings balance the sweet potatoes and black beans. For extra flavor, serve with salsa or your favorite hot sauce. You can even place the tacos on a colorful platter to impress your guests. Enjoy your homemade Sweet Potato Black Bean Tacos with these fun ideas! Check the Full Recipe for more details. {{image_4}} If you want more protein in your sweet potato black bean tacos, consider adding meat. Chicken, beef, or pork work well. Cook the meat simply with salt and pepper. You can also use ground turkey or shredded rotisserie chicken for ease. Just warm the meat and mix it into the taco filling. This adds flavor and makes the meal more filling. For a gluten-free version, use corn tortillas. They are naturally gluten-free and provide a nice texture. Ensure your black beans do not contain any added gluten. Double-check the labels to be safe. You can also add quinoa or rice for more texture and nutrients. Both are gluten-free and pair nicely with sweet potatoes. Spice up your tacos by changing the seasonings. Try adding cayenne for heat or oregano for a Mediterranean twist. If you love a smoky flavor, use chipotle powder instead of smoked paprika. You can even go sweet with a pinch of cinnamon. Each spice brings a new taste that keeps your tacos exciting. Feel free to mix and match spices to find your favorite blend. For the full recipe and more ideas, check out the details above! To store leftover tacos, place them in an airtight container. Keep them in the fridge for up to three days. Make sure the tacos are cool before sealing the container. If you have extra toppings, store them separately. This keeps everything fresh and tasty. To reheat, use a skillet over medium heat. Warm the tacos for about two minutes on each side. This method keeps the tortillas soft and the fillings warm. You can also use the microwave if you're in a hurry. Just place the tacos on a plate and cover them with a damp paper towel. Heat for 30 seconds, then check if they're warm. You can freeze the sweet potato and black bean filling. Place it in a freezer-safe bag. Remove as much air as possible to avoid freezer burn. It can last for up to three months in the freezer. When ready to use, thaw it in the fridge overnight. Reheat it in a skillet before serving. Enjoy your tacos anytime with this easy method! For the full recipe, refer to the beginning of this article. Yes, you can prep these tacos early. Roast the sweet potatoes and warm the black beans. Store them in separate containers. You can keep them in the fridge for up to three days. When ready to eat, just reheat the filling and warm the tortillas. This makes for a quick meal. If you want a change, try pinto beans or chickpeas. Both will add good taste and texture. You can also use lentils for a different twist. Just make sure any beans are cooked and seasoned well. Absolutely! These tacos are great for meal prep. Prepare a big batch of the filling. You can store it in the fridge and assemble tacos as needed. This saves time and helps you enjoy healthy meals all week. Each taco has about 200-250 calories, depending on the toppings you use. Sweet potatoes and black beans are nutritious and filling. You get fiber and vitamins in each bite. For the full recipe, check out the section above. This blog post showed you how to make tasty sweet potato black bean tacos. We covered the main ingredients, cooking steps, and expert tips for the best results. You learned about storage, meal prep, and optional variations to fit your taste. These tacos are easy and fun to make. With all the added tips, you’ll impress your family and friends with your cooking. Enjoy your tacos and feel good about your healthy choices!

Sweet Potato Black Bean Tacos Flavorful and Filling

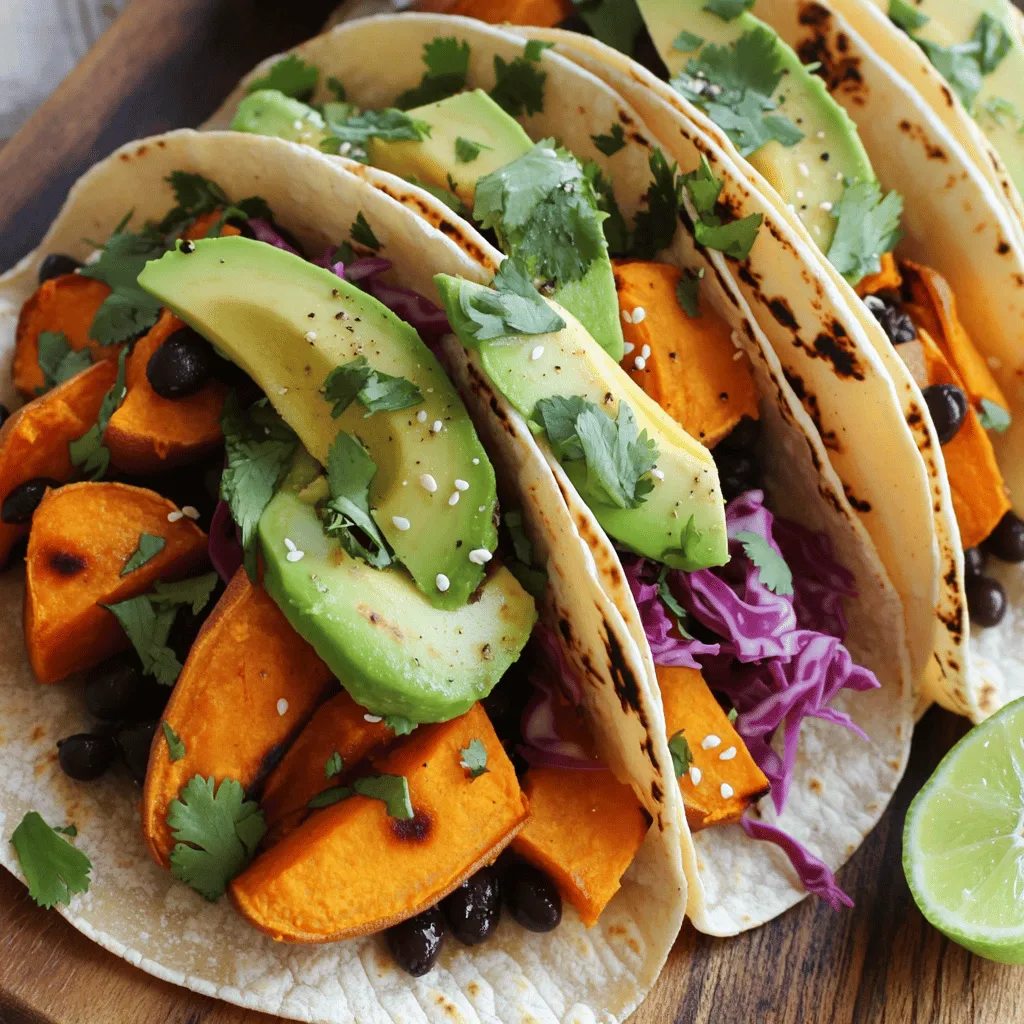
Looking for a new way to enjoy tacos? Sweet Potato Black Bean Tacos are your answer! These tasty treats combine

To make this creamy delight, you need just a few simple ingredients: - 1 cup coconut milk (either canned or freshly made) - 1/4 cup chia seeds - 2 tablespoons maple syrup (or honey for sweetness) - 1 ripe mango, diced into small cubes - 1 teaspoon pure vanilla extract - A pinch of salt These ingredients work together to create a rich and flavorful pudding. Coconut milk gives it a creamy base, while chia seeds add texture. The mango offers a sweet and fruity burst that beautifully complements the dish. You can enhance your pudding with a few garnishes: - Fresh mint leaves for a pop of color - Extra mango cubes for a delightful touch These add more flavor and make your dish look even more appealing. If you need to swap out any ingredients, consider these options: - Almond milk or oat milk can replace coconut milk. - Agave nectar is a great alternative to maple syrup. - Any ripe fruit can work instead of mango. Consider berries or peaches. These substitutions keep the pudding tasty while catering to your needs. Making mango coconut chia pudding is simple. First, gather all your ingredients. You will need coconut milk, chia seeds, maple syrup, mango, vanilla, and a pinch of salt. This recipe takes about 10 minutes to prepare. You must chill the pudding for at least 4 hours. Start by taking a medium mixing bowl. Pour in 1 cup of coconut milk. Add 2 tablespoons of maple syrup for sweetness. Then, add 1 teaspoon of pure vanilla extract. Sprinkle in a pinch of salt. Use a whisk to mix everything well. Keep whisking until it’s smooth. This step is key to a creamy texture. After mixing, sprinkle in 1/4 cup of chia seeds. Stir gently to spread the seeds evenly. Now, cover the bowl with plastic wrap or a lid. Place it in the fridge and let it chill for at least 4 hours. You can leave it overnight for best results. The chia seeds will absorb the liquid and thicken the mix. Once it’s set, take it out and stir to break up any clumps. Now, it’s time to serve! Layer the pudding in clear glasses with diced mango for a stunning look. You can find the full recipe above to guide you through the entire process. Enjoy each spoonful of this creamy delight! To get the perfect texture for your chia pudding, follow these steps. First, whisk the coconut milk well. This breaks up any clumps and makes it smooth. When you add the chia seeds, stir gently. This helps them spread evenly in the liquid. Let the pudding chill for at least 4 hours. If you can wait overnight, do it! The longer you chill, the thicker it becomes. For a fun presentation, use clear glasses or jars. This way, you can show off the pretty layers. Start with a layer of chia pudding, then add diced mango. Repeat this to create a beautiful pattern. Just before serving, top with more mango and a mint sprig. This adds color and a fresh taste. You can boost the flavor with some simple add-ins. Try adding a pinch of cinnamon for warmth. A splash of lime juice gives a nice zing. You can also mix in other fruits, like strawberries or pineapple. These will add new tastes and colors to your pudding. For a creamier texture, blend in some yogurt or nut butter. If you want to explore the full recipe, check out the [Full Recipe]. {{image_4}} You can switch up the fruit in your Mango Coconut Chia Pudding. Use berries, bananas, or peaches for a different taste. For a tropical twist, add pineapple or kiwi. Mix and match for fun flavors. Each fruit adds its own sweetness and texture. This keeps your pudding exciting and fresh. This recipe is already vegan if you use maple syrup. You can make it sugar-free too. Replace maple syrup with a sugar-free sweetener. This way, you can enjoy the creamy goodness without added sugar. You still get all the flavor without the guilt. Try flavored coconut milk for a twist. Use vanilla, chocolate, or even mango-flavored milk. These alternatives give a fun twist while keeping the creamy texture. You can also mix in some spice, like cinnamon or nutmeg, for added depth. Experiment to find your favorite flavor! For the complete recipe, check out the Full Recipe section. After enjoying your Mango Coconut Chia Pudding, store any leftovers in the fridge. Place the pudding in an airtight container. This keeps it fresh and prevents odors from mixing. Be sure to cover it well. I recommend using glass jars or plastic containers with tight lids. Glass jars work great because they show off the layers. They also do not absorb smells or stains. If you use plastic, make sure it is food-safe. Mango Coconut Chia Pudding lasts for about five days in the fridge. Look for changes in texture or smell. If it smells sour or feels slimy, it’s time to toss it. No one wants to eat spoiled pudding! Yes, you can use other milks. Almond, soy, or oat milk work well. Each milk will change the flavor. Coconut milk gives a rich, creamy taste. Choose a milk that you enjoy. Your pudding can stay fresh for up to five days. Store it in a sealed container. The chia seeds will keep absorbing liquid over time. If it seems too thick, add a splash of milk. Yes, chia pudding is very healthy! It's low in calories and high in fiber. It helps you feel full for longer. Plus, it has good fats and protein. This makes it a great snack or breakfast. Chia seeds are tiny powerhouses! They are rich in omega-3 fatty acids, fiber, and protein. They support heart health and digestion. Eating them can also help with weight management. They keep you feeling satisfied longer. Absolutely! Making it the night before works great. This gives the chia seeds time to soak up the liquid. You’ll wake up to a ready-made tasty treat. It’s perfect for busy mornings. After a few hours, check the texture. The pudding should be thick and creamy. If it feels too runny, let it sit longer. Stir it well to break any clumps. Enjoy your creamy delight from the Full Recipe! Mango Coconut Chia Pudding is easy to make and fun to enjoy. We covered the main ingredients, preparation steps, and how to customize this dish. Don’t forget the tips for texture and flavor. You can try new fruit combinations and choose healthier options. Store it well to keep it fresh. This pudding is tasty and full of nutrition. Enjoy making it your own!

Mango Coconut Chia Pudding Creamy Delight Recipe

Are you ready to indulge in a creamy, tropical treat? My Mango Coconut Chia Pudding is the perfect blend of

- 2 cups rolled oats - 1 cup pecans, coarsely chopped - 1/2 cup pumpkin seeds (pepitas) - 1/2 cup unsweetened shredded coconut These main ingredients form the base of your granola. Rolled oats offer a chewy texture and provide fiber. Pecans add a lovely crunch and rich flavor. Pumpkin seeds bring a nice nutty taste and extra nutrition. Unsweetened shredded coconut gives a hint of sweetness and a tropical twist. - 1/2 cup pure maple syrup - 1/4 cup coconut oil, melted and slightly cooled - 1 teaspoon pure vanilla extract Sweeteners and oils bring balance to the granola. Pure maple syrup sweetens while adding depth. Coconut oil keeps your granola crispy and helps it clump. Pure vanilla extract enhances the overall flavor, making each bite delightful. - 1/2 teaspoon ground cinnamon - 1/4 teaspoon fine sea salt - Optional add-ins (e.g., dried fruits) Spices and seasoning elevate the taste of your granola. Ground cinnamon adds warmth and comfort. Fine sea salt enhances the sweetness of the maple syrup. You can also add dried fruits to make your granola more exciting. Try cranberries or raisins for a sweet surprise. For the complete recipe, check out the Full Recipe section. Enjoy making this crunchy, nutritious snack! First, preheat your oven to 350°F (175°C). This heat will help the granola get that nice crunch. Next, gather your dry ingredients. In a big bowl, mix together: - 2 cups rolled oats - 1 cup pecans, coarsely chopped - 1/2 cup pumpkin seeds (pepitas) - 1/2 cup unsweetened shredded coconut - 1/2 teaspoon ground cinnamon - 1/4 teaspoon fine sea salt Make sure to stir well. You want all the dry bits to blend nicely. Now, it’s time to whip up the wet mix. In a separate bowl, whisk together: - 1/2 cup pure maple syrup - 1/4 cup coconut oil, melted and slightly cooled - 1 teaspoon pure vanilla extract Whisk until it looks smooth. This mixture will sweeten and flavor your granola. Pour the wet mix over the dry ingredients. Use a spatula to fold everything together. Make sure each oat and nut gets coated. Then, spread the granola mixture onto a baking sheet lined with parchment paper. Lay it out in an even layer. This helps it bake evenly. Place your baking sheet in the oven. Bake for about 25-30 minutes. Halfway through, stir the granola. This step is key to getting it golden and toasty. Look for a nice brown color and a sweet smell to know it’s ready. After baking, take it out and let it cool. Cooling is very important for that perfect crunchy texture. Once cool, add in 1/2 cup of dried cranberries or your favorite dried fruit. This adds a nice touch of sweetness. For the full recipe, check out the detailed instructions above. To get that ideal crunch in your maple pecan granola, cooling it properly is key. After baking, let the granola cool completely on the baking sheet. This step allows it to harden and form that perfect texture. If you move it too soon, it can become soft. For storage, use an airtight container. This keeps your granola fresh for longer. It’s best to store it in a cool, dry place. If you keep it sealed, it can last up to two weeks. You can easily adjust the sweetness to fit your taste. If you prefer a sweeter granola, add more maple syrup. If you want it less sweet, reduce the amount you use. Switching nuts or seeds is another fun way to make the recipe your own. You might try almonds or walnuts in place of pecans. You could also use sunflower seeds instead of pumpkin seeds. The options are endless! Pair your granola with yogurt and fresh fruits for a tasty breakfast. Just scoop some granola on top of creamy yogurt and add your favorite fruits. You can also enjoy granola as a snack throughout the day. It’s great on its own or mixed into trail mix. You can even sprinkle it over oatmeal for added crunch. If you want the full recipe, you can find it detailed earlier in the article. {{image_4}} You can change the taste of your maple pecan granola easily. Adding chocolate or cocoa powder gives it a sweet twist. Just mix in a few tablespoons of cocoa with your dry ingredients. You can even add chocolate chips after baking for a fun treat. Substituting different seeds or nuts is another great option. Try sunflower seeds, almonds, or walnuts. Each nut or seed brings its unique taste and texture. Get creative and find your favorite mix! Making this granola fit your diet is simple. For gluten-free options, use certified gluten-free oats. They will keep the crunch and flavor without gluten. If you want a vegan adaptation, replace the honey with extra maple syrup. This keeps it sweet without using any animal products. Enjoy your snack without worry! Seasonal dried fruits or spices can add a lovely touch. In the fall, try adding chopped apples or pumpkin spice. In the summer, dried mango or coconut flakes work well. Using fresh spices like cinnamon or nutmeg can also elevate your granola. These flavors keep your granola exciting all year long. Experiment with what you love and make it your own! To keep your Maple Pecan Granola fresh, use an airtight container. This helps lock in flavor and crunch. Glass jars or plastic containers work well. Avoid leaving granola in its original bag, as it may lose its texture. For long-term storage, consider placing granola in the fridge. The cool air keeps it fresh longer. Just make sure your container seals tightly to prevent moisture. How long does it last? When stored properly, your granola can last up to two weeks. After that, it starts to lose its taste and crunch. Look for signs of spoilage. If you notice a strange smell, or if the granola feels stale, it’s time to toss it. Fresh granola has a sweet aroma and a crisp texture. Granola is not just a snack! You can use it in many ways. Sprinkle it on yogurt or oatmeal for added crunch. It also makes a great topping for desserts. Use it on ice cream or as a layer in parfaits. If you want to get creative, add it to cookie dough for a fun twist. Maple pecan granola is packed with good food. Each ingredient offers great health benefits. - Rolled oats: They give you fiber. Fiber helps with digestion and keeps you full. - Pecans: These nuts are a source of healthy fats and protein. They help your heart. - Pumpkin seeds: Full of zinc and magnesium, they boost your immune system. - Dried fruits: If you add cranberries or raisins, they add vitamins and natural sweetness. This granola is a tasty way to get fiber and protein in your diet. You can enjoy it as a snack or breakfast. Yes, you can make granola without coconut. If you do not like coconut, here are some options: - Use more nuts: You can add extra pecans or even almonds instead. - Try seeds: Sunflower seeds or chia seeds work well too. You can also replace coconut oil with another oil. Use light olive oil or avocado oil for a different taste. Making clusters is easy with a few tips. You want your granola to stick together. - Add more sweetener: A bit of extra maple syrup helps bind the oats and nuts. - Press the mixture: When you spread it on the baking sheet, press it down. This helps create larger clusters. Baking it at the right temperature is key. Bake it slowly at 350°F until it's golden brown. Stir halfway to keep it even. This will give you crunchy, clumpy granola. For the full recipe, check out the Maple Pecan Granola Delight. This recipe for maple pecan granola covers all the bases. You learned about the key ingredients, from oats to spices. The step-by-step guide helps you prepare easily. You also got tips for a perfect crunch and ways to customize your granola. Remember, you can store it long-term if you keep it in an airtight container. Enjoy your granola with yogurt or as a snack. The possibilities are endless, so get creative with your flavors!

Maple Pecan Granola Crunchy and Nutritious Snack

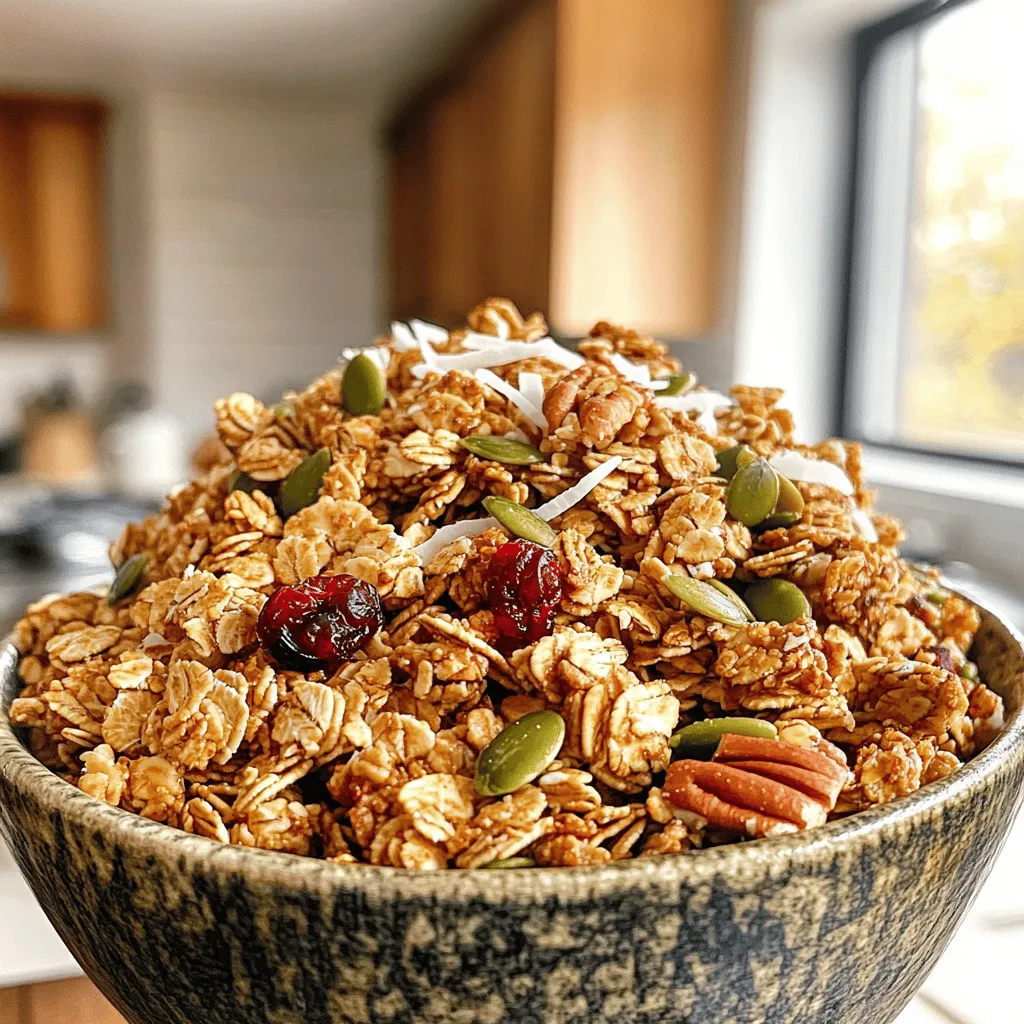
Looking for a snack that’s both tasty and healthy? Let me introduce you to Maple Pecan Granola! This crunchy delight

Older posts
Newer posts
← Previous Page1 … Page49 Page50 Page51 … Page68 Next →

dsad

© 2025 recipesstation • Built with GeneratePress

Our Policies

  • Copyright Policy
  • Cookie Policy
  • GDPR Policy
  • Privacy Policy
  • Disclaimer
  • Terms Of Use

More Information

  • Home
  • About
  • Contact
  • Appetizers
  • Dessert
  • Dinner
  • Drinks
©2025, recipesstation About Back To Top