Garlic Knots Irresistible Twist on Pizza Dough

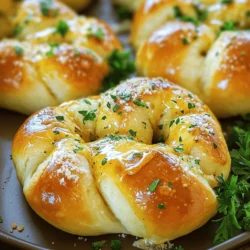
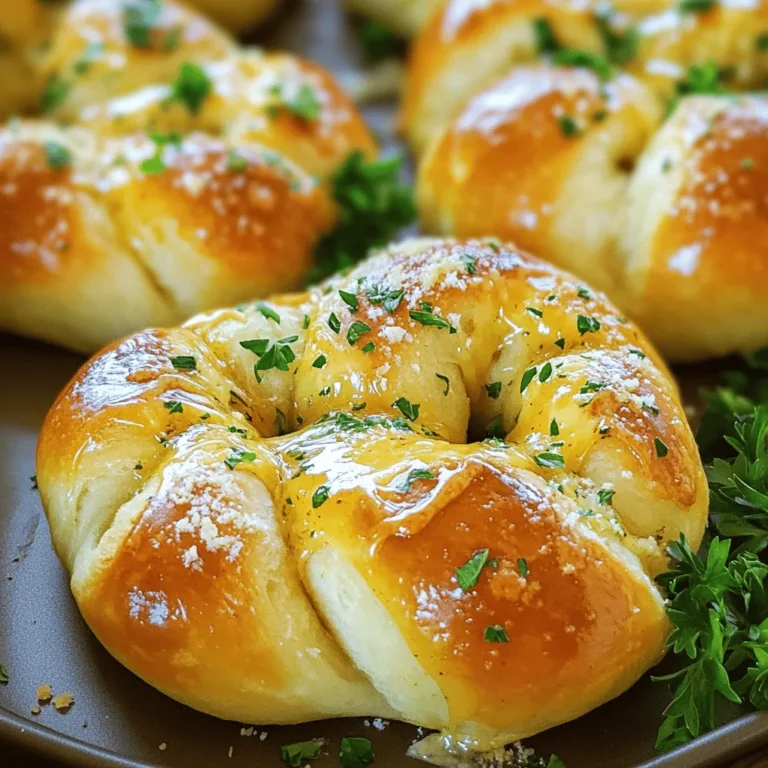
Do you love pizza? Then you’ll adore garlic knots! These soft, buttery twists bring pizza dough to a new level. Packed with garlic and herbs, they are perfect as a snack or appetizer. In this article, I’ll guide you through a simple recipe, tips, and tasty variations. Get ready to whip up a batch of these irresistible garlic knots that will have everyone coming back for more!

Ingredients

Main Ingredients

– 1 package (1.5 lbs) pizza dough (can be store-bought or homemade)

– 4 tablespoons unsalted butter, melted

– 5 cloves garlic, finely minced

– 1 teaspoon dried oregano

– 1 teaspoon dried basil

– 1 teaspoon garlic powder

– Salt, to taste

– Freshly cracked black pepper, to taste

To make garlic knots, you need a few key ingredients. Pizza dough is the base. You can use store-bought or make your own. You also need butter, which adds richness. Garlic, both fresh and powder, gives the knots their distinct flavor. Dried herbs like oregano and basil enhance the taste. Don’t forget salt and pepper to season.

Optional Ingredients

– Grated Parmesan cheese

– Fresh parsley for garnish

Adding grated Parmesan cheese is a lovely touch. It gives a salty, nutty flavor. Fresh parsley adds color and freshness on top. These optional ingredients make the knots even more special. You can choose to use them based on your taste.

For the full recipe, check out the detailed instructions that follow.

Step-by-Step Instructions

Preparation Steps

– Preheat your oven to 400°F (200°C).

– Line a baking sheet with parchment paper for easy cleanup.

– If using store-bought pizza dough, let it rest for 30 minutes.

Letting the dough rest helps it soften. This makes it easier to shape into knots. If you make your own dough, skip this step.

Shaping the Garlic Knots

– Lightly flour a clean surface and roll out the dough. Aim for a rectangle about ½ inch thick.

– Use a sharp knife or pizza cutter to slice the dough into strips. Each strip should be about 1 inch wide and 5-6 inches long.

– Take each strip and tie it into a knot. Tuck the ends underneath for a nice shape. Arrange them on the baking sheet, leaving space between each knot.

Shaping the knots can be fun! You can make them as loose or tight as you like. Just remember, they will puff up in the oven.

Baking the Knots

– In a bowl, mix melted butter, minced garlic, oregano, basil, garlic powder, and a pinch of salt and pepper. Stir well.

– Use a pastry brush to coat each knot with this garlic butter mixture. Make sure to get garlic and herbs on every knot.

– Place the baking sheet in the oven and bake for 15-18 minutes. Look for a golden brown color and a puffed-up look.

After baking, brush the knots with any leftover garlic butter. Sprinkle chopped parsley and Parmesan cheese on top for extra flavor.

These garlic knots are warm and tasty! You will want to eat them right away. For the full recipe, check the details above.

Tips & Tricks

Perfecting the Garlic Knots

Using store-bought dough is quick and easy. It saves time and effort. Allow the dough to rest for 30 minutes. This helps it become soft and easy to shape. Homemade dough is great if you have time. It gives a fresh taste and texture.

For both types of dough, ensure you shape the knots well. Tie each strip into a secure knot. Tuck the ends underneath. This helps them rise nicely in the oven. Space them apart on the baking sheet. They need room to expand while baking.

Enhancing Flavor

To boost flavor, add herbs like thyme or rosemary. They add a nice twist to the garlic knots. You can also sprinkle in some crushed red pepper for heat. Adjust the garlic amount to suit your taste. If you love garlic, use more! If you prefer less, reduce it.

Mix your herbs into the garlic butter well. This ensures each knot gets a burst of flavor. You can also experiment with different oils. Olive oil can replace butter for a lighter option. These small changes can make the knots your own.

For the full recipe, check the details above and enjoy making these delightful treats!

{{image_4}}

Variations

Flavor Variations

You can make garlic knots even more fun with flavor twists. One great option is adding cheese. You can stuff the knots with mozzarella or cheddar before tying them. Melted cheese inside adds a gooey, delicious surprise. Just press some cheese into the dough before you tie the knot.

Another twist is to make spicy garlic knots. Simply add chili flakes to the garlic butter mix. This gives your knots a kick. Adjust the amount based on your spice level. I love the heat, and it pairs well with the garlic.

Dietary Modifications

If you’re gluten-free, you can still enjoy these knots. Many stores sell gluten-free pizza dough. Just follow the same steps for preparation. The taste may differ slightly, but they will still be tasty.

For those who avoid dairy, there are vegan options too. You can replace the butter with olive oil or vegan butter. The garlic and herbs will still shine through. This way, you can enjoy garlic knots without compromising your diet.

For more details and the complete recipe, check out the Full Recipe.

Storage Info

Storing Garlic Knots

To keep your garlic knots fresh, store them in an airtight container. Place a paper towel inside to absorb moisture. This helps maintain their soft texture. If you plan to eat them within three days, store them at room temperature. For longer storage, refrigerate them for up to a week.

Reheating Tips

When reheating, the oven gives the best results. Preheat it to 350°F (175°C). Place your garlic knots on a baking sheet. Heat for about 5 to 10 minutes. The knots will regain their crispness. You can use a microwave too, but they may turn soft. Heat them in 15-second bursts until warm. Enjoy these tasty treats just like when they were fresh!

FAQs

Common Questions

How long can garlic knots be stored?

You can store garlic knots in the fridge for up to three days. Just place them in an airtight container. If you want them to last longer, try freezing them. They can stay fresh in the freezer for about three months.

Can garlic knots be frozen?

Yes, garlic knots can be frozen! To freeze, let them cool completely. Then, wrap them tightly in plastic wrap and place them in a freezer bag. When you’re ready to eat, just thaw and reheat them.

Cooking Method Questions

Can I use pizza dough for other recipes?

Absolutely! Pizza dough is very versatile. You can use it for calzones, breadsticks, or even flatbreads. Just shape it as needed and bake.

What’s the best way to keep garlic knots warm while serving?

To keep garlic knots warm, place them in a bread basket lined with a clean kitchen towel. This will help trap heat. You can also cover them loosely with foil.

You learned how to make garlic knots from scratch. We covered the main and optional ingredients, along with step-by-step instructions. I shared tips for perfecting the knots and ideas for flavor variations. Storage and reheating methods were also discussed.

With these simple steps, you can enjoy warm, tasty garlic knots any time. Get creative with flavors and enjoy sharing this treat with others. Happy cooking!
- 1 package (1.5 lbs) pizza dough (can be store-bought or homemade) - 4 tablespoons unsalted butter, melted - 5 cloves garlic, finely minced - 1 teaspoon dried oregano - 1 teaspoon dried basil - 1 teaspoon garlic powder - Salt, to taste - Freshly cracked black pepper, to taste To make garlic knots, you need a few key ingredients. Pizza dough is the base. You can use store-bought or make your own. You also need butter, which adds richness. Garlic, both fresh and powder, gives the knots their distinct flavor. Dried herbs like oregano and basil enhance the taste. Don’t forget salt and pepper to season. - Grated Parmesan cheese - Fresh parsley for garnish Adding grated Parmesan cheese is a lovely touch. It gives a salty, nutty flavor. Fresh parsley adds color and freshness on top. These optional ingredients make the knots even more special. You can choose to use them based on your taste. For the full recipe, check out the detailed instructions that follow. - Preheat your oven to 400°F (200°C). - Line a baking sheet with parchment paper for easy cleanup. - If using store-bought pizza dough, let it rest for 30 minutes. Letting the dough rest helps it soften. This makes it easier to shape into knots. If you make your own dough, skip this step. - Lightly flour a clean surface and roll out the dough. Aim for a rectangle about ½ inch thick. - Use a sharp knife or pizza cutter to slice the dough into strips. Each strip should be about 1 inch wide and 5-6 inches long. - Take each strip and tie it into a knot. Tuck the ends underneath for a nice shape. Arrange them on the baking sheet, leaving space between each knot. Shaping the knots can be fun! You can make them as loose or tight as you like. Just remember, they will puff up in the oven. - In a bowl, mix melted butter, minced garlic, oregano, basil, garlic powder, and a pinch of salt and pepper. Stir well. - Use a pastry brush to coat each knot with this garlic butter mixture. Make sure to get garlic and herbs on every knot. - Place the baking sheet in the oven and bake for 15-18 minutes. Look for a golden brown color and a puffed-up look. After baking, brush the knots with any leftover garlic butter. Sprinkle chopped parsley and Parmesan cheese on top for extra flavor. These garlic knots are warm and tasty! You will want to eat them right away. For the full recipe, check the details above. Using store-bought dough is quick and easy. It saves time and effort. Allow the dough to rest for 30 minutes. This helps it become soft and easy to shape. Homemade dough is great if you have time. It gives a fresh taste and texture. For both types of dough, ensure you shape the knots well. Tie each strip into a secure knot. Tuck the ends underneath. This helps them rise nicely in the oven. Space them apart on the baking sheet. They need room to expand while baking. To boost flavor, add herbs like thyme or rosemary. They add a nice twist to the garlic knots. You can also sprinkle in some crushed red pepper for heat. Adjust the garlic amount to suit your taste. If you love garlic, use more! If you prefer less, reduce it. Mix your herbs into the garlic butter well. This ensures each knot gets a burst of flavor. You can also experiment with different oils. Olive oil can replace butter for a lighter option. These small changes can make the knots your own. For the full recipe, check the details above and enjoy making these delightful treats! {{image_4}} You can make garlic knots even more fun with flavor twists. One great option is adding cheese. You can stuff the knots with mozzarella or cheddar before tying them. Melted cheese inside adds a gooey, delicious surprise. Just press some cheese into the dough before you tie the knot. Another twist is to make spicy garlic knots. Simply add chili flakes to the garlic butter mix. This gives your knots a kick. Adjust the amount based on your spice level. I love the heat, and it pairs well with the garlic. If you're gluten-free, you can still enjoy these knots. Many stores sell gluten-free pizza dough. Just follow the same steps for preparation. The taste may differ slightly, but they will still be tasty. For those who avoid dairy, there are vegan options too. You can replace the butter with olive oil or vegan butter. The garlic and herbs will still shine through. This way, you can enjoy garlic knots without compromising your diet. For more details and the complete recipe, check out the Full Recipe. To keep your garlic knots fresh, store them in an airtight container. Place a paper towel inside to absorb moisture. This helps maintain their soft texture. If you plan to eat them within three days, store them at room temperature. For longer storage, refrigerate them for up to a week. When reheating, the oven gives the best results. Preheat it to 350°F (175°C). Place your garlic knots on a baking sheet. Heat for about 5 to 10 minutes. The knots will regain their crispness. You can use a microwave too, but they may turn soft. Heat them in 15-second bursts until warm. Enjoy these tasty treats just like when they were fresh! How long can garlic knots be stored? You can store garlic knots in the fridge for up to three days. Just place them in an airtight container. If you want them to last longer, try freezing them. They can stay fresh in the freezer for about three months. Can garlic knots be frozen? Yes, garlic knots can be frozen! To freeze, let them cool completely. Then, wrap them tightly in plastic wrap and place them in a freezer bag. When you're ready to eat, just thaw and reheat them. Can I use pizza dough for other recipes? Absolutely! Pizza dough is very versatile. You can use it for calzones, breadsticks, or even flatbreads. Just shape it as needed and bake. What's the best way to keep garlic knots warm while serving? To keep garlic knots warm, place them in a bread basket lined with a clean kitchen towel. This will help trap heat. You can also cover them loosely with foil. You learned how to make garlic knots from scratch. We covered the main and optional ingredients, along with step-by-step instructions. I shared tips for perfecting the knots and ideas for flavor variations. Storage and reheating methods were also discussed. With these simple steps, you can enjoy warm, tasty garlic knots any time. Get creative with flavors and enjoy sharing this treat with others. Happy cooking!

- Garlic Knots

Indulge in the delightful world of garlic knots, the perfect twist on your favorite pizza dough! These soft, buttery bites are packed with garlic and herbs, making them a must-try appetizer or snack. Our simple recipe guides you through every step, along with fun variations and tips for the perfect knot. Click through to explore the full recipe and bring this irresistible treat to your table today! Your taste buds will thank you!

Ingredients
  

1 package (1.5 lbs) pizza dough (can be store-bought or homemade)

4 tablespoons unsalted butter, melted

5 cloves garlic, finely minced

1 teaspoon dried oregano

1 teaspoon dried basil

1 teaspoon garlic powder

Salt, to taste

Freshly cracked black pepper, to taste

Fresh parsley, finely chopped (for garnish)

Grated Parmesan cheese (optional, for serving)

Instructions
 

Begin by preheating your oven to 400°F (200°C). Prepare a baking sheet by lining it with parchment paper for easy cleanup.

    If you are using store-bought pizza dough, allow it to rest at room temperature for approximately 30 minutes to soften, making it easier to work with.

      Lightly flour a clean surface and roll out the pizza dough into a rectangle that is about ½ inch thick.

        Using a sharp knife or pizza cutter, slice the dough into strips that are approximately 1 inch wide and 5-6 inches long.

          For each strip, tie it into a knot, ensuring you tuck the ends underneath to create a secure shape. Arrange each knot on the prepared baking sheet, leaving space between them.

            In a small mixing bowl, combine the melted butter, minced garlic, dried oregano, dried basil, garlic powder, and a pinch of salt and pepper. Mix well to ensure the herbs are evenly distributed throughout the butter.

              Using a pastry brush, generously coat each garlic knot with the flavorful butter mixture, making sure to get some of the garlic and herbs onto each knot.

                Place the baking sheet in the preheated oven and bake for 15-18 minutes, or until the knots are beautifully golden brown and puffed up.

                  After removing them from the oven, brush the knots with any remaining garlic butter for an extra burst of flavor. Sprinkle with chopped parsley and grated Parmesan cheese, if using, for a lovely finishing touch.

                    Serve these aromatic garlic butter herb knots warm, and enjoy every bite of this delectable treat!

                      Prep Time: 20 minutes | Total Time: 40 minutes | Servings: 12 knots

                        - Presentation Tips: Arrange the garlic knots on a decorative serving platter and sprinkle with additional parsley for a pop of color. Provide a small bowl of marinara sauce on the side for dipping, enhancing the presentation and flavor experience.

                          Leave a Comment

                          Recipe Rating