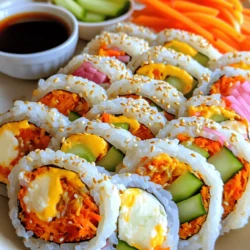
Are you ready to try a fun twist on a classic dish? Korean Cheese Kimchi Kimbap combines rich flavors in an easy recipe you can whip up at home. This guide will take you through selecting ingredients, crafting each layer, and rolling it perfectly. Whether you’re a Kimbap master or new to Korean cuisine, you’ll love how simple and tasty this dish is. Let’s dive into the delicious world of Kimbap!
Ingredients
List of Key Ingredients
– Short-grain rice
– Nori seaweed
– Kimchi
– Mozzarella cheese
Optional Ingredients
– Cucumber
– Carrot
– Eggs
Supplies and Equipment Needed
– Bamboo sushi mat
– Non-stick skillet
– Sharp knife
Gathering the right ingredients is key to making Korean cheese kimchi kimbap. I like to use short-grain rice because it sticks better than long-grain rice. The nori seaweed adds a great flavor and texture. Kimchi brings spice and tanginess, while mozzarella cheese gives it a creamy touch.
For added crunch, you can include cucumber and carrot. They not only taste great, but they also add color. If you want to include protein, beating a few eggs can make a nice omelet to add to the mix.
You will need some supplies, too. A bamboo sushi mat helps you roll the kimbap tightly. A non-stick skillet works best for cooking the eggs, while a sharp knife ensures clean cuts when serving. All these ingredients and tools will help you craft this delicious dish with ease. For the full recipe, check out the provided instructions.
Step-by-Step Instructions
Preparing the Rice
Start by mixing the rice, sesame oil, and salt in a large bowl. I use 2 cups of cooked short-grain rice. Add 1 tablespoon of sesame oil and 1 teaspoon of salt. Make sure you mix it well. You want every grain of rice to be tasty and coated. This step is very important for the flavor.
Cooking the Eggs
To cook the eggs, heat 1 tablespoon of vegetable oil in a non-stick skillet over medium heat. Pour in the 2 beaten eggs. Swirl the pan to spread the eggs into a thin layer. Cook until the edges set, then flip it gently. Cook for another minute and remove it from the pan. Let it cool on a plate. After it cools, slice it into thin strips. These strips add a nice texture.
Assembling the Kimbap
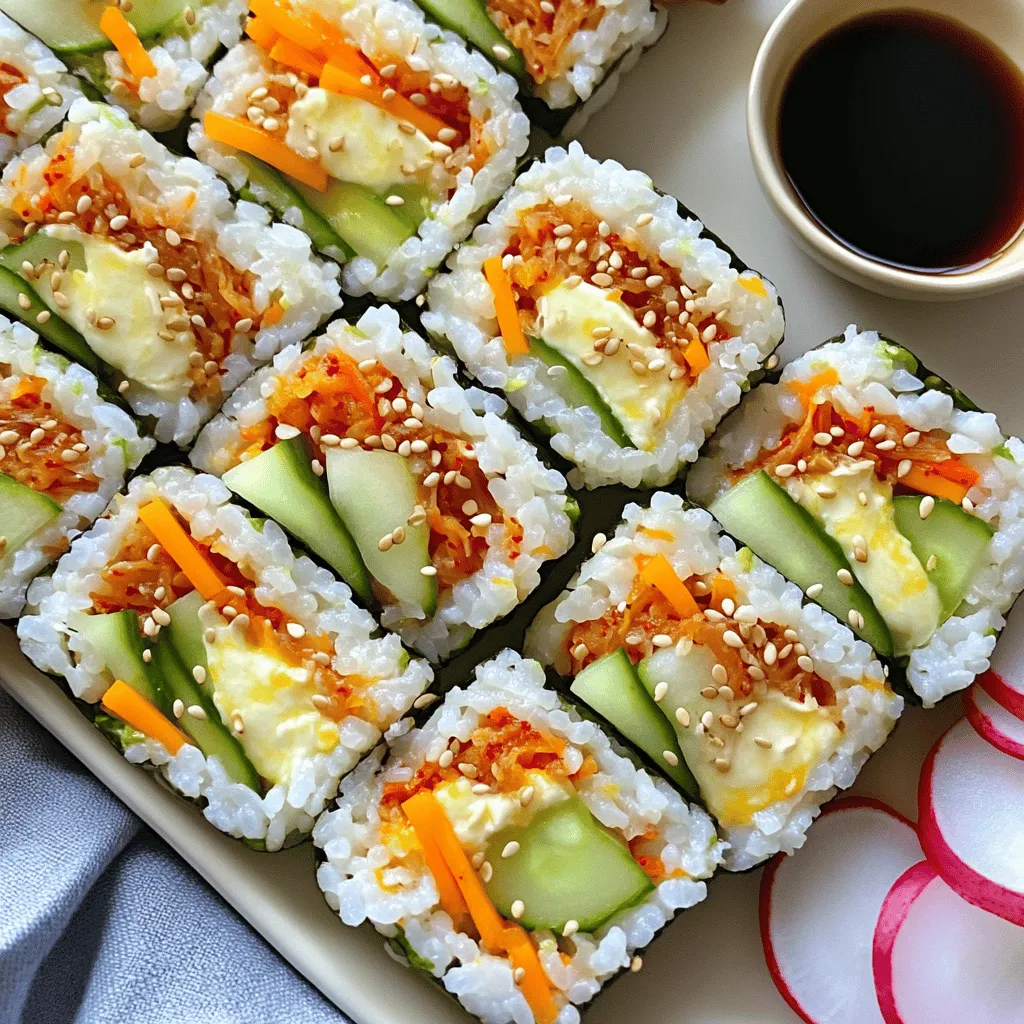
Lay a sheet of nori on a bamboo sushi mat or a clean cutting board. Make sure the shiny side is down. With slightly damp hands, take about 1 cup of seasoned rice. Spread it evenly over the nori, leaving 1 inch at the top. This space helps seal the kimbap later. Now, add the fun part! In the middle of the rice, layer the fillings: add chopped kimchi first, then shredded mozzarella cheese, julienned cucumber, julienned carrot, and the strips of omelet.
Rolling the Kimbap
To roll the kimbap, start from the bottom edge of the nori. Gently roll it away from you while pressing evenly. Keep rolling until you reach the exposed edge. Moisten this edge with a little water to seal it. This makes sure the roll stays together.
Slicing and Serving
Once you have your rolls, it’s time to slice! Use a sharp knife to cut each kimbap roll into bite-sized pieces. Apply gentle pressure to avoid squishing the filling. For presentation, arrange the sliced kimbap on a nice platter. Sprinkle sesame seeds on top for flavor. You can also add a small dish of soy sauce for dipping. Enjoy your delicious creation!
Tips & Tricks
Best Practices for Ingredients
How to choose fresh kimchi
When selecting kimchi, look for vibrant colors. Fresh kimchi has a crisp texture and a balanced flavor. Avoid kimchi that smells overly sour or has a mushy texture. You can ask for a sample if buying from a store. This ensures you get the best quality for your kimbap.
Selecting the right type of cheese
Mozzarella cheese works best for this recipe. It melts well and adds a creamy texture. Choose whole milk mozzarella for a rich flavor. If you prefer a bit more zest, try pepper jack cheese. This adds a nice kick to your kimbap.
Perfecting the Roll
Tips for even pressure while rolling
While rolling, use your fingers to apply gentle, even pressure. This ensures a tight roll without squishing the filling. Start from the bottom edge and roll away from you. Keep the nori tight around the rice and filling.
How to prevent the filling from spilling
To avoid spills, don’t overfill your kimbap. Keep about one inch of space at the top edge of the nori. This helps seal the roll better. If you notice any filling creeping out, gently press it back in while rolling.
Enhancing the Flavor
Suggestions for additional seasonings
You can add a splash of soy sauce or a sprinkle of gochugaru for more flavor. Consider adding a dash of sesame seeds to the rice for a nutty taste. Mixing in a bit of garlic powder also gives it a nice kick.
Using garnishes effectively
Garnishes can elevate your dish. Use sesame seeds to add crunch and visual appeal. You can also serve with pickled radish on the side for a refreshing contrast. A small dish of soy sauce is great for dipping too.
For detailed steps to make this delicious dish, check out the Full Recipe.
Variations
Alternative Fillings
You can get creative with the fillings in your kimbap. If you want a vegetarian option, try using avocado or pickled radish. Both add great flavor and texture. You can also mix in other veggies like bell peppers or spinach for color and taste.
If you want protein, add beef or tofu. Cooked bulgogi beef brings a sweet and savory flavor. Tofu, on the other hand, is a great plant-based choice. Marinate it in soy sauce for extra taste. Both options give you tasty and filling kimbap.
Dietary Modifications
If you need gluten-free options, look for gluten-free soy sauce. This will help keep your kimbap tasty while meeting your needs. You can also use rice paper instead of nori for a different wrap.
For vegan swaps, replace the cheese with a plant-based alternative. Nutritional yeast gives a cheesy flavor too. Instead of eggs, you can use scrambled tofu to mimic the texture. These changes make the kimbap suitable for everyone.
Seasonal Variations
Seasonal vegetables can add freshness to your kimbap. In spring, add fresh greens like asparagus. In summer, use thin slices of zucchini and bell peppers for crunch. Fall brings great options like roasted sweet potatoes or butternut squash.
Different types of kimchi can spice things up too. For a milder taste, use white kimchi. If you like it hot, go for spicy kimchi. Each type can change the flavor of your kimbap, making it fun to experiment.
For the full recipe, don’t forget to refer to the earlier section. Happy cooking!
Storage Info
Best Practices for Leftovers
To keep your kimbap fresh, wrap it tight in plastic wrap. This helps keep air out. Store it in the fridge. Kimbap stays good for about three days. After that, the rice may dry out.
Reheating Tips
You can reheat kimbap by using a microwave. Place the kimbap on a plate. Cover it with a damp paper towel to keep it moist. Heat for about 30 seconds. This method keeps the rice soft. You can also eat kimbap cold. It tastes great right from the fridge!
Freezing Options
If you want to freeze kimbap, it’s best to freeze it raw. Wrap each roll in plastic wrap. Then, place them in a freezer bag. They can last up to one month in the freezer. To cook, let the kimbap thaw in the fridge overnight. Cook them in a skillet for a few minutes. This way, you keep the flavors fresh and tasty!
FAQs
What is Kimbap?
Kimbap is a Korean dish made of rice and fillings rolled in seaweed. It holds cultural significance as a popular snack or meal, often enjoyed during picnics or on the go. Kimbap is not sushi; it uses different ingredients and flavors. You can find many variations based on regional tastes.
Can I make Kimbap ahead of time?
Yes, you can prepare Kimbap ahead of time. Store it in the fridge for up to a day. Wrap each roll in plastic wrap to keep it fresh. If you plan to eat it later, slice it just before serving. This helps maintain its shape and texture.
What is the best type of kimchi to use?
For Kimbap, I recommend using napa cabbage kimchi. It has a crisp texture and a balanced flavor. You can also try radish kimchi for a different crunch. Make sure to drain it well to avoid excess moisture that can make the rice soggy.
How to make Korean Cheese Kimchi Kimbap at home?
To make Korean Cheese Kimchi Kimbap at home, follow the steps in the full recipe. Start by mixing the rice with sesame oil and salt. Then, layer the kimchi, cheese, and other fillings on the rice. Roll it up gently and slice it for serving.
Are there gluten-free options?
Yes, there are gluten-free options for Kimbap. Use gluten-free soy sauce for dipping. Additionally, choose gluten-free nori. Most ingredients in Kimbap are gluten-free, so you can enjoy this dish without worry.
How to cut Kimbap properly?
To cut Kimbap, use a sharp knife for clean slices. Start by moistening the knife with water to prevent sticking. Slice each roll into bite-sized pieces, applying gentle pressure. Aim for even cuts to make the Kimbap look neat and appealing.
Kimbap is a fun dish that combines unique flavors. We explored key ingredients, like short-grain rice and kimchi, and equipment needed for making it. I shared simple steps, from preparing rice to perfecting your roll. You can even customize fillings based on your taste! Remember to store any leftovers properly to enjoy later. Trying new variations keeps kimbap interesting. With practice, you can impress friends and family with delicious homemade kimbap. Now, it’s your turn to get creative and enjoy this delightful dish!