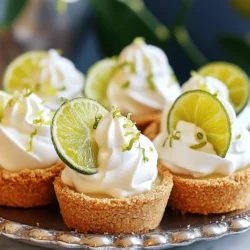
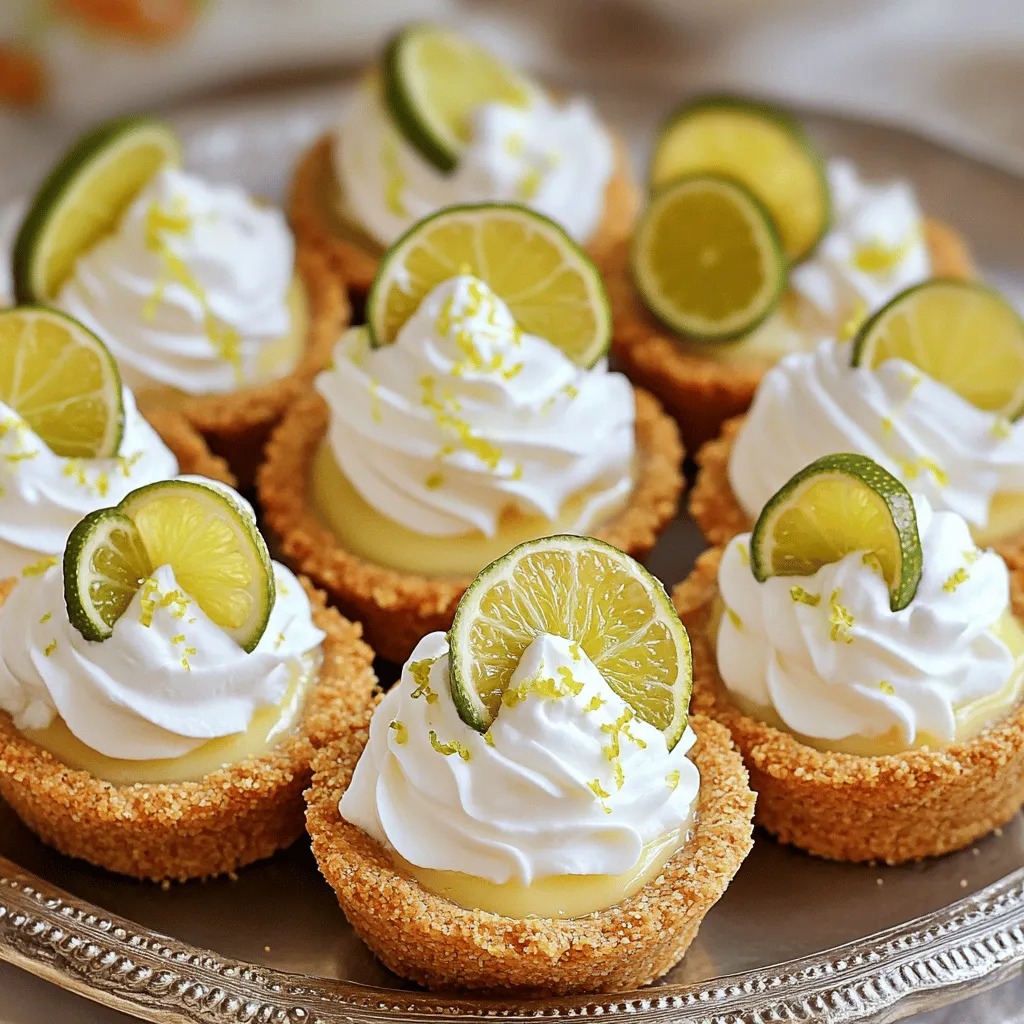
Ready to whip up a treat that’s both easy and delicious? These No-Bake Mini Key Lime Pies are perfect for hot days when you crave something sweet and zesty. With a buttery graham cracker crust and a tangy filling made from fresh key limes, these mini pies are sure to impress. I’ll walk you through each step, ensuring your baking experience is as delightful as the pies themselves. Let’s dive in!
Ingredients for No-Bake Mini Key Lime Pies
When making no-bake mini key lime pies, the right ingredients are key. Let’s look at what you need.
Main Ingredients
– 1 cup graham cracker crumbs
– 1/4 cup granulated sugar
– 1/2 teaspoon ground cinnamon
– 1/4 cup unsalted butter, melted
– 1 (8 oz) package cream cheese, softened to room temperature
– 1 can (14 oz) sweetened condensed milk
– 1/2 cup freshly squeezed key lime juice
– Zest of 2 key limes
These ingredients create that delicious, creamy filling and a crunchy crust you crave. The graham cracker crumbs give the pies a sweet and buttery base. The sweetened condensed milk adds a rich creaminess. Fresh key lime juice brings that bright, zesty flavor.
Optional Ingredients
– Whipped cream
– Key lime slices for garnish
– Ground cinnamon
While optional, these ingredients make your mini pies even better. Whipped cream adds fluffiness on top. Key lime slices and zest look pretty and add a fresh touch. A sprinkle of cinnamon can enhance the overall flavor.
For the full recipe, you can refer to the detailed instructions above. Enjoy making these delightful treats!
Step-by-Step Instructions
Preparing the Crust
To start, gather your ingredients for the crust. In a medium bowl, combine:
– 1 cup graham cracker crumbs
– 1/4 cup granulated sugar
– 1/2 teaspoon ground cinnamon
Stir these together until they mix well. Next, pour in:
– 1/4 cup unsalted butter, melted
Use a fork to mix until the texture looks like wet sand. This step is key for a good crust. Now, take a muffin tin and press the crumb mixture into each cup. Make sure to pack it firmly for a solid base.
Making the Filling
Now, let’s make the filling. In a large bowl, beat:
– 1 (8 oz) package cream cheese, softened to room temperature
Use an electric mixer on medium speed until smooth. Slowly add:
– 1 can (14 oz) sweetened condensed milk
Beat this until creamy. Make sure there are no lumps! Next, mix in:
– 1/2 cup freshly squeezed key lime juice
– Zest of 2 key limes
Keep mixing until the filling is velvety and smooth.
Assembling the Mini Pies
It’s time to fill the crusts! Spoon or pipe the key lime mixture into each crust. Fill them to the top for that perfect look. Then, place the muffin tin in the refrigerator. Chill for at least 4 hours. This step is crucial for the pies to set properly.
Serving the Dessert
Once your mini pies have set, remove them from the muffin tin. If you used a silicone tin, they should pop out easily. If you used a metal tin, run a butter knife around the edges to help. Place the pies on a serving platter.
For the finishing touch, add a dollop of whipped cream on each pie. Garnish with a slice of key lime and a sprinkle of lime zest. These little treats look fantastic and taste even better! For the full recipe, check the provided details.
Tips & Tricks for Perfect Mini Pies
Ingredient Substitutions
If you run out of graham crackers, try using crushed cookies. Vanilla wafers or digestive biscuits work well. They add a unique flavor twist.
For lime juice, fresh key limes give the best taste. You can use regular lime juice, but it won’t be as tangy. Key limes are smaller and have a distinct flavor. They make your pies bright and zesty.
Techniques for Smooth Filling
Start with cream cheese at room temperature. This helps it blend easily. If it’s cold, you’ll get lumps. Use an electric mixer for best results. Beat the cream cheese first until creamy.
When adding sweetened condensed milk, pour it in slowly. This keeps the filling smooth. Mix it well before adding lime juice. This method ensures a silky texture.
Chilling Tips
Chill your mini pies for at least four hours. This time helps them set properly. If you want a quicker method, place them in the freezer for one hour. Then, move them to the fridge to finish chilling.
Ensure they are covered to prevent drying out. This keeps the texture creamy and fresh. Enjoy your delightful mini key lime pies!
For the full recipe, check out the detailed instructions above.
Variations of No-Bake Mini Key Lime Pies
Flavor Variations
You can easily switch up the flavors of your no-bake mini key lime pies. One fun option is to make coconut key lime pies. Just add shredded coconut to the crust or filling. This gives your pies a tropical twist.
Another idea is to create berry-infused versions. You can fold in fresh strawberries, blueberries, or raspberries into the filling. This adds a burst of color and flavor. You can also top the pies with berry compote for a sweet finish.
Dietary Modifications
If you need gluten-free options, swap the graham crackers for gluten-free crumbs. Almond flour or crushed nuts can work great too. This keeps the crust tasty and safe for everyone.
For vegan adaptations, replace cream cheese with a plant-based alternative. Use coconut cream instead of sweetened condensed milk. This makes the pies creamy and dairy-free while still delicious.
Serving Suggestions
Toppings can take your mini pies to the next level. You can use whipped cream for a light and fluffy touch. Fresh fruit like key lime slices or berries also adds a nice visual appeal.
Consider pairing these treats with side dishes like fruit salad or a light sorbet. They balance the tartness of the pies and make for a refreshing meal.
For the full recipe, check out the details above. Enjoy making your no-bake mini key lime pies!
Storage Info
Refrigeration Tips
To store leftover mini key lime pies, place them in an airtight container. This keeps the pies fresh and prevents them from absorbing other smells. They last up to five days in the fridge. Always ensure they are covered well to maintain their taste.
Freezing Instructions
You can freeze mini key lime pies for future enjoyment. To do this, wrap each pie in plastic wrap. Then, place them in a freezer-safe bag or container. They can stay frozen for up to two months.
When you’re ready to enjoy them, take the pies out and let them thaw in the fridge overnight. This keeps the texture smooth. You can serve them chilled or at room temperature. For the best taste, add fresh whipped cream and a slice of lime just before serving. Want to make it a fun dessert? Consider using colorful plates for a bright presentation.
FAQs
How long do no-bake mini key lime pies last?
No-bake mini key lime pies can last up to five days in the fridge. Store them in an airtight container. This keeps them fresh and tasty. Cover them well to prevent drying out.
Can I use bottled lime juice instead of fresh?
Yes, you can use bottled lime juice. However, fresh lime juice provides a better flavor. Fresh juice is bright and tangy. Bottled juice might taste dull. It can also change the texture slightly. For the best taste, I recommend using fresh key limes.
What if I don’t have a muffin tin?
If you don’t have a muffin tin, use small cups or ramekins. You can also shape the crust with a flat bottom glass. Press the crust mixture into these containers instead. Just ensure they are evenly packed.
What is the difference between key limes and regular limes?
Key limes are smaller and have a stronger flavor. They are more aromatic and less bitter than regular limes. Key limes are often used in desserts, like key lime pie. Regular limes are larger and more common in grocery stores. Both can work in recipes, but key limes give a special taste.
No-bake mini key lime pies are easy and fun to make. We covered the key ingredients like graham crackers and sweetened condensed milk. I shared steps for preparing the crust, making the filling, and assembling your pies. You learned tips for smooth filling and chilling. I also explored delicious variations and how to store your treats. These pies are perfect for any gathering. Dive into your kitchen and enjoy creating these tasty bites. They’re sure to impress your friends and family!