![For my roasted garlic hummus, I use these tasty items: - 1 cup canned chickpeas, thoroughly drained and rinsed - 4 tablespoons tahini - 4 tablespoons freshly squeezed lemon juice - 3 tablespoons extra-virgin olive oil - 1 whole head of garlic - 1 teaspoon ground cumin - Sea salt, to taste - 2-3 tablespoons water (as needed for consistency) - Fresh parsley, chopped (for garnish) - Paprika (for garnish) You can swap ingredients to suit your taste. For tahini, try sunflower seed butter. If you want a tangy kick, use lime juice instead of lemon juice. Olive oil can be replaced with avocado oil for a different flavor. If you don’t have cumin, try smoked paprika for a smoky touch. Each ingredient in my hummus has benefits. Chickpeas are high in protein and fiber. They help you feel full and support digestion. Tahini is rich in healthy fats and vitamins. It boosts heart health. Fresh lemon juice adds vitamin C, which helps your immune system. Olive oil has good fats that can lower bad cholesterol levels. Garlic is known for its anti-inflammatory and immune-boosting properties. It adds a wonderful flavor to the dip, too! For the full recipe, check out Roasted Garlic Bliss Hummus . Start with your oven. Preheat it to 400°F (200°C). Next, take a whole head of garlic. Cut off the top, about 1/4 inch down. This exposes the cloves. Drizzle a teaspoon of olive oil over the cloves. Then wrap the garlic in aluminum foil. Place it in the oven once it’s hot. Roast for 30-35 minutes until soft and fragrant. After roasting, let it cool for a few minutes. Squeeze the soft cloves out into a bowl. Now, grab your food processor. Add the roasted garlic cloves to the bowl. Next, include 1 cup of drained chickpeas. Then, add 4 tablespoons of tahini and 4 tablespoons of lemon juice. Pour in 3 tablespoons of olive oil and a teaspoon of ground cumin. Sprinkle in some sea salt to taste. Blend this mix on high speed until it is smooth. If it’s too thick, add 2-3 tablespoons of water. Blend again until you get a creamy texture. Taste your hummus and adjust the salt or lemon juice if needed. Once satisfied, transfer it to a serving bowl. For a nice look, drizzle some olive oil on top. Sprinkle paprika and fresh parsley for garnish. Enjoy your roasted garlic hummus with veggies or pita chips. This recipe is a true delight for your taste buds! For the full recipe, check the main article. To get the right texture for your hummus, start with good-quality chickpeas. Use canned chickpeas that are drained and rinsed well. This helps remove excess salt and improves flavor. When blending, add water slowly. Start with one tablespoon at a time. If your hummus is too thick, it may not blend well. Keep blending until it turns creamy and smooth. Roasted garlic gives a deep, rich flavor. But you can add more! Try a dash of smoked paprika for a subtle kick. A pinch of cayenne pepper adds heat without overpowering the dish. Fresh herbs like cilantro or dill can brighten the flavor. For a nutty twist, add a spoonful of toasted sesame oil. These simple changes can take your hummus to the next level. One big mistake is undercooking the garlic. Roast it until soft and caramelized. This makes the flavor sweet and mellow. Another error is not adjusting the seasoning. Always taste your hummus before serving. You might need more salt or lemon juice. Lastly, don’t skip the olive oil drizzle on top! It makes your hummus look nice and adds extra flavor. For the full recipe, check the section above. {{image_4}} To make spicy roasted garlic hummus, add some heat! Blend in 1-2 teaspoons of cayenne pepper or a splash of hot sauce. You can also use roasted jalapeños for a smoky kick. This adds a fiery twist to the creamy base. If you love fresh herbs, try adding basil, cilantro, or dill. Chop about 1/4 cup of your chosen herb and mix it in right before serving. This will give your hummus a bright, fresh taste. You can also use dried herbs like oregano for a different vibe. For a unique flavor, swap tahini with nut butter. Almond or cashew butter works wonders. This adds a rich, nutty taste to your hummus. You can also toss in a handful of toasted nuts, like pine nuts, to enhance the texture and flavor. Check out the Full Recipe for more details on crafting these variations! Store your roasted garlic hummus in an airtight container. This keeps it fresh longer. Be sure to let it cool before sealing to avoid condensation. You can also layer plastic wrap over the hummus before sealing. This adds extra protection against air. Homemade roasted garlic hummus lasts about five to seven days in the fridge. Make sure to check for any signs of spoilage first. If it looks or smells off, toss it out. You can also freeze hummus for about four months. This helps you enjoy it later. To freshen up your cold hummus, stir in a bit of olive oil or lemon juice. This adds flavor and moisture. If it’s frozen, thaw it in the fridge overnight. Avoid using a microwave, as it can change the texture. For the best taste, serve it at room temperature. Enjoy your roasted garlic hummus with fresh veggies or pita chips! For the full recipe, refer back to the instructions above. You can serve roasted garlic hummus in many fun ways. It works great as a dip with fresh veggies, like carrots and cucumbers. You can also pair it with pita chips or bread. For a tasty twist, spread it on sandwiches or wraps. You might even try using it as a base for pizza! Adding a drizzle of olive oil and a sprinkle of paprika makes it pop visually. Yes, you can freeze roasted garlic hummus. Just place it in an airtight container. Be sure to leave some space at the top. Hummus can expand as it freezes. When you're ready to use it, let it thaw in the fridge overnight. You might need to stir in a bit of water to restore its creamy texture. Homemade hummus stays fresh in the fridge for about one week. Keep it in a sealed container to maintain quality. If you see any signs of spoilage, like mold, it’s best to toss it. Always check the smell and taste before serving. Enjoy the fresh, rich flavor of your roasted garlic hummus straight from your kitchen! For the complete recipe, check the [Full Recipe]. You learned about the key ingredients for roasted garlic hummus, including substitutes and health gains. I showed you how to prepare it, blend it, and add the perfect finishing touches. I shared tips for great texture and flavor, while avoiding common mistakes. You discovered fun variations and proper storage tips to keep it fresh. Roasted garlic hummus is tasty and easy to make. Try it today; you won’t regret it!](https://recipesstation.com/wp-content/uploads/2025/05/af59da2f-ea80-49d7-86fe-30feec58938a-768x768.webp)
Are you ready to elevate your snacking game? Roasted Garlic Hummus is both healthy and packed with flavor. In this guide, I will share simple ingredients, easy steps, and helpful tips for making the best dip ever. You’ll learn about ingredient swaps, health benefits, and exciting variations to keep things fresh. Let’s dive in and make this tasty treat together!
Ingredients
Main Ingredients List
For my roasted garlic hummus, I use these tasty items:
– 1 cup canned chickpeas, thoroughly drained and rinsed
– 4 tablespoons tahini
– 4 tablespoons freshly squeezed lemon juice
– 3 tablespoons extra-virgin olive oil
– 1 whole head of garlic
– 1 teaspoon ground cumin
– Sea salt, to taste
– 2-3 tablespoons water (as needed for consistency)
– Fresh parsley, chopped (for garnish)
– Paprika (for garnish)
Ingredient Substitutions
You can swap ingredients to suit your taste. For tahini, try sunflower seed butter. If you want a tangy kick, use lime juice instead of lemon juice. Olive oil can be replaced with avocado oil for a different flavor. If you don’t have cumin, try smoked paprika for a smoky touch.
Health Benefits of Each Ingredient
Each ingredient in my hummus has benefits. Chickpeas are high in protein and fiber. They help you feel full and support digestion. Tahini is rich in healthy fats and vitamins. It boosts heart health. Fresh lemon juice adds vitamin C, which helps your immune system. Olive oil has good fats that can lower bad cholesterol levels. Garlic is known for its anti-inflammatory and immune-boosting properties. It adds a wonderful flavor to the dip, too!
For the full recipe, check out Roasted Garlic Bliss Hummus .
Step-by-Step Instructions
Preparation of Roasted Garlic
Start with your oven. Preheat it to 400°F (200°C). Next, take a whole head of garlic. Cut off the top, about 1/4 inch down. This exposes the cloves. Drizzle a teaspoon of olive oil over the cloves. Then wrap the garlic in aluminum foil. Place it in the oven once it’s hot. Roast for 30-35 minutes until soft and fragrant. After roasting, let it cool for a few minutes. Squeeze the soft cloves out into a bowl.
Blending the Hummus
Now, grab your food processor. Add the roasted garlic cloves to the bowl. Next, include 1 cup of drained chickpeas. Then, add 4 tablespoons of tahini and 4 tablespoons of lemon juice. Pour in 3 tablespoons of olive oil and a teaspoon of ground cumin. Sprinkle in some sea salt to taste. Blend this mix on high speed until it is smooth. If it’s too thick, add 2-3 tablespoons of water. Blend again until you get a creamy texture.
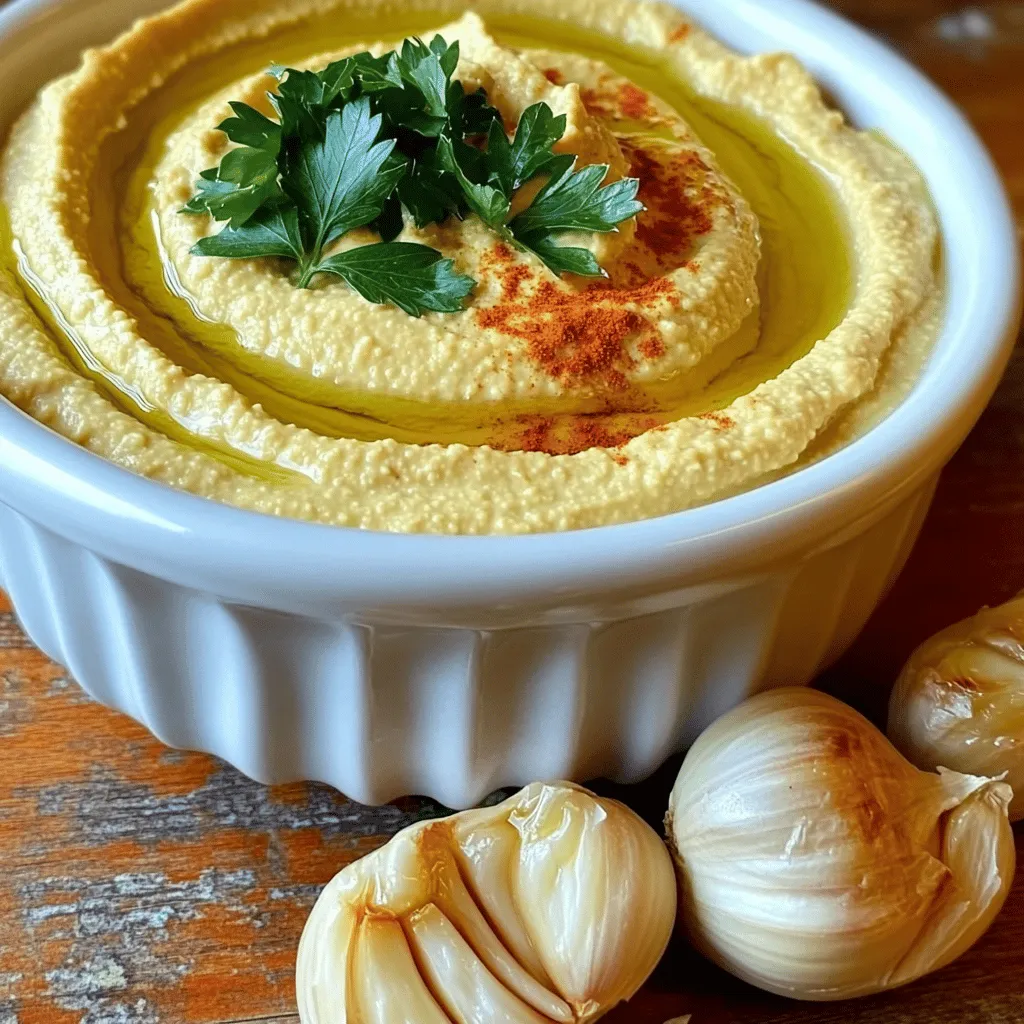
Final Touches
Taste your hummus and adjust the salt or lemon juice if needed. Once satisfied, transfer it to a serving bowl. For a nice look, drizzle some olive oil on top. Sprinkle paprika and fresh parsley for garnish. Enjoy your roasted garlic hummus with veggies or pita chips. This recipe is a true delight for your taste buds! For the full recipe, check the main article.
Tips & Tricks
Achieving the Perfect Consistency
To get the right texture for your hummus, start with good-quality chickpeas. Use canned chickpeas that are drained and rinsed well. This helps remove excess salt and improves flavor. When blending, add water slowly. Start with one tablespoon at a time. If your hummus is too thick, it may not blend well. Keep blending until it turns creamy and smooth.
Flavor Enhancements
Roasted garlic gives a deep, rich flavor. But you can add more! Try a dash of smoked paprika for a subtle kick. A pinch of cayenne pepper adds heat without overpowering the dish. Fresh herbs like cilantro or dill can brighten the flavor. For a nutty twist, add a spoonful of toasted sesame oil. These simple changes can take your hummus to the next level.
Common Mistakes to Avoid
One big mistake is undercooking the garlic. Roast it until soft and caramelized. This makes the flavor sweet and mellow. Another error is not adjusting the seasoning. Always taste your hummus before serving. You might need more salt or lemon juice. Lastly, don’t skip the olive oil drizzle on top! It makes your hummus look nice and adds extra flavor. For the full recipe, check the section above.
Variations
Spicy Roasted Garlic Hummus
To make spicy roasted garlic hummus, add some heat! Blend in 1-2 teaspoons of cayenne pepper or a splash of hot sauce. You can also use roasted jalapeños for a smoky kick. This adds a fiery twist to the creamy base.
Herb-Infused Versions
If you love fresh herbs, try adding basil, cilantro, or dill. Chop about 1/4 cup of your chosen herb and mix it in right before serving. This will give your hummus a bright, fresh taste. You can also use dried herbs like oregano for a different vibe.
Nut-Based Alternatives
For a unique flavor, swap tahini with nut butter. Almond or cashew butter works wonders. This adds a rich, nutty taste to your hummus. You can also toss in a handful of toasted nuts, like pine nuts, to enhance the texture and flavor.
Check out the Full Recipe for more details on crafting these variations!
Storage Info
Proper Storage Techniques
Store your roasted garlic hummus in an airtight container. This keeps it fresh longer. Be sure to let it cool before sealing to avoid condensation. You can also layer plastic wrap over the hummus before sealing. This adds extra protection against air.
Shelf Life of Roasted Garlic Hummus
Homemade roasted garlic hummus lasts about five to seven days in the fridge. Make sure to check for any signs of spoilage first. If it looks or smells off, toss it out. You can also freeze hummus for about four months. This helps you enjoy it later.
Reheating/Freshening Tips
To freshen up your cold hummus, stir in a bit of olive oil or lemon juice. This adds flavor and moisture. If it’s frozen, thaw it in the fridge overnight. Avoid using a microwave, as it can change the texture. For the best taste, serve it at room temperature. Enjoy your roasted garlic hummus with fresh veggies or pita chips! For the full recipe, refer back to the instructions above.
FAQs
What is the best way to serve Roasted Garlic Hummus?
You can serve roasted garlic hummus in many fun ways. It works great as a dip with fresh veggies, like carrots and cucumbers. You can also pair it with pita chips or bread. For a tasty twist, spread it on sandwiches or wraps. You might even try using it as a base for pizza! Adding a drizzle of olive oil and a sprinkle of paprika makes it pop visually.
Can I freeze roasted garlic hummus?
Yes, you can freeze roasted garlic hummus. Just place it in an airtight container. Be sure to leave some space at the top. Hummus can expand as it freezes. When you’re ready to use it, let it thaw in the fridge overnight. You might need to stir in a bit of water to restore its creamy texture.
How long does homemade hummus last in the fridge?
Homemade hummus stays fresh in the fridge for about one week. Keep it in a sealed container to maintain quality. If you see any signs of spoilage, like mold, it’s best to toss it. Always check the smell and taste before serving. Enjoy the fresh, rich flavor of your roasted garlic hummus straight from your kitchen! For the complete recipe, check the [Full Recipe].
You learned about the key ingredients for roasted garlic hummus, including substitutes and health gains. I showed you how to prepare it, blend it, and add the perfect finishing touches. I shared tips for great texture and flavor, while avoiding common mistakes. You discovered fun variations and proper storage tips to keep it fresh.
Roasted garlic hummus is tasty and easy to make. Try it today; you won’t regret it!
![For my roasted garlic hummus, I use these tasty items: - 1 cup canned chickpeas, thoroughly drained and rinsed - 4 tablespoons tahini - 4 tablespoons freshly squeezed lemon juice - 3 tablespoons extra-virgin olive oil - 1 whole head of garlic - 1 teaspoon ground cumin - Sea salt, to taste - 2-3 tablespoons water (as needed for consistency) - Fresh parsley, chopped (for garnish) - Paprika (for garnish) You can swap ingredients to suit your taste. For tahini, try sunflower seed butter. If you want a tangy kick, use lime juice instead of lemon juice. Olive oil can be replaced with avocado oil for a different flavor. If you don’t have cumin, try smoked paprika for a smoky touch. Each ingredient in my hummus has benefits. Chickpeas are high in protein and fiber. They help you feel full and support digestion. Tahini is rich in healthy fats and vitamins. It boosts heart health. Fresh lemon juice adds vitamin C, which helps your immune system. Olive oil has good fats that can lower bad cholesterol levels. Garlic is known for its anti-inflammatory and immune-boosting properties. It adds a wonderful flavor to the dip, too! For the full recipe, check out Roasted Garlic Bliss Hummus . Start with your oven. Preheat it to 400°F (200°C). Next, take a whole head of garlic. Cut off the top, about 1/4 inch down. This exposes the cloves. Drizzle a teaspoon of olive oil over the cloves. Then wrap the garlic in aluminum foil. Place it in the oven once it’s hot. Roast for 30-35 minutes until soft and fragrant. After roasting, let it cool for a few minutes. Squeeze the soft cloves out into a bowl. Now, grab your food processor. Add the roasted garlic cloves to the bowl. Next, include 1 cup of drained chickpeas. Then, add 4 tablespoons of tahini and 4 tablespoons of lemon juice. Pour in 3 tablespoons of olive oil and a teaspoon of ground cumin. Sprinkle in some sea salt to taste. Blend this mix on high speed until it is smooth. If it’s too thick, add 2-3 tablespoons of water. Blend again until you get a creamy texture. Taste your hummus and adjust the salt or lemon juice if needed. Once satisfied, transfer it to a serving bowl. For a nice look, drizzle some olive oil on top. Sprinkle paprika and fresh parsley for garnish. Enjoy your roasted garlic hummus with veggies or pita chips. This recipe is a true delight for your taste buds! For the full recipe, check the main article. To get the right texture for your hummus, start with good-quality chickpeas. Use canned chickpeas that are drained and rinsed well. This helps remove excess salt and improves flavor. When blending, add water slowly. Start with one tablespoon at a time. If your hummus is too thick, it may not blend well. Keep blending until it turns creamy and smooth. Roasted garlic gives a deep, rich flavor. But you can add more! Try a dash of smoked paprika for a subtle kick. A pinch of cayenne pepper adds heat without overpowering the dish. Fresh herbs like cilantro or dill can brighten the flavor. For a nutty twist, add a spoonful of toasted sesame oil. These simple changes can take your hummus to the next level. One big mistake is undercooking the garlic. Roast it until soft and caramelized. This makes the flavor sweet and mellow. Another error is not adjusting the seasoning. Always taste your hummus before serving. You might need more salt or lemon juice. Lastly, don’t skip the olive oil drizzle on top! It makes your hummus look nice and adds extra flavor. For the full recipe, check the section above. {{image_4}} To make spicy roasted garlic hummus, add some heat! Blend in 1-2 teaspoons of cayenne pepper or a splash of hot sauce. You can also use roasted jalapeños for a smoky kick. This adds a fiery twist to the creamy base. If you love fresh herbs, try adding basil, cilantro, or dill. Chop about 1/4 cup of your chosen herb and mix it in right before serving. This will give your hummus a bright, fresh taste. You can also use dried herbs like oregano for a different vibe. For a unique flavor, swap tahini with nut butter. Almond or cashew butter works wonders. This adds a rich, nutty taste to your hummus. You can also toss in a handful of toasted nuts, like pine nuts, to enhance the texture and flavor. Check out the Full Recipe for more details on crafting these variations! Store your roasted garlic hummus in an airtight container. This keeps it fresh longer. Be sure to let it cool before sealing to avoid condensation. You can also layer plastic wrap over the hummus before sealing. This adds extra protection against air. Homemade roasted garlic hummus lasts about five to seven days in the fridge. Make sure to check for any signs of spoilage first. If it looks or smells off, toss it out. You can also freeze hummus for about four months. This helps you enjoy it later. To freshen up your cold hummus, stir in a bit of olive oil or lemon juice. This adds flavor and moisture. If it’s frozen, thaw it in the fridge overnight. Avoid using a microwave, as it can change the texture. For the best taste, serve it at room temperature. Enjoy your roasted garlic hummus with fresh veggies or pita chips! For the full recipe, refer back to the instructions above. You can serve roasted garlic hummus in many fun ways. It works great as a dip with fresh veggies, like carrots and cucumbers. You can also pair it with pita chips or bread. For a tasty twist, spread it on sandwiches or wraps. You might even try using it as a base for pizza! Adding a drizzle of olive oil and a sprinkle of paprika makes it pop visually. Yes, you can freeze roasted garlic hummus. Just place it in an airtight container. Be sure to leave some space at the top. Hummus can expand as it freezes. When you're ready to use it, let it thaw in the fridge overnight. You might need to stir in a bit of water to restore its creamy texture. Homemade hummus stays fresh in the fridge for about one week. Keep it in a sealed container to maintain quality. If you see any signs of spoilage, like mold, it’s best to toss it. Always check the smell and taste before serving. Enjoy the fresh, rich flavor of your roasted garlic hummus straight from your kitchen! For the complete recipe, check the [Full Recipe]. You learned about the key ingredients for roasted garlic hummus, including substitutes and health gains. I showed you how to prepare it, blend it, and add the perfect finishing touches. I shared tips for great texture and flavor, while avoiding common mistakes. You discovered fun variations and proper storage tips to keep it fresh. Roasted garlic hummus is tasty and easy to make. Try it today; you won’t regret it!](https://recipesstation.com/wp-content/uploads/2025/05/af59da2f-ea80-49d7-86fe-30feec58938a-250x250.webp)
