Skip to content
DisclaimerTerms Of UseGDPR PolicyCookie Policy

recipesstation

  • Home
  • Drinks
  • Appetizers
  • Dinner
  • Dessert
  • About
  • Contact
  • Privacy Policy
DisclaimerTerms Of UseGDPR PolicyCookie Policy

Emily

- 1 cup canned pumpkin puree - 1/2 cup unsweetened applesauce - 1/4 cup honey or maple syrup - 1/2 cup whole wheat flour - 1/2 cup rolled oats - 1 teaspoon baking powder - 1 teaspoon baking soda - 1 teaspoon pumpkin pie spice (or ground cinnamon) - 1/4 teaspoon salt - 1/4 cup chopped walnuts or pecans (optional) To make 2-point pumpkin muffins, you need simple ingredients. Canned pumpkin puree gives these muffins a rich flavor. Unsweetened applesauce adds moisture without extra sugar. Honey or maple syrup serves as a natural sweetener. Whole wheat flour and rolled oats provide a healthy base. Baking powder and baking soda help the muffins rise. Pumpkin pie spice or ground cinnamon adds warmth and flavor. A pinch of salt brings all the tastes together. If you want some crunch, add chopped walnuts or pecans. With these ingredients, you can create a tasty treat. For the full recipe, refer to the given details. Enjoy your baking! - Preheat the oven: Set your oven to 350°F (175°C). This heat is perfect for baking muffins. - Prepare the muffin tin: Lightly grease a muffin tin with non-stick cooking spray. You can also use cupcake liners to keep them from sticking. - Combine wet ingredients: In a large bowl, mix 1 cup of canned pumpkin puree, 1/2 cup of unsweetened applesauce, and 1/4 cup of honey or maple syrup. Stir until smooth. - Whisk dry ingredients: In another bowl, whisk together 1/2 cup of whole wheat flour, 1/2 cup of rolled oats, 1 teaspoon of baking powder, 1 teaspoon of baking soda, 1 teaspoon of pumpkin pie spice (or ground cinnamon), and 1/4 teaspoon of salt. Make sure there are no lumps. - Fold mixtures together: Gradually mix the dry ingredients into the wet mixture. Use a spatula or wooden spoon. Stir until just combined. Be careful not to overmix; this keeps your muffins light. - Fill muffin cups: Spoon the batter into the prepared muffin cups. Fill each cup about three-quarters full to let them rise. - Bake and check for doneness: Place the muffin tin in the oven. Bake for 18-20 minutes. They are ready when a toothpick inserted into a muffin comes out clean. To avoid dense muffins, don’t overmix the batter. Mix until the dry and wet ingredients just blend. This keeps the muffins light and fluffy. Also, make sure to measure your flour correctly. Too much flour can lead to a heavy texture. Use a spoon to scoop the flour into your measuring cup, then level it off with a knife. For sweeteners, you can try using agave syrup or coconut sugar. Both can add a nice flavor. They also keep the muffins moist. If you prefer a sugar-free option, use a sugar substitute like stevia. Just check the conversion rate on the package, as it can vary. To present these muffins, serve them warm on a nice plate. A drizzle of honey or maple syrup adds a touch of sweetness. You can also sprinkle a little cinnamon on top for extra flavor. Pair these muffins with coffee or tea for a cozy treat. They also go great with a glass of cold milk. If you want something fruity, serve with a side of fresh berries. These combos make for a delightful breakfast or snack! {{image_4}} You can easily change up the taste of your muffins. Here are some ideas: - Adding chocolate chips: Mix in 1/2 cup of chocolate chips. This adds sweetness and a rich flavor. The chocolate pairs well with the pumpkin. - Incorporating different spices: Try adding nutmeg, ginger, or even cardamom. Each spice brings a unique flavor. A teaspoon of each can elevate your muffins. If you have dietary needs, you can adapt this recipe to fit them. Here are some options: - Gluten-free adaptations: Use gluten-free flour instead of whole wheat flour. It keeps the muffins soft and moist. Just ensure your oats are gluten-free. - Reducing sugar content: Cut down the honey or maple syrup by half. You can also use a sugar substitute. This option is great for those watching their sugar intake. Explore these variations to make the 2-Point Pumpkin Muffins your own! For the full recipe, check the earlier section. To keep your 2-Point Pumpkin Muffins fresh, use an airtight container. This keeps moisture in and air out. Place the muffins in the container once they cool completely. If you have more than you can eat, freezing is a great option. Wrap each muffin in plastic wrap, then place them in a freezer bag. This helps prevent freezer burn. You can store them this way for up to three months. These muffins can stay fresh at room temperature for about three days. If you store them in the fridge, they can last for up to a week. Look for signs of spoilage like mold or an off smell. If the muffins feel dry or hard, they may not taste good anymore. Enjoy your muffins while they are still soft and tasty! These muffins are just 2 Weight Watchers points each. This makes them a great choice for anyone watching their points. You can enjoy a tasty treat without feeling guilty. Plus, they are full of flavor and nutrients, thanks to the pumpkin and whole wheat flour. Yes, you can make these muffins in advance. They store well and taste great even after a few days. Just let them cool completely before storing them. Place them in an airtight container. They will stay fresh for about three days. You can also freeze them for longer storage. Just thaw them at room temperature when you’re ready to eat. If you don’t have applesauce, you can use mashed bananas. They will add moisture and sweetness. You could also try yogurt if you want a creamy texture. Just keep in mind that these options may change the flavor slightly. Each substitute can give your muffins a unique twist. Yes, you can use regular all-purpose flour instead of whole wheat flour. However, this may change the texture a bit. Whole wheat flour adds more fiber and a nutty flavor. If you prefer white flour, the muffins will still taste good and be soft. Just remember to adjust cooking time if needed. These muffins use simple, healthy ingredients and easy steps, making baking fun. You learned how to mix, bake, and store them well. Plus, tips for serving and making your muffins special were shared. Experiment with flavors or stick to basics. You can easily adapt recipes to fit your taste. Enjoy making these muffins for yourself or to share. Happy baking!

2-Point Pumpkin Muffins Recipe Easy and Tasty Treat

You’re going to love these 2-Point Pumpkin Muffins! They are easy to make and perfect for any time of year.

To make roasted Parmesan green beans, gather these simple ingredients: - 1 pound fresh green beans, trimmed - 2 tablespoons olive oil - ½ cup freshly grated Parmesan cheese - 2 cloves garlic, minced - 1 teaspoon lemon zest - 1 teaspoon garlic powder - ½ teaspoon crushed red pepper flakes (optional) - Salt and freshly ground black pepper, to taste - Juice of ½ lemon These ingredients work together to give the green beans a rich flavor. Fresh green beans are crisp and tasty. The olive oil helps them roast nicely. Parmesan cheese adds a savory touch. Garlic and lemon zest brighten the dish. If you like heat, add crushed red pepper flakes. This recipe makes a great side dish for any meal. Check the Full Recipe for more details on how to prepare this dish. First, set your oven to 425°F (220°C). This temperature helps the beans get crispy. While the oven heats, get a large baking sheet and line it with parchment paper. This makes cleanup a breeze. Grab 1 pound of fresh green beans and trim the ends. Place them in a big bowl. Add 2 tablespoons of olive oil, 2 cloves of minced garlic, and 1 teaspoon of lemon zest. For extra flavor, stir in 1 teaspoon of garlic powder and ½ teaspoon of crushed red pepper flakes if you want some heat. Season with salt and pepper. Toss everything well, so each bean gets coated. - First Roast: Spread the green beans on the lined baking sheet. Make sure they are in a single layer. Roast them for 15 minutes. This makes them tender and a bit caramelized. - Add the Cheese: After 15 minutes, take the sheet out of the oven. Sprinkle ½ cup of freshly grated Parmesan cheese over the beans. Make sure every bean gets cheese. - Final Roast: Put the baking sheet back in the oven. Roast for another 5 to 7 minutes. You want the cheese to melt and turn light golden brown. - Finishing Touch: Once done, take the green beans out. Drizzle juice from ½ lemon over them. This brightens the taste and adds zest. For the full recipe, check the ingredients and steps above! To get perfect roasted green beans, spread them out in a single layer. Overcrowding the pan leads to soggy beans. Make sure each bean touches the hot surface. This way, they crisp up nicely. You can also toss them halfway through cooking for even browning. For the best cheese melt, use fresh Parmesan cheese. Grate it yourself for more flavor. Add the cheese after the first roast. This timing ensures the cheese melts without burning. If you want a crispier top, broil them for a minute or two after the final roast. - Suggested spices or herbs: Add a pinch of onion powder for depth. Try fresh thyme or rosemary for a fragrant touch. Toss in some lemon pepper for a fresh zing. - Serving suggestions: Pair these green beans with grilled chicken or fish. They also work well as a side for pasta dishes. For a fun twist, serve them with a dip like ranch or garlic aioli. This recipe is a great way to enjoy green beans in a tasty and healthy way. For the full recipe, check out the details provided. {{image_4}} You can switch up the cheese in this dish. Try using Pecorino Romano for a sharper taste. For a creamier texture, use mozzarella. If you want something tangy, feta adds a nice touch. Each cheese gives a new flavor twist to the roasted green beans. Roasted Parmesan green beans pair well with other veggies. Adding diced bell peppers brings sweetness and color. You can also mix in cherry tomatoes for a juicy burst. Carrots add a nice crunch, while zucchini gives a mild flavor. Just make sure to adjust the roasting time for any added vegetables. If you like heat, try boosting the spice level. Increasing red pepper flakes makes a big difference. Just add more to your mix before roasting. You can also add chili powder or sriracha for an extra kick. Both options bring warmth without overpowering the green beans. Adjust the amount based on your spice preference. After enjoying your roasted Parmesan green beans, store any leftovers in an airtight container. Make sure they cool down before sealing. Keep them in the fridge for up to three days. If you want to keep them longer, freezing is a great option. To reheat, I suggest using an oven or toaster oven. Preheat it to 350°F (175°C). Spread the green beans on a baking sheet. Heat them for about 10 minutes until warm. This method keeps them crispy and tasty. You can also use a microwave, but they might lose some crunch. If you plan to freeze your roasted green beans, follow these best practices: - Let them cool completely before freezing. - Spread them out in a single layer on a baking sheet. - Freeze them for about an hour until firm. - Transfer to a freezer bag, remove air, and seal tightly. Label the bag with the date. They can last up to three months in the freezer. When ready to enjoy, thaw them in the fridge overnight before reheating. Roast green beans for 15 minutes first. After that, add cheese and roast for 5 to 7 more minutes. The beans should be tender and slightly caramelized. Keep an eye on the cheese to avoid burning. Yes, you can use other vegetables. Try broccoli, asparagus, or Brussels sprouts. Adjust the roasting time as needed. Each vegetable has its own cooking time. Just make sure they are cut to similar sizes for even cooking. Absolutely, this recipe is great for meal prep. You can store the roasted green beans in an airtight container. They will stay fresh in the fridge for up to 4 days. Reheat them in the oven for the best taste. These green beans pair well with many dishes. Serve them with grilled chicken, steak, or fish. They also go great with pasta and rice dishes. Their flavor complements many main courses. To make this dish vegan, skip the Parmesan cheese. You can use nutritional yeast for a cheesy flavor. It adds a nice taste without dairy. You can also try vegan cheese if you prefer a similar texture. Roasting green beans with Parmesan is simple and fun. We covered fresh ingredients, step-by-step baking, and helpful tips. You can switch flavors, cheese, or spices to fit your taste. Store leftovers well for later enjoyment. Roasted green beans make a great side for many meals. I hope you enjoy making this tasty dish. Remember, cooking is all about experimenting and having fun!

Roasted Parmesan Green Beans Flavorful Side Dish

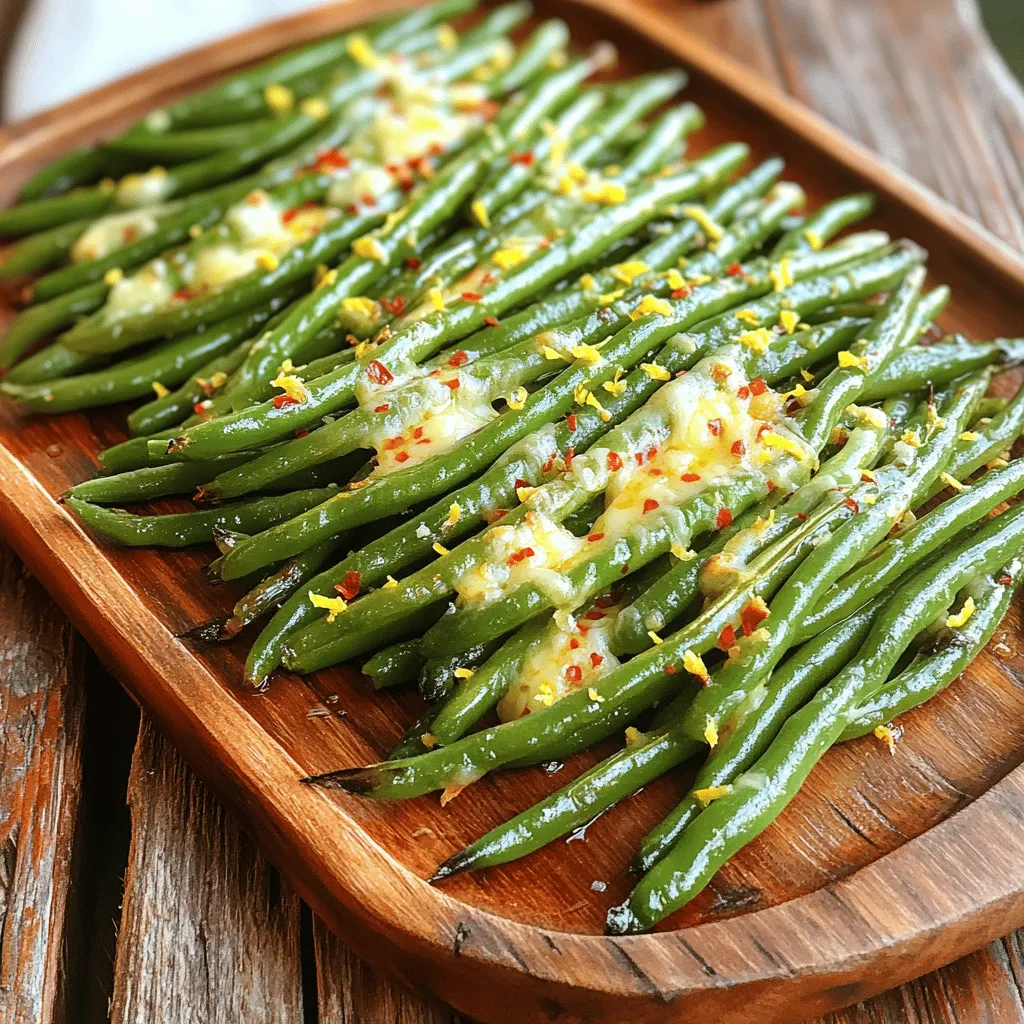
Are you looking for a simple and tasty side dish? Try my Roasted Parmesan Green Beans! This easy recipe brings

- 1 lb ground beef - 1 small onion, diced - 2 cloves garlic, minced - 1 cup mixed vegetables (carrots, peas, corn) - 1 cup beef broth - 1 tablespoon Worcestershire sauce - 1 teaspoon smoked paprika - Salt and pepper, to taste - 1 cup cheddar cheese, shredded (divided) - 2 cups biscuit mix - 2 teaspoons garlic powder - 1 teaspoon dried parsley - 1 cup milk - 1/4 cup melted butter Gathering the right ingredients is key to making Cheddar Bay Ground Beef Cobbler. First, you need 1 pound of ground beef. It adds that rich flavor. You will also want a small onion, diced. This brings a sweet base to the dish. Fresh garlic is a must, so grab 2 cloves and mince them up. Next, include 1 cup of mixed vegetables. Think about carrots, peas, and corn. These add color and texture. You will also need 1 cup of beef broth. This keeps the filling moist and tasty. Worcestershire sauce adds depth, so don't skip the tablespoon of it. For a smoky touch, include 1 teaspoon of smoked paprika. Season with salt and pepper to your taste. Cheese lovers rejoice! You’ll need 1 cup of shredded cheddar cheese, divided. Now, for the biscuit topping, use 2 cups of biscuit mix. Mix in 2 teaspoons of garlic powder and 1 teaspoon of dried parsley for extra flavor. You’ll also need 1 cup of milk and 1/4 cup of melted butter to make the batter rich and luscious. With these ingredients, you are ready to create a dish that will delight your family and friends. For the full recipe, check the section above. - Preheat the oven to 400°F (200°C). - Gather all ingredients and tools needed. Before starting, make sure you have everything ready. This will help your cooking go smoothly. - Brown the ground beef in a skillet. - Add diced onion and minced garlic. In a large skillet, cook the ground beef over medium heat. Use a spatula to break it apart. Cook until it's brown, about 5-7 minutes. Next, stir in the diced onion and minced garlic. Cook for about 3 minutes until the onion turns soft and clear. - Add mixed veggies, broth, Worcestershire sauce, and spices. - Simmer and incorporate cheddar cheese. Now, mix in the veggies, broth, Worcestershire sauce, smoked paprika, salt, and pepper. Bring this mix to a gentle simmer. Let it cook for about 5 minutes. This warms everything up nicely. Now, take it off the heat and stir in half a cup of cheddar cheese until it melts into the mix. - Mix biscuit ingredients in a separate bowl. - Combine milk and melted butter for batter. In another bowl, combine the biscuit mix, garlic powder, and dried parsley. Next, pour in the milk and melted butter. Stir until just combined to form a soft batter. - Pour filling into the baking dish. - Add biscuit batter to the top and bake. Take a greased 9x13-inch baking dish and pour in the beef and veggie filling. Spread it out evenly. Then, drop spoonfuls of the biscuit batter over the filling. Make sure it covers most of it. - Add remaining cheddar cheese after baking. - Allow to cool and serve warm. Place the dish in the preheated oven. Bake for 20-25 minutes until the biscuit topping is golden brown. Once out of the oven, sprinkle the rest of the cheddar cheese on top. Put it back in the oven for 5 more minutes until the cheese melts and bubbles. Let it cool for a few minutes before serving. Enjoy this comfort dish warm, and feel free to add a salad or sour cream on top for extra flavor. For the full recipe, check out the details above! To make your Cheddar Bay ground beef cobbler even better, start with lean ground beef. This choice cuts down on extra fat and keeps the dish lighter. You can also switch up the veggies. Use what you like! Carrots, peas, or even bell peppers all work well in this recipe. Cheddar cheese gives a nice, rich flavor, but feel free to swap in other cheeses. Try mozzarella for a milder taste or pepper jack for a kick! If you want fewer calories, low-fat cheese is a great choice. It melts well and still adds good flavor. To make your biscuits fluffier, mix the batter gently. Overmixing can lead to tough biscuits. For the best coverage, drop spoonfuls of batter evenly over the filling. This ensures every bite has a good mix of beef and biscuit. Follow these tips to elevate your cobbler to the next level. For the complete recipe, check out the Full Recipe. {{image_4}} You can easily adjust this recipe to fit your diet. For a gluten-free option, use a gluten-free biscuit mix. This swap keeps the same texture and taste that we love. If you want a vegetarian meal, simply replace the ground beef with a plant-based crumble. It absorbs flavors just like beef, making it a great choice. To boost the flavor, try adding some spices. A pinch of cayenne can bring heat and excitement to your dish. If you like fresh tastes, add herbs like thyme or basil. Chopped parsley also brightens up the flavors and looks great on top. Feeling creative? You can give this dish a twist inspired by other cuisines. For an Italian flair, add marinara sauce and sprinkle mozzarella cheese on top. It will melt beautifully and blend with the beef. For a Southwest kick, mix in black beans and jalapeños. This adds a spicy, zesty flavor that will surprise your taste buds. With these variations, you can make Cheddar Bay Ground Beef Cobbler your own. Each option offers a new way to enjoy this classic dish. For the complete recipe, check out the [Full Recipe]. To store leftovers of Cheddar Bay Ground Beef Cobbler, let it cool first. Place the cobbler in a container with a tight lid. Use glass or plastic containers that seal well. This helps keep the dish fresh. You can store it in the refrigerator for about 3 to 4 days. If you want to save it for later, freezing is a great option. First, let the cobbler cool completely. Then, cut it into portions. Wrap each piece tightly in plastic wrap. Place the wrapped pieces in a freezer-safe bag or container. This will keep your cobbler fresh for up to 3 months. When you are ready to enjoy it, take it out of the freezer. Thaw it in the fridge overnight. For quick reheating, you can use the microwave. Place a portion on a microwave-safe plate. Cover it with a damp paper towel to keep it moist. Heat it for 1 to 2 minutes, checking it often. If you want to keep the topping crisp, use the oven. Preheat your oven to 350°F (175°C). Place the cobbler in an oven-safe dish. Cover it loosely with foil to prevent burning. Heat for about 15 to 20 minutes. This way, your cobbler stays warm and tasty. For the full recipe, check the detailed instructions above. Cheddar Bay Cobbler is a comforting dish that blends savory ground beef with a cheesy biscuit topping. The dish takes inspiration from the famous Cheddar Bay Biscuits served at Red Lobster. You get a warm, hearty filling made from ground beef, veggies, and cheese, all topped with fluffy biscuit dough. It's a true crowd-pleaser, perfect for family dinners or gatherings. Yes, you can prepare this dish in advance. Cook the ground beef and assemble the cobbler, but don’t bake it right away. Cover the dish and place it in the fridge. When you're ready to eat, bake it as directed. This way, you save time and still enjoy a fresh, hot meal. Absolutely! To make this recipe vegan, swap the ground beef for a plant-based substitute. You can use lentils or veggie crumbles. Replace the milk with a plant milk like almond or soy. Use vegan cheese instead of cheddar for that gooey topping. With these swaps, you can still enjoy a delicious cobbler. If you want to add heat, try adding chopped jalapeños to the beef mixture. You can also stir in cayenne pepper or hot sauce while cooking. For an extra kick, sprinkle red pepper flakes on top of the biscuit layer before baking. Spice it up to fit your taste! This cobbler pairs well with simple sides. A fresh green salad adds a nice crunch. You can also serve it with coleslaw for a tangy bite. For a creamier touch, add a dollop of sour cream on top of each serving. These sides balance the rich flavors of the cobbler nicely. This blog post covered how to make Cheddar Bay Ground Beef Cobbler, from ingredients to storage tips. You learned to prepare a tasty filling and a fluffy biscuit topping. You can also adapt this dish to fit different diets and spice levels. Cooking this recipe is fun and satisfying. Enjoy making it your own, and share it with friends and family. Happy cooking!

Cheddar Bay Ground Beef Cobbler Sure to Delight You

Looking for a comforting dish that’s easy to make and packed with flavor? Try my Cheddar Bay Ground Beef Cobbler!

- 8 oz noodles (rice noodles or egg noodles) - 1 lb boneless, skinless chicken breast, thinly sliced - 2 cups mixed vegetables (bell peppers, carrots, snap peas, etc.) - 3 tablespoons soy sauce (low sodium) - 1 tablespoon oyster sauce - 1 tablespoon hoisin sauce - 1 teaspoon sesame oil - 2 green onions, thinly sliced - Toasted sesame seeds - Bring a large pot of salted water to a boil. - Add the noodles and cook until al dente, following package instructions. - Drain the noodles and toss them with a little oil to keep them from sticking. - Heat vegetable oil in a large skillet over medium-high heat. - Add thinly sliced chicken to the skillet and stir-fry until cooked through. - Once done, remove the chicken from the skillet and set it aside. - In the same skillet, add mixed vegetables, minced garlic, and grated ginger. - Stir-fry the mixture until the vegetables are tender but still crisp. - Be sure to stir constantly to avoid burning the garlic. - Return the cooked chicken to the skillet with the vegetables. - Add the drained noodles into the pan, mixing all components together. - Drizzle in soy sauce, oyster sauce, hoisin sauce, and sesame oil. - Toss everything together until the noodles and chicken are well coated. - Heat the stir-fry for about 2 minutes to warm through. - Gently fold in the sliced green onions for added flavor and crunch. - Serve the stir-fry noodles on plates or in bowls. - Top with toasted sesame seeds for a nice finish. Enjoy this recipe for a quick and tasty meal! For the full recipe, check [Full Recipe]. When choosing noodles, you can pick between rice noodles and egg noodles. Rice noodles are light and soak up sauce well. They are perfect for a gluten-free option. Egg noodles add a nice chew and richness. They hold up well in stir-fries. *Cooking tips for different types:* - Rice Noodles: Soak in hot water for 10 minutes. Drain and rinse before use. - Egg Noodles: Boil for 3-5 minutes until al dente. Drain and toss with oil. Stir-frying is all about high heat. Use a wok or large skillet for best results. Preheat the pan until it's hot. This helps cook the chicken quickly. It also gives the veggies a nice crunch. *Avoiding overcooking vegetables:* - Cook vegetables for only 3-4 minutes. They should stay crisp and colorful. Stir constantly to prevent burning. Spices and herbs can really boost flavor. Consider adding garlic, ginger, or a pinch of chili flakes. Each adds a unique taste. *Balancing sweetness and saltiness:* - Use soy sauce for saltiness. - Hoisin sauce brings sweetness. - Taste as you go to find the right mix. Try these tips to elevate your 15-Minute Chicken Stir Fry Noodles. For more details, check the Full Recipe. {{image_4}} You can change the protein in this dish easily. Shrimp or tofu work great. Shrimp cooks fast and adds a nice flavor. Tofu gives a hearty texture and absorbs sauces well. Just cut the tofu into cubes and stir-fry it like chicken. If you want beef, thinly slice flank steak. Cook it for a few minutes until brown. Each protein adds its own unique taste. Mix up the veggies to fit the season. Try broccoli, zucchini, or snap peas for crunch. Seasonal veggies taste fresh and vibrant. You can also add leafy greens like spinach or bok choy. Just toss them in at the end. They will wilt slightly but still stay green and tasty. For gluten-free needs, use rice noodles instead of egg noodles. They cook fast and taste great. Check the sauce labels too. Some soy sauces contain gluten. Look for gluten-free soy sauce or tamari. This way, everyone can enjoy your 15-Minute Chicken Stir Fry Noodles Delight without worry. For gluten-free needs, make sure to check ingredients in the [Full Recipe]. Store your chicken stir fry noodles in an airtight container. Make sure to let them cool before sealing. These noodles stay fresh in the fridge for up to three days. After that, they may lose flavor and texture. The best way to reheat is in a skillet over medium heat. Add a splash of water or broth to help steam the noodles. This keeps them moist and tasty. Avoid using the microwave, as it can make the noodles soggy. You can freeze the chicken stir fry noodles for up to three months. Use freezer-safe bags or containers for storage. When ready to eat, thaw them overnight in the fridge. Then, reheat in a skillet, adding a bit of water to keep them from drying out. Yes, you can easily make this dish vegetarian. Just swap the chicken with plant-based options like tofu or tempeh. Both options hold flavor well and cook nicely in the stir fry. Simply cut them into bite-sized pieces and follow the same cooking steps for chicken. You can also use seitan or chickpeas for added protein. This gives you a filling meal while keeping it meat-free. If you want to add heat, there are several simple ways. You can add sliced fresh chilies or a pinch of red pepper flakes while you cook. Another option is to drizzle some chili oil over the dish just before serving. Sriracha sauce is also a popular choice. Mix it in with the sauces for a spicy kick. Adjust the level of heat to your taste. This stir fry pairs well with a few simple side dishes. Steamed rice is a classic choice, balancing the flavors of the noodles. You could also serve a fresh cucumber salad for a crunchy contrast. For a heartier option, try some egg rolls or spring rolls. These add a nice crunch and complement the stir fry well. In this post, we explored how to make a tasty stir-fry dish. We covered main ingredients like chicken, noodles, and mixed veggies, along with flavorful sauces. You learned the step-by-step process for cooking and mixing the components. Additionally, I shared tips on selecting the right noodles and how to enhance flavors. Remember, you can adapt this recipe with different proteins or vegetables. Enjoy your cooking and have fun experimenting with flavor combinations!

Savory 15-Minute Chicken Stir Fry Noodles Delight

Are you craving a quick and tasty meal? My Savory 15-Minute Chicken Stir Fry Noodles are the answer! This recipe

For this one-pot beef and cheddar ranch pasta, you will need: - 1 pound ground beef - 12 ounces penne pasta - 4 cups beef broth These three main items make the base of your dish. The ground beef gives a hearty flavor. The penne pasta soaks up the tasty sauce. The beef broth adds depth and richness. Next, we add some extra ingredients for flavor: - 1 packet (1 ounce) ranch dressing mix - 1 cup shredded sharp cheddar cheese, divided - 1 cup sour cream The ranch dressing mix adds a zesty kick. Sharp cheddar cheese melts into a creamy sauce. Sour cream brings a nice tanginess to balance the flavors. Don’t forget the seasoning and garnish to finish it off: - 1 tablespoon olive oil - 1 teaspoon garlic powder - 1 teaspoon onion powder - Chopped fresh chives or parsley Olive oil helps to cook the beef. Garlic and onion powder boost the overall taste. Fresh chives or parsley add a pop of color and freshness to your dish. For the full recipe, check out the One-Pot Beef and Cheddar Ranch Pasta recipe. Enjoy cooking! First, heat one tablespoon of olive oil in a large pot over medium heat. Add one pound of ground beef. Use a wooden spoon to break it apart. Cook the beef until it turns brown, about 5-7 minutes. Now, it's time to add flavor. Sprinkle in salt, pepper, one teaspoon of garlic powder, and one teaspoon of onion powder. Mix well. This builds a great base for your dish. Next, drain any extra grease from the pot. Pour in four cups of beef broth and one packet of ranch dressing mix. Stir until everything blends together. The ranch dressing adds a tasty twist. Now, add 12 ounces of penne pasta to the pot. Raise the heat to bring the mixture to a boil. Once it boils, lower the heat to medium-low. Cover the pot and let it simmer for about 12-15 minutes, stirring occasionally. This step lets the pasta cook without sticking. Once the pasta is al dente, it’s time for creaminess. Add one cup of sour cream and half of the shredded sharp cheddar cheese. Stir until the cheese melts and the sauce becomes creamy. Remove the pot from heat. Sprinkle the remaining cheddar cheese on top. Cover the pot for a few minutes to let the cheese melt. Before serving, add chopped fresh chives or parsley for a pop of color. Enjoy your meal! For the full recipe, click here. To make this dish even creamier, consider adding more cheese. You can mix in an extra half cup of cheddar cheese. This adds a rich, cheesy flavor that everyone loves. You can also use cream cheese or even mascarpone for a different taste. Both will give the dish a smooth texture. Want to spice things up? Add herbs like oregano or basil. A pinch of red pepper flakes adds heat. You can also adjust the ranch dressing. If you like it tangy, add a bit more. If you prefer a milder flavor, use less. Avoid overcooked pasta by stirring it often. Check the pasta a minute or two before the time is up. This ensures it stays al dente. For one-pot cooking, use a large pot. It gives the pasta room to move. Cover the pot while it simmers. This helps the pasta cook evenly and saves time. {{image_4}} You can switch up the protein in your one-pot beef and cheddar ranch pasta. Instead of ground beef, try ground turkey or chicken. These options keep the dish leaner while still tasty. Just cook them the same way as beef. If you want a vegetarian meal, use lentils or mushrooms. Both give a great texture and flavor. They soak up all the tasty ranch and cheese. While penne pasta works great, you can use other types too. Rotini, fusilli, or even spaghetti can change the feel of the dish. Each type adds a unique twist to the meal. For those needing gluten-free options, try brown rice pasta or chickpea pasta. They cook well and taste good. Just read the package instructions for the right cooking time. Adding vegetables can boost the nutrition and flavor. Try bell peppers, spinach, or broccoli. Chop them small and add them with the beef. They will cook well and add color to your plate. You can also play with sauces. Instead of ranch dressing, try barbecue sauce or a creamy Alfredo sauce. Each sauce gives the dish a new vibe. Mix it up and make it your own! For the full recipe, check out the One-Pot Beef and Cheddar Ranch Pasta. To keep your one-pot beef and cheddar ranch pasta fresh, store leftovers in airtight containers. This helps prevent moisture loss and keeps flavors intact. I recommend using glass or BPA-free plastic containers. Make sure the pasta cools down before sealing it. This will stop condensation from forming inside the container. You can freeze this dish for later enjoyment. First, let it cool completely. Then, portion it out into freezer-safe bags or containers. Squeeze out as much air as possible before sealing. When you are ready to eat, thaw it in the fridge overnight. To reheat, place it in a pot on low heat. Add a splash of water or broth to help it warm evenly. In the fridge, your pasta lasts about 3-4 days. In the freezer, it can stay good for up to three months. Look for signs of spoilage, like an off smell or discoloration. If it smells sour or looks strange, it’s best to throw it away. You can find the full recipe for this dish in the article above. To boost flavor, try adding fresh herbs like basil or thyme. You can also mix in diced tomatoes or bell peppers for a sweet taste. If you want spice, add red pepper flakes or hot sauce. For depth, a splash of Worcestershire sauce works well. Experiment with these ideas to make your dish stand out! Yes, you can use other cheeses. Monterey Jack or Pepper Jack adds a nice twist. Cream cheese can create a rich, creamy texture too. If you prefer a sharper bite, try Gruyère or Swiss cheese. Just pick a cheese you love, and it will taste great! This pasta pairs well with a fresh salad. A simple green salad with vinaigrette is perfect. Garlic bread is also a great choice for a comforting meal. You can add a side of steamed veggies for a colorful plate. Enjoy your meal with these tasty sides! This blog post shared how to make One-Pot Beef and Cheddar Ranch Pasta. We covered the main and additional ingredients, and the simple steps to cook this dish. Tips for creaminess, flavor adjustments, and cooking practices were important too. Variations allow for different proteins and pastas. Proper storage ensures your leftovers stay fresh. In the end, this dish is versatile and easy to adapt. Enjoy making it your own!

One-Pot Beef and Cheddar Ranch Pasta Quick and Easy

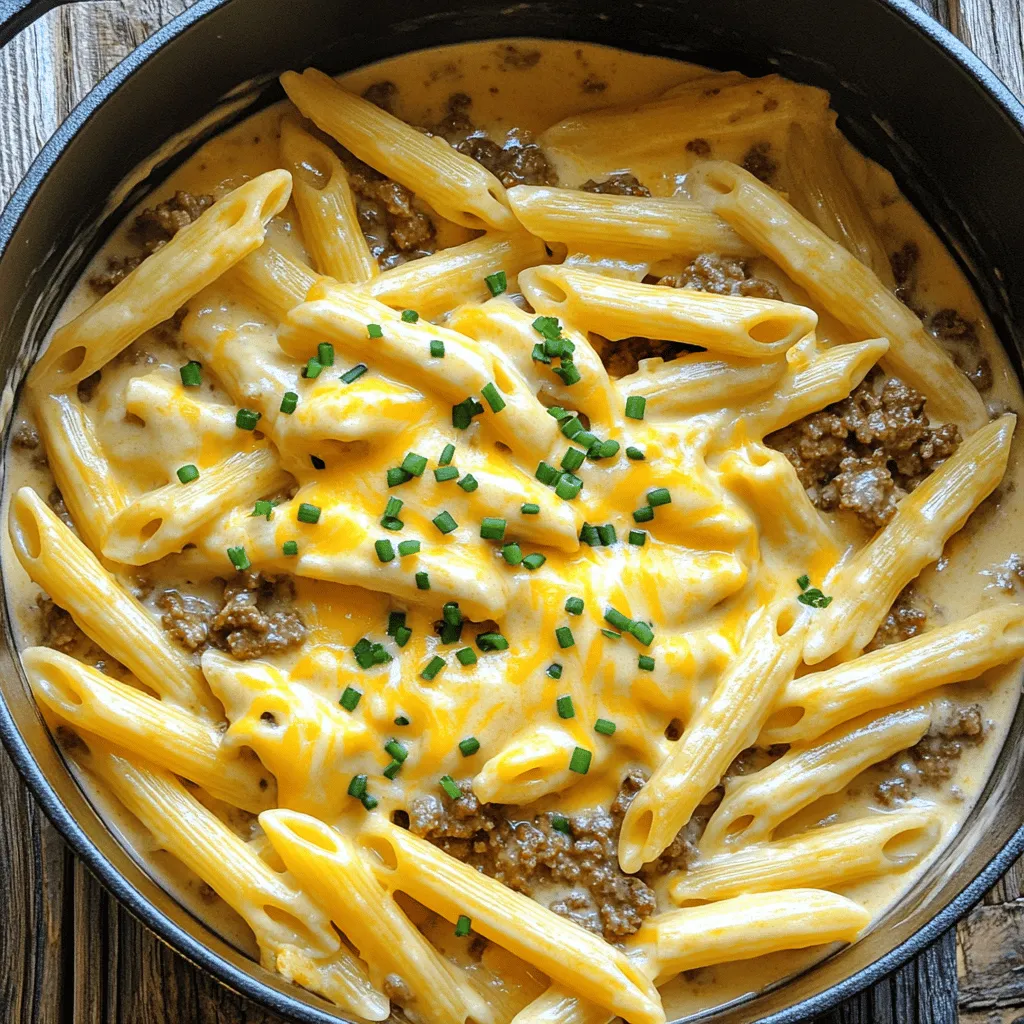
Looking for a quick, delicious meal that requires just one pot? You’re in the right place! My One-Pot Beef and

To make these yummy chocolate chip mint Greek yogurt pops, you need: - 2 cups plain Greek yogurt - 1/2 cup honey or maple syrup (your choice) - 1 teaspoon pure peppermint extract - 1/4 teaspoon vanilla extract - 1/2 cup mini chocolate chips These simple ingredients create a creamy and refreshing treat. The Greek yogurt gives it a nice base. Honey or maple syrup adds sweetness. The peppermint extract brings a cool flavor, and the chocolate chips give a sweet crunch in every bite. You can add a few garnishes to make your pops even better. Fresh mint leaves look great on top. They add a bright green color and a fresh hint of mint. You can also drizzle a little chocolate sauce over the pops before serving. This makes them look fancy and taste even more delicious. If you have dietary needs, you can swap some ingredients. For a dairy-free option, use coconut yogurt instead of Greek yogurt. If you need a sugar-free treat, try using a sugar substitute like stevia. This keeps the sweetness without the extra sugar. Always check the labels to ensure they fit your needs. For those who dislike mint, you can skip the peppermint extract and use other flavors like vanilla or almond. This way, everyone can enjoy these tasty pops! Start by grabbing a medium bowl. Add 2 cups of plain Greek yogurt to it. Next, pour in 1/2 cup of honey or maple syrup. I like honey for its rich flavor, but maple syrup works too! Then, add 1 teaspoon of pure peppermint extract. This gives the pops their minty kick. Finally, stir in 1/4 teaspoon of vanilla extract for a nice balance. Use a whisk or spatula to mix until smooth and creamy. Now, it’s time to fold in the mini chocolate chips. Use 1/2 cup of these tiny treats. Gently mix them into the yogurt blend. Make sure they spread evenly for that chocolatey goodness in every bite. Next, take your popsicle molds. Carefully pour the yogurt mixture into each mold, filling them about three-quarters full. Leave space for the pops to expand. Then, place popsicle sticks into the molds, making sure they stay centered. Tap the molds lightly on the counter to remove any air bubbles. Transfer the molds to the freezer. Let them freeze for at least 4 hours or until solid. This step is key! To release the pops, run warm water over the outside of the molds for a few seconds. This helps loosen them. Pull gently on the sticks to slide the pops out easily. If you want, you can add fresh mint leaves on top for garnish. This adds color and flavor! Enjoy your homemade chocolate chip mint Greek yogurt pops. For the complete recipe, check [Full Recipe]. To get a creamy texture in your pops, start with good yogurt. I use plain Greek yogurt for the best results. Make sure it's fresh and not too watery. Mixing honey or maple syrup adds sweetness and keeps it smooth. Use a whisk to blend everything well. This step helps make your yogurt mixture light and fluffy. To stop the pops from sticking, fill your molds only three-quarters full. This gives the mixture room to expand. After pouring, gently tap the molds on the counter. This step removes air bubbles. If you still have trouble, run warm water over the outside of the molds before pulling the pops out. This quick fix helps loosen them. Choose molds that are easy to fill and clean. Silicone molds work well because they are flexible. For easy removal, look for molds with a built-in stick holder. Always remember to center the sticks before freezing. This keeps them straight and makes for a better presentation when you serve your pops. Follow all these tips for the best results with your Chocolate Chip Mint Greek Yogurt Pops. For the full recipe, check the previous section. {{image_4}} You can mix up the flavors in your pops. Try using different extracts. Almond or orange can add a fun twist. You can also switch the chocolate chips for peanut butter chips. This makes a yummy treat too! Experiment with your favorites to find the best combo. Adding fruit can bring a fresh taste to your pops. Try using mashed bananas or pureed strawberries. You can also fold in chopped nuts like walnuts or almonds. This gives your pops a nice crunch and extra flavor. Just make sure the pieces are small so they mix well. If you want a vegan option, swap the Greek yogurt for coconut yogurt. Use maple syrup instead of honey to keep it vegan. You can also find dairy-free chocolate chips to make it all plant-based. This way, everyone can enjoy a refreshing treat! For the full recipe, check out the Chocolate Chip Mint Greek Yogurt Pops. Store your chocolate chip mint Greek yogurt pops in the freezer. Keep them in an airtight container or a freezer bag. This will help prevent freezer burn. If you use a bag, seal it tightly to lock out air. Label the container with the date. This way, you know when you made them. To freeze your pops correctly, ensure they are fully solid. It takes about four hours. If you want to keep them longer, wrap each pop in plastic wrap. This adds extra protection and keeps them fresh. Place them back in the container or bag after wrapping. This helps maintain their lovely flavor and texture. These pops can last up to two months in the freezer. After that, they may start to lose taste. Check for any ice crystals or changes in texture. If they feel grainy or icy, it’s best to toss them. Always remember, for the best taste, enjoy them within the first month. Yes, you can use other sweeteners. Agave syrup or stevia works well too. Just remember that the flavor may change slightly. Adjust the amount to your taste. If you prefer less sweetness, start with less. You can always add more later. You need to freeze the pops for at least 4 hours. This time helps them become solid and enjoyable. I recommend leaving them in longer if you want them extra firm. If you are in a hurry, check them after about 3 hours. They should be solid enough to enjoy. Yes, you can add fresh mint leaves to the mixture. Just chop them finely before mixing in. This will give your pops a great minty flavor. But be careful not to add too many. Too much mint can make the flavor too strong. If you want a light taste, use just a few leaves. For detailed steps, check out the Full Recipe. You can make tasty Chocolate Chip Mint Greek Yogurt Pops with simple steps. We covered ingredients, mixing, and freezing techniques. I shared tips to keep your pops creamy and easy to remove from molds. You can explore different flavors or add fruits and nuts. Proper storage helps maintain their quality. Enjoy creating these refreshing treats! They are simple, healthy, and perfect for warm days.

Chocolate Chip Mint Greek Yogurt Pops Refreshing Treat

If you’re searching for a cool treat that’s both tasty and healthy, you’ve found it! These Chocolate Chip Mint Greek

- 1 pound ground chicken - 1 cup puff pastry, thawed - 4 cloves garlic, minced - 1 small onion, finely chopped - 1/2 cup ricotta cheese - 1/4 cup grated Parmesan cheese - 1 teaspoon Italian seasoning - 2 tablespoons fresh parsley, finely chopped - Salt and pepper to taste Garlic chicken puffs start with simple yet flavorful ingredients. Ground chicken serves as the main protein. It cooks up tender and juicy, making it perfect for these puffs. Puff pastry adds a delightful crunch. You can buy it frozen. Just thaw before using. Garlic and onion bring depth to the dish. Minced garlic adds a strong flavor, while onion gives sweetness. Together, they create a tasty base for your filling. For the cheese, I love using ricotta. It adds creaminess and richness. The grated Parmesan brings a savory kick. Mixing these cheeses with the chicken makes the filling irresistible. Seasoning is key. I use Italian seasoning for a burst of flavor. Fresh parsley adds a bright touch. Don’t forget to season with salt and pepper to elevate the taste. You can find the full recipe to guide you through making these delicious snacks. - Preheat the oven: Start by heating your oven to 400°F (200°C). Line a baking sheet with parchment paper or lightly coat it with cooking spray to prevent sticking. - Cook chicken with garlic and onion: In a medium skillet, add a drizzle of olive oil over medium heat. Add minced garlic and chopped onion. Cook them until the onion is soft and smells sweet, about 3-4 minutes. Then, add the ground chicken. Cook it until there’s no pink left, breaking it apart with a spoon. Season with salt, pepper, and Italian seasoning. After it cooks, take it off the heat and let it cool for a few minutes. - Mix chicken with cheeses and parsley: In a large bowl, combine the cooled chicken mix with ricotta cheese, grated Parmesan cheese, and chopped parsley. Stir well until everything blends nicely. - Prepare and fill puff pastry: On a floured surface, roll out the thawed puff pastry. Use a knife to cut it into squares about 4x4 inches. Place a generous spoonful of the chicken filling in the center of each square. - Seal and bake the puffs: Fold each square to form a triangle. Press the edges to seal. Crimp the edges with a fork for a nice finish. Brush the tops with beaten egg for a golden color. Arrange the puffs on the baking sheet, leaving space between them. Bake for 15-20 minutes, or until they turn golden brown and puffed. These garlic chicken puffs are a delight to make and eat! For the full recipe, check out the section above. Enjoy your cooking! - Avoid overfilling the puffs: Use just enough filling. If you add too much, they may burst while baking. Aim for a tablespoon of filling for each puff. - Best practices for sealing: First, press the edges of the pastry to remove any air. Then, crimp the edges with a fork. This keeps the filling inside and makes a nice design. - Suggested seasoning additions: Try adding a pinch of smoked paprika or cayenne pepper. This gives the puffs a nice kick. Fresh herbs like thyme or basil also add great flavor. - Pairing sauces for serving: Serve your puffs with marinara sauce or garlic aioli. Both sauces enhance the garlic flavor and add moisture. - Plating suggestions: Stack the garlic chicken puffs on a bright plate. This makes them stand out. You can also arrange them in a circle for a fun look. - Garnishing with herbs: Sprinkle fresh parsley or chives on top. This adds color and freshness. It makes your dish look even more appetizing. {{image_4}} You can easily swap proteins in this recipe. Ground turkey works well if you want a leaner option. For a plant-based choice, try crumbled tofu or tempeh. Both alternatives keep the meal light but still tasty. You can add your favorite spices to enhance the flavor. Want to spice things up? Add diced jalapeños or red pepper flakes to make spicy chicken puffs. This will give your puffs a warm kick. For a different twist, try a Mediterranean flair. Mix in herbs like dill or mint, and add feta cheese for a rich taste. These options keep the dish fresh and exciting! While puff pastry is classic, phyllo dough adds a nice crunch. Just layer it well, and you’ll create a beautiful texture. If you need gluten-free options, look for gluten-free puff pastry. This way, everyone can enjoy the treat! You can find these options in most grocery stores now. After you enjoy your garlic chicken puffs, you may have some left. Store them in an airtight container in the fridge. They stay fresh for about three days. You can also freeze them for later. To freeze, place the puffs on a baking sheet first. Freeze them for one hour, then put them in a freezer bag. This way, they won't stick together. To enjoy your puffs again, reheating is key. Preheat your oven to 350°F (175°C). Place the puffs on a baking sheet. Heat them for about 10-15 minutes. This keeps them crispy. You can also use an air fryer. Set the air fryer to 350°F and reheat for about 5 minutes. This method helps keep the puffs nice and crunchy. In the fridge, garlic chicken puffs last for about three days. After that, they may spoil. Signs of spoilage include a sour smell, strange texture, or discoloration. If you see any of these, it’s best to throw them away. Always check your food before eating to stay safe. To make Garlic Chicken Puffs, gather these ingredients: - 1 pound ground chicken - 1 cup puff pastry, thawed - 4 cloves garlic, minced - 1 small onion, finely chopped - 1/2 cup ricotta cheese - 1/4 cup grated Parmesan cheese - 1 egg, beaten (for egg wash) - 2 tablespoons fresh parsley, finely chopped - 1 teaspoon Italian seasoning - Salt and pepper to taste - Cooking spray or parchment paper for baking Start by preheating your oven to 400°F (200°C). In a skillet, heat oil and cook minced garlic and onion until soft. Then, add the ground chicken and cook until no longer pink. Mix in salt, pepper, and Italian seasoning. Once cooked, let the mixture cool. In a bowl, combine this with ricotta, Parmesan, and parsley. Roll out your puff pastry into 4x4 inch squares. Fill each square with the chicken mixture, fold, seal, and crimp the edges. Brush with egg wash and bake for 15-20 minutes until golden. For the full recipe, check out the details above. Yes, you can freeze Garlic Chicken Puffs before baking. Start by preparing the puffs as usual. After sealing them, place them on a baking sheet in a single layer. Freeze them for about 1-2 hours until firm. Once frozen, transfer them to a freezer bag or container. When you want to bake them, preheat your oven. You can bake them straight from the freezer, but add about 5-10 minutes to the baking time. They will taste fresh and delicious! Garlic Chicken Puffs taste great with various dipping sauces. Here are some suggestions: - Marinara sauce for a classic Italian touch - Ranch dressing for a creamy, zesty flavor - Sweet chili sauce for a hint of sweetness - Garlic aioli for extra garlic flavor These sauces enhance the dish and keep your guests coming back for more! This blog post covered how to make delicious Garlic Chicken Puffs. We discussed key ingredients like chicken, puff pastry, and the perfect cheeses. You learned how to prepare the filling and seal the pastry for baking. I offered tips for enhancing flavors and unique variations to suit your taste. Lastly, you received advice on storage and reheating. I hope you feel confident to try this recipe. Enjoy making your own tasty Garlic Chicken Puffs!

Garlic Chicken Puffs Flavorful and Easy Snack Recipe

If you crave a tasty snack that’s simple to make, you’ve found it! Garlic Chicken Puffs are packed with flavor

To make a tasty Chicken Caesar Wrap, gather these key items: - 2 cups cooked chicken breast, shredded - 4 large whole wheat tortillas - 1 cup romaine lettuce, chopped - ½ cup cherry tomatoes, halved - ½ cup grated Parmesan cheese - ¼ cup Caesar dressing (can be homemade or store-bought) - ½ teaspoon garlic powder - ½ teaspoon black pepper - 1 tablespoon olive oil - Fresh parsley, chopped (for garnishing) These ingredients create a balance of protein, fresh veggies, and creamy sauce. The chicken provides the main flavor, while the lettuce adds crunch. If you lack some ingredients, here are alternatives to use: - Use grilled turkey or tofu instead of chicken. - Swap whole wheat tortillas for spinach or corn tortillas. - Replace romaine with kale or mixed greens. - Use feta cheese instead of Parmesan for a different taste. - Opt for ranch dressing if you prefer a different flavor. Feel free to mix these substitutes based on what you have at home. Each change can give your wrap a new twist. To elevate your wrap, consider these garnishes: - Add sliced avocados for creaminess. - Sprinkle crushed red pepper for heat. - Top with extra grated cheese for richness. - Include fresh herbs like basil or cilantro for a fragrant touch. These garnishes can enhance flavor and make your wrap look appealing. For the full recipe, check the details provided earlier. Enjoy your cooking! Start by shredding your cooked chicken breast. In a medium bowl, mix the chicken with garlic powder, black pepper, and Caesar dressing. Stir until the chicken is coated well. This mix makes the wrap tasty and rich. You can add more dressing if you like it creamier. If you want, try using grilled chicken for extra flavor. Grab a warmed tortilla and lay it flat on a clean surface. Place a good amount of the chicken mixture in the center. Next, add the fresh filling of romaine lettuce, halved cherry tomatoes, and Parmesan cheese on top. Be sure to spread it evenly. This mix of flavors makes each bite exciting. Finally, roll the tortilla tightly, folding in the sides as you go. This keeps all the tasty filling inside. To warm the tortillas, heat a non-stick skillet over medium heat. Add a drizzle of olive oil to the skillet. Once it’s warm, add one tortilla. Heat it for about 30 seconds on each side. It should be soft and easy to bend. Remove it from the skillet and repeat with the other tortillas. Warming makes them more flexible and easier to wrap. To make a great Chicken Caesar Wrap, start with warm tortillas. Warm tortillas are easier to roll and less likely to tear. Use fresh ingredients for the best taste. Chop your lettuce and tomatoes just before using them. This keeps everything crisp. Don’t overfill your wrap. A little filling goes a long way. This helps you roll it tight and neat. If you have leftover wraps, wrap them in foil or plastic wrap. Keep them in the fridge for up to three days. To keep the lettuce fresh, store it separately. You can add it right before eating. If you want to reheat your wrap, use a skillet. Heat it on low for a few minutes until warm. For a quick meal, pair your wrap with a side of fruit. Sliced apples or grapes work well. You can also serve it with chips for crunch. Another fun idea is to serve it with extra Caesar dressing for dipping. This adds a nice touch to each bite. For a hearty meal, add a bowl of soup. A light tomato or minestrone soup goes great with it. {{image_4}} If you want a vegetarian wrap, swap chicken for chickpeas or grilled veggies. Both options add protein and flavor. For a vegan twist, use a plant-based Caesar dressing. This keeps the taste while making it meat-free. You can also use tofu for a nice protein boost. Just marinate and grill it for the best taste. While Caesar dressing is classic, you can try other sauces too. Ranch dressing gives a creamy twist. A yogurt-based sauce can also lighten the dish. If you love heat, add a spicy sauce or sriracha. Each sauce brings a new flavor to your wrap. Feel free to mix and match to find your favorite. Adding extra ingredients can make your wrap pop. Try tossing in sliced olives or avocado for creaminess. You can also add crispy bacon bits for a smoky flavor. Fresh herbs like basil or cilantro can brighten the dish. For a crunch, add nuts or seeds. Each add-in adds a different layer of taste and texture to your Chicken Caesar Wrap. For the full recipe, you can check out Zesty Chicken Caesar Wrap 🥗. To keep your Chicken Caesar Wrap fresh, store it in an airtight container. This helps prevent air from drying it out. If you have leftovers, you can wrap them tightly in plastic wrap. This method also works well for individual wraps. Always make sure to keep the dressing separate until you are ready to eat. This keeps the wrap from getting soggy. When stored properly, the Chicken Caesar Wrap lasts about 3 to 4 days in the fridge. If you notice any unusual smell or texture, it’s best to toss it. To enjoy the wrap at its best, eat it within the first two days. This way, you will savor the fresh flavors and textures. You can freeze Chicken Caesar Wraps if you want to keep them for longer. Wrap each one in plastic wrap, then place them in a freezer bag. Be sure to remove as much air as possible before sealing. They can last up to 2 months in the freezer. When you’re ready to eat, thaw them overnight in the fridge. Reheat in a skillet for a few minutes or enjoy them cold. A Chicken Caesar Wrap is tasty and can be healthy too. Each wrap gives you protein, fiber, and vitamins. Here’s a quick look at what you get: - Calories: About 350-400, depending on the dressing and tortilla. - Protein: Roughly 30 grams from the chicken and cheese. - Carbohydrates: Around 30-35 grams, mostly from the tortilla. - Fat: About 10-15 grams, depending on the dressing used. This wrap is a good choice for lunch or dinner. You get energy without too many empty calories. Yes, you can make Chicken Caesar Wrap ahead of time! This is great for meal prep. Just follow these tips: - Prep the filling: Mix the chicken, dressing, and spices. Store it in the fridge. - Keep veggies separate: Store the lettuce and tomatoes in another container. This keeps them fresh. - Assemble before eating: Wrap it just before you enjoy it. This way, the tortilla stays soft and the veggies stay crisp. Pair your Chicken Caesar Wrap with fun sides! Here are some tasty options: - Fresh fruit: Slices of apple or a fruit salad add sweetness. - Veggies and dip: Baby carrots or cucumber sticks with hummus work well. - Chips: Baked tortilla chips or potato chips for crunch. - Soup: A light soup like tomato or vegetable makes a nice combo. These sides enhance the meal and make it more filling. For the full recipe, check out the Zesty Chicken Caesar Wrap. This blog post covered how to make a Chicken Caesar Wrap. We discussed key ingredients, easy steps, and tips for a perfect wrap. I shared tasty variations, storage tips, and common questions. Remember, you can swap ingredients for your taste. Making this wrap can be fun and quick. Enjoy your homemade Chicken Caesar Wrap with friends or family. It's a meal that satisfies both hunger and taste. Now, go ahead and try it! You'll love it.

Savory Chicken Caesar Wrap Easy and Delicious Meal

Are you ready for a meal that’s both easy and tasty? My Chicken Caesar Wrap is perfect for lunch or

To make this tasty soup, gather these key ingredients: - 1 pound Italian sausage (choose mild or spicy according to your taste) - 1 medium onion, finely diced - 2 cloves garlic, minced - 3 medium carrots, peeled and diced - 2 celery stalks, diced - 6 cups chicken broth (preferably low-sodium) - 1 can (14 oz) diced tomatoes, undrained - 1 cup Ditalini pasta - 1 cup heavy cream - 1 cup freshly grated Parmesan cheese - 1 teaspoon dried oregano - 1 teaspoon dried basil - Salt and freshly ground black pepper to taste - Fresh parsley, chopped, for garnish These ingredients create a rich, savory base. The Italian sausage adds depth. The vegetables bring color and sweetness. Ditalini pasta gives it a hearty texture. You can tweak this recipe with some optional ingredients. Here are a few ideas: - Use turkey sausage for a leaner option. - Swap the heavy cream for half-and-half for a lighter soup. - Add spinach or kale for a boost of greens. - Use vegetable broth for a vegetarian twist. These substitutions keep the soup rich and delicious. You can customize it to fit your taste. Season the soup to enhance its flavor. Here are some great ideas: - Add a pinch of red pepper flakes for heat. - Stir in some fresh herbs like thyme or rosemary. - Top each bowl with more grated Parmesan for extra flavor. - Use a drizzle of olive oil before serving. These simple touches elevate the soup. They add layers of flavor and make it visually appealing. Enjoy the process of making this savory delight. For the full recipe, check out the recipe section above. Start by heating a large pot over medium heat. Add 1 pound of Italian sausage. Use a wooden spoon to break it up as it cooks. Stir occasionally for about 5-7 minutes. You want the sausage to be browned and cooked all the way through. If you see extra grease, drain it from the pot. This step gives the soup a great base of flavor. Next, add the diced onion, carrots, and celery to the pot. Stir this mixture for about 5 minutes. The goal is to soften the veggies and make the onion clear. After that, add 2 cloves of minced garlic. Stir it for 1 minute until you smell that wonderful aroma. Be careful not to burn the garlic. Now, pour in 6 cups of chicken broth and add the can of diced tomatoes. Increase the heat to bring everything to a gentle boil. Once the mix is boiling, it's time to add the Ditalini pasta. Add 1 cup along with 1 teaspoon each of dried oregano and dried basil. Reduce the heat to a simmer and cook for about 10-12 minutes. You want the pasta to be al dente, just firm enough to bite into. This pasta adds a fun texture to the soup. Lower the heat once more and stir in 1 cup of heavy cream and 1 cup of freshly grated Parmesan cheese. Mix everything well until the cheese melts and the soup becomes creamy. Season with salt and freshly ground black pepper to taste. Let it simmer for an additional 2-3 minutes to blend all the flavors. When it’s done, serve it hot in bowls. Don't forget to garnish with fresh chopped parsley for a lovely touch. For the full recipe, check the detailed instructions above. To get the best flavor in your creamy Parmesan sausage ditalini soup, start with high-quality Italian sausage. Choosing a mix of mild and spicy sausage gives a great balance. When you brown the sausage, make sure you let it get a nice color. This adds depth to the soup. Use fresh vegetables that are in season for the best taste. Don't skip the garlic; it brings out the flavors. Always taste and adjust the seasoning as you go. A squeeze of lemon before serving can also brighten the dish. One common mistake is overcooking the pasta. Ditalini should be al dente, so watch it closely. If you cook it too long, it can become mushy. Another mistake is not draining excess fat from the sausage. This can make the soup greasy. Also, be careful not to boil the soup after adding the cream. Boiling can cause it to separate and lose its smooth texture. Lastly, don’t forget the fresh parsley for garnish; it adds color and freshness. For this recipe, a large pot or Dutch oven is best. It helps cook everything evenly. A wooden spoon is great for stirring the sausage and vegetables. Use a sharp knife and cutting board for chopping the veggies. A measuring cup for the broth and cream will ensure accuracy. If you like to blend your soup, an immersion blender can help achieve a creamy texture. For a rustic touch, serve in wide bowls with crusty bread on the side. For the full recipe, check out the complete instructions above. {{image_4}} You can make this soup vegetarian or vegan with simple swaps. Instead of sausage, use lentils or mushrooms. Both add texture and flavor. For a vegan version, switch heavy cream with coconut milk or cashew cream. These options keep the soup rich and creamy but without animal products. If you want a different protein, consider ground turkey or chicken. They both work well in this recipe. You can also use plant-based sausages if you prefer. These alternatives give you variety while keeping the soup hearty and filling. To add some heat, include red pepper flakes or a dash of hot sauce. This small change can elevate the soup’s flavor. For a fresh twist, try adding fresh herbs like basil or thyme. They brighten up the dish and add depth. Experimenting with spices and herbs helps you create a unique version of Creamy Parmesan Sausage Ditalini Soup. After enjoying your Creamy Parmesan Sausage Ditalini Soup, let it cool. Place leftovers in an airtight container. This keeps the soup fresh. You can store it in the fridge for up to three days. If you want to keep it longer, freezing is the way to go. When you’re ready to reheat the soup, use the stove for best results. Pour the soup into a pot. Heat it over medium-low heat. Stir often to prevent sticking. This helps keep the creamy texture. You can also use the microwave. Just make sure to cover it loosely. Heat in short bursts, stirring in between. To freeze the soup, first cool it completely. Use freezer-safe containers or bags. Leave some space at the top for expansion. This soup can last up to three months in the freezer. When you’re ready to eat, thaw it overnight in the fridge. Reheat as explained before for delicious results. For the full recipe, check out the details above. Yes, you can make this soup in a slow cooker. Start by browning the sausage in a pan. Then, add all the ingredients to the slow cooker. Set it on low for about 6-8 hours or high for 3-4 hours. This method allows the flavors to blend nicely. To make the soup less creamy, you can reduce the amount of heavy cream. Try using half a cup instead of a full cup. You can also substitute with milk or low-fat cream. This change will still keep the soup rich but lighter. I love serving this soup with crusty bread. It’s perfect for dipping! You can also add a simple salad for some freshness. Garlic bread or a side of roasted veggies can be great choices too. This recipe is not gluten-free due to the Ditalini pasta. However, you can substitute it with gluten-free pasta. Just check the cooking time, as it may vary from regular pasta. To adjust servings, simply double or triple the ingredients. This soup is easy to scale up. If you want to make it for a big crowd, use a larger pot and ensure you have enough broth. The Full Recipe is easy to follow for larger quantities. This blog post explored how to make Creamy Parmesan Sausage Ditalini Soup. We covered key ingredients, step-by-step instructions, and tips for better flavor. You learned how to store leftovers and even ways to adapt the recipe for dietary needs. In the end, making this soup is easy and fun. With your creativity, you can enjoy this dish tailored to your taste. So get cooking, and enjoy a warm bowl of comfort!

Creamy Parmesan Sausage Ditalini Soup Savory Delight

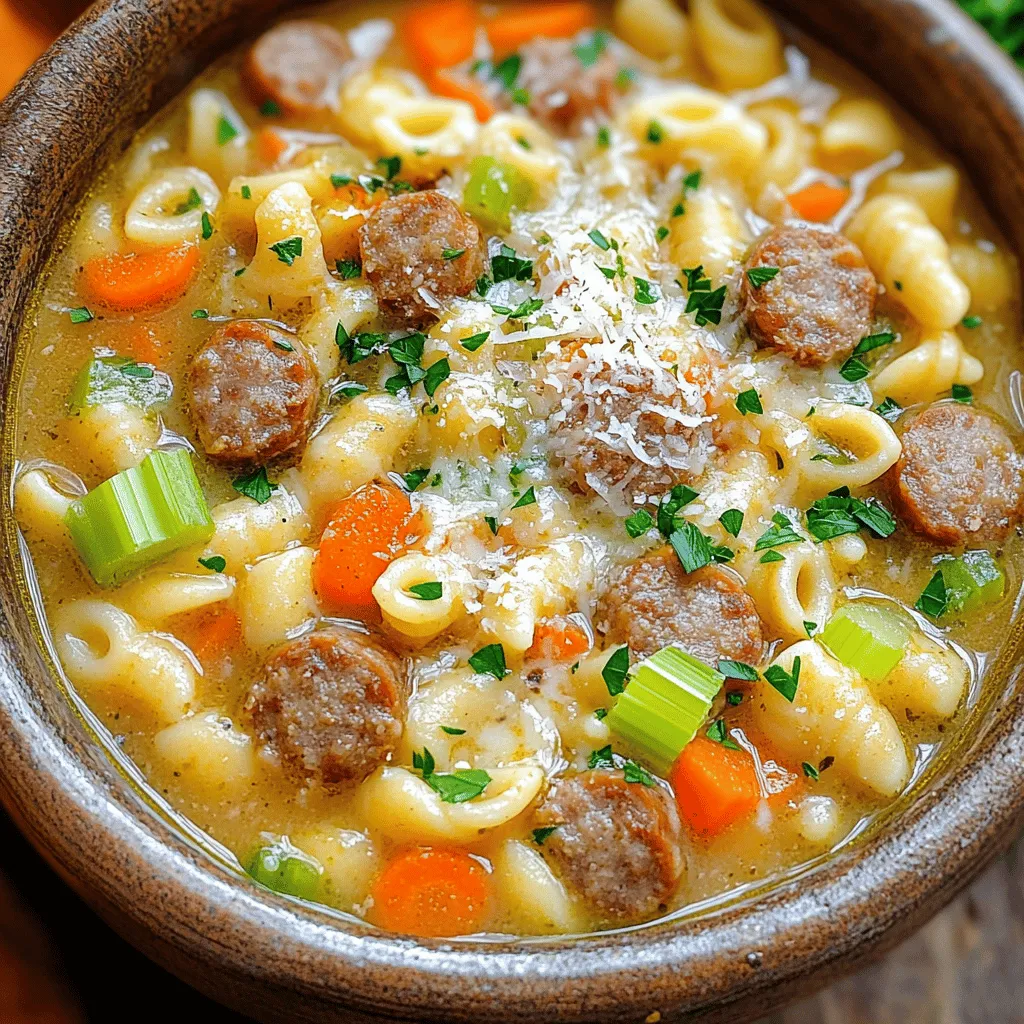
If you crave a warm, hearty meal, you’re in for a treat! My Creamy Parmesan Sausage Ditalini Soup offers rich

- Ground beef and dairy ingredients - 1 pound ground beef - 1 cup cream cheese, softened - 1 cup sour cream - 1 cup shredded cheddar cheese (plus an extra ½ cup for topping) - Canned ingredients - 1 can (15 oz) black beans, rinsed and drained - 1 can (11 oz) sweet corn, drained - 1 can (10 oz) diced tomatoes with green chilies - Seasoning and toppings - 1 tablespoon taco seasoning - 1 tablespoon olive oil - ½ cup green onions, finely chopped - Tortilla chips, for serving When I make this Meaty Texas Trash Dip, I love how every ingredient adds to the flavor. The ground beef gives it a rich base. Cream cheese and sour cream make it creamy and smooth. Black beans and corn add texture and sweetness. The diced tomatoes with green chilies give it that kick we all crave. Taco seasoning ties everything together. You can feel the warmth of the spices in every bite. Green onions on top add freshness and color. Don't forget the tortilla chips! They are perfect for scooping up all that deliciousness. This dip is not just tasty; it’s a crowd-pleaser. Whether for a party or a cozy night in, this dip will shine. If you want to see how to prepare it, check out the Full Recipe. 1. Preparing the beef and draining fat Start by heating olive oil in a large skillet over medium heat. Add 1 pound of ground beef. Cook it for about 5-7 minutes. Break it up with a spatula until it is fully browned. Once cooked, remove the skillet from heat and drain any excess fat. This step keeps the dip from being greasy. 2. Mixing in the beans, corn, and tomatoes Return the skillet to the heat. Add 1 tablespoon of taco seasoning. Stir it into the beef to coat it evenly. Next, add 1 can of rinsed black beans, 1 can of drained sweet corn, and 1 can of diced tomatoes with green chilies. Mix everything well and let it heat through for about 3-4 minutes, stirring often. 3. Creating the creamy dip base Lower the heat to a gentle simmer. Add 1 cup of softened cream cheese and 1 cup of sour cream into the skillet. Stir continuously until the mixture is fully blended and smooth. This step forms a rich and creamy base for your dip. 4. Melting the cheese and final touches Incorporate 1 cup of shredded cheddar cheese into the mixture. Mix well until the cheese melts completely and blends evenly. After combining, remove the skillet from heat. Top the dip with ½ cup of freshly chopped green onions for color. Sprinkle with an extra ½ cup of shredded cheddar cheese for added richness. 5. Serving the dip Transfer the dip to a decorative serving dish or keep it in the skillet for a casual look. Serve warm with crispy tortilla chips for delightful dipping. Enjoy this meaty Texas Trash Dip as a tasty snack or appetizer! For the full recipe, check the recipe section above. - Ensuring a non-greasy dip After cooking the ground beef, always drain the fat. This step keeps your dip rich without being oily. Use a colander to let the fat flow away while keeping the beef intact. - Perfectly blending ingredients for creaminess Start with softened cream cheese. It mixes better and gives a smooth texture. Stir in the sour cream slowly until you achieve a creamy base. Keep mixing until there are no lumps. - Adjusting flavors with seasoning Taste as you go! After adding the taco seasoning, sample your dip. If you want it spicier, add a touch more seasoning. You can also mix in some hot sauce if you like a kick. - Ideal serving temperatures Serve your Meaty Texas Trash Dip warm for the best flavor. Heat helps the cheese melt and brings out the dip's rich taste. You can keep it warm in a slow cooker if you are serving a crowd. - Best accompaniments for dipping Tortilla chips are a classic choice. They add crunch and balance the dip's creaminess. You can also try fresh veggies like bell peppers and carrots for a healthier option. Enjoy the mix of textures! {{image_4}} You can make Meaty Texas Trash Dip your own with some fun twists. First, if you want a vegetarian option, swap the ground beef for lentils or mushrooms. Both options add great texture and flavor. If you love heat, add jalapeños. You can mix them in or top the dip with them. This extra spice gives your dip a nice kick. Cheese is another area to play with. You can try pepper jack for a spicy twist or cream cheese for a richer feel. Each cheese adds a different taste, so explore what you like best. This dip works well in other dishes, too. You can use it as a topping on baked potatoes or mix it into a pasta dish. It adds a creamy, meaty flavor that can elevate any meal. For parties, presentation matters. Use a colorful dish to serve the dip. Add fresh herbs like cilantro or parsley on top to make it pop. Serve with a variety of chips, like tortilla or pita, to give your guests options. These twists and serving ideas can make your Meaty Texas Trash Dip even more fun and tasty! For the full recipe, check out the detailed instructions above. To keep your Meaty Texas Trash Dip fresh, store leftovers in an airtight container. Place it in the fridge within two hours of serving. This dip is best eaten within three to four days. For longer storage, freeze the dip. Make sure to use a freezer-safe container. Leave some space at the top for expansion. This dip can last in the freezer for up to three months. When you're ready to enjoy it again, just thaw it in the fridge overnight. To reheat this dip, use a microwave or a stovetop. If using a microwave, place the dip in a microwave-safe bowl. Heat it in short bursts, stirring in between, until it's hot throughout. For stovetop reheating, transfer the dip to a saucepan. Heat it over low heat, stirring often. This method helps keep the texture creamy. Avoid high heat, as it can cause the dip to separate. Enjoy your warm dip with crispy tortilla chips! How to make Meaty Texas Trash Dip spicier? You can add chopped jalapeños or hot sauce for extra heat. Stir them in with the beef and beans. Another option is to use pepper jack cheese instead of cheddar. This will give your dip a nice kick. Can I make this dip ahead of time? Yes, you can prepare the dip a day before. Just follow the full recipe, then store it in the fridge. When you're ready to serve, heat it in the oven or microwave until warm. This makes it super easy for parties or gatherings. What other chips can I use for serving? Tortilla chips are great, but don’t stop there! You can use pita chips, veggie sticks, or even pretzel crisps. Each option adds a unique crunch and taste to your dip. What is the best cheese for this dip? Shredded cheddar cheese is a classic choice, but you can mix it up! Try using Monterey Jack or a blend of cheeses for a more complex flavor. Creamy cheese helps balance the savory meat and beans. How can I reduce the calories in this recipe? To cut calories, use lean ground beef or turkey. You can also swap cream cheese and sour cream for low-fat versions. Lastly, serving with veggie sticks instead of chips lowers the overall calorie count while still being tasty. This blog post covered all you need to make a tasty Meaty Texas Trash Dip. We discussed ingredients, step-by-step cooking tips, and fun variations. Remember to choose the right cheese and spice it up to fit your taste. You can even make veggie options or serve it in creative ways. Properly storing leftovers keeps the dip fresh for later. Dive into those FAQs for more helpful advice. Enjoy your dip-making journey. You’re now ready to impress at your next gathering!

Meaty Texas Trash Dip Irresistible Flavor Explosion

If you want a dip that packs a punch, you’re in the right place! My Meaty Texas Trash Dip is

Older posts
Newer posts
← Previous Page1 … Page56 Page57 Page58 … Page65 Next →

dsad

© 2025 recipesstation • Built with GeneratePress

Our Policies

  • Copyright Policy
  • Cookie Policy
  • GDPR Policy
  • Privacy Policy
  • Disclaimer
  • Terms Of Use

More Information

  • Home
  • About
  • Contact
  • Appetizers
  • Dessert
  • Dinner
  • Drinks
©2025, recipesstation About Back To Top